
DIGITNOW m126
DIGITNOW 22MP All-in-1 Film & Slide Scanner
User Manual
1. Introduction
This manual provides detailed instructions for the operation and maintenance of your DIGITNOW 22MP All-in-1 Film & Slide Scanner (Model m126). This device is designed to convert various film and slide formats, including 35mm, 135, 110, 126, and Super 8 films/slides/negatives, into high-quality digital JPG photos. Please read this manual thoroughly before use to ensure proper functionality and to maximize the lifespan of your scanner.
2. Package Contents
Verify that all items listed below are included in your package:
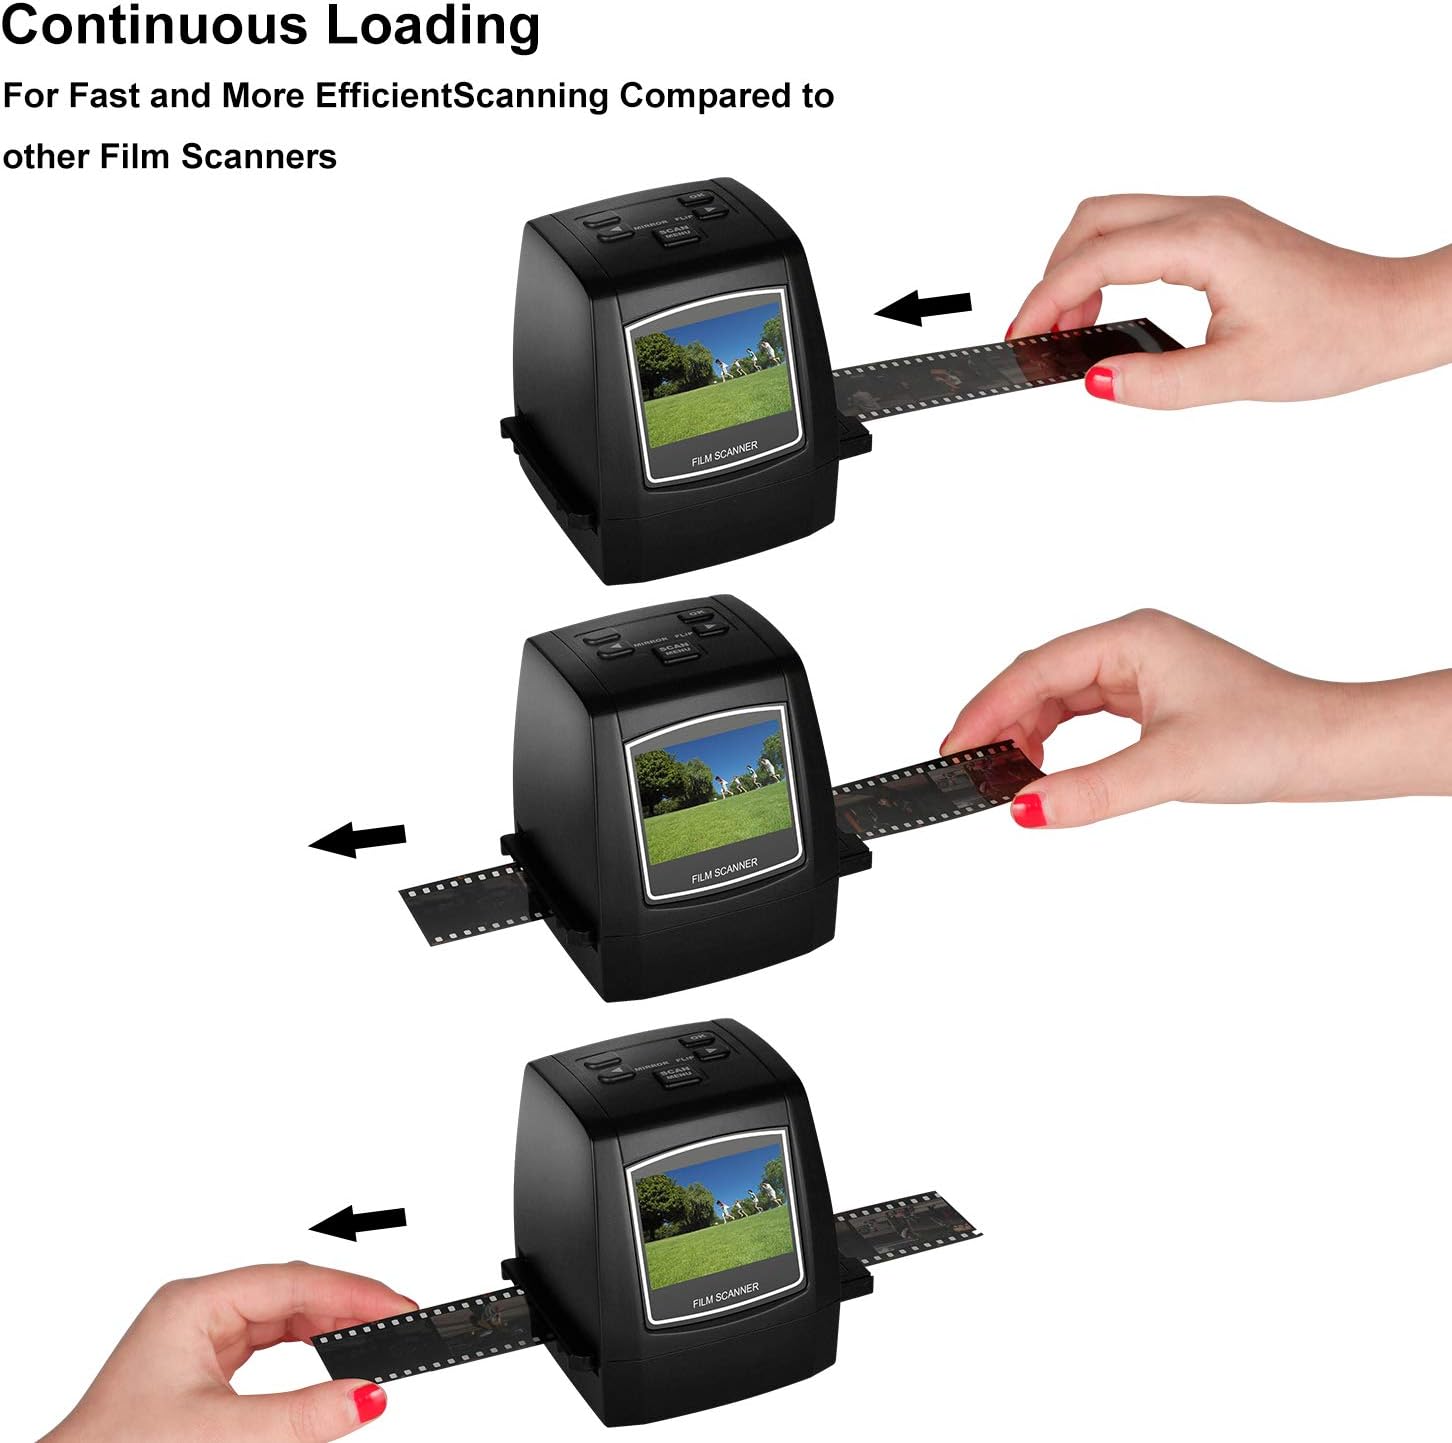
Image: All components included in the DIGITNOW Film & Slide Scanner package.
- DIGITNOW 22MP All-in-1 Film & Slide Scanner
- 100-240V AC Adapter
- USB Data Cable
- User's Manual
- Negative Film Holder
- Slide Holder
- Super 8 Film Holder
- 110 Film Holder
- Cleaning Brush
3. Product Features
- Converts 35mm/135, 110, 126KPK and Super 8 films, Slides & Negatives into digital JPEG format within 1 to 2 seconds.
- Stand-Alone operation, no computer required. Transfer old film/slides to Color or Black&White pictures in an SD card (up to 32GB, not included) and adjust the brightness or color of the image directly on the device.
- Mac & PC Compatible. Easily transfer high-resolution images to your computer, laptop, smartphone, and tablet.
- With software interpolation, digitized photo quality can reach up to 22 Megapixels.
- View scanned photos directly on the integrated 2.4” color LCD screen, or connect it to a TV for a larger display.
4. Parts Description

Image: Front view of the scanner, showing the 2.4-inch LCD screen and control buttons.

Image: Rear view of the scanner, highlighting the SD card slot, USB port, and TV Out port.
Control Buttons:
- Power Button: Turns the scanner ON/OFF.
- OK Button: Confirms selections or captures an image.
- Left/Right Arrows: Navigate menus or adjust settings.
- Mirror/Flip Button: Flips or mirrors the image during preview.
- Scan/Menu Button: Initiates scanning or accesses the main menu.
Ports and Slots:
- SD Card Slot: Insert an SD card (up to 32GB, not included) for saving scanned images.
- USB Port: Connects to a computer for data transfer or power.
- TV Out Port: Connects to a TV for larger display of images.
5. Setup
- Power Connection: Connect the provided AC adapter to the scanner's USB port and plug it into a power outlet. Alternatively, connect the scanner to a computer's USB port using the supplied USB cable.
- Insert SD Card: Insert an SD card (not included) into the SD card slot on the back of the scanner. Ensure it is inserted correctly until it clicks into place.
- Power On: Press the Power button to turn on the scanner. The LCD screen will light up.
6. Operating Instructions
6.1 Supported Film and Slide Types

Image: Visual representation of the various film and slide formats compatible with the scanner.
6.2 Scanning Films and Slides
Follow these steps to digitize your films and slides:
- Select Film Type: From the main menu, use the arrow buttons to navigate to the 'Capture' mode. Press OK. Then, select the appropriate film type (e.g., 35mm Negative, 135 Slide, Super 8, 110, 126) using the arrow buttons and press OK to confirm.
- Insert Film/Slide Holder: Insert the correct film or slide holder into the slot on the side of the scanner. Ensure it slides in smoothly.
- Load Film/Slide: Carefully load your film strip or slide into the designated slot on the holder. For film strips, ensure the film is flat and properly aligned. For slides, place them securely in the slide holder.
- Preview Image: The image from your film or slide will appear on the 2.4-inch LCD screen. You can use the 'Mirror/Flip' button to adjust the orientation if needed.
- Adjust Settings (Optional): Press the 'Scan/Menu' button to access settings like exposure compensation (brightness) or color balance (Red, Green, Blue). Use the arrow buttons to adjust and OK to confirm.
- Scan Image: Once the image looks satisfactory, press the 'OK' button to capture and save the digital photo to the inserted SD card.
- Continuous Scanning: For film strips, gently pull the film through the holder to the next frame and repeat the scanning process.

Image: Demonstration of continuous film loading for efficient scanning.
6.3 Video Demonstration
Watch this official product video for a visual guide on unboxing, setting up, and operating the DIGITNOW Film & Slide Scanner:
Video: A comprehensive guide demonstrating the unboxing, setup, and scanning process of the DIGITNOW Film & Slide Scanner. This video covers inserting film/slides, adjusting settings, and capturing digital images.
7. Maintenance
To ensure optimal performance and longevity of your scanner, follow these maintenance tips:
- Cleaning the Lens: Use the provided cleaning brush to gently remove any dust or debris from the scanner's lens and film slot. Do not use liquid cleaners or abrasive materials.
- Exterior Cleaning: Wipe the exterior of the scanner with a soft, dry cloth.
- Storage: When not in use, store the scanner in a cool, dry place away from direct sunlight and extreme temperatures.
8. Troubleshooting
| Problem | Possible Cause | Solution |
|---|---|---|
| Scanner does not power on. | No power connection or faulty adapter. | Ensure the AC adapter is securely connected to the scanner and a working power outlet. Try a different USB port or power outlet. |
| Image appears dark or discolored. | Incorrect exposure/color settings or dirty lens. | Adjust exposure compensation and color balance settings in the menu. Clean the scanner lens with the provided brush. |
| Cannot save images to SD card. | SD card full, not inserted correctly, or corrupted. | Check if the SD card has enough free space. Reinsert the SD card. Try a different SD card. Format the SD card (this will erase all data). |
| Film/slide not recognized or blurry. | Incorrect film holder or improper loading. | Ensure you are using the correct film/slide holder for your media type. Make sure the film/slide is inserted flat and correctly aligned within the holder. |
9. Specifications
| Feature | Detail |
|---|---|
| Product Dimensions | 3.2 x 3.2 x 4 inches (4.03"D x 3.42"W x 4.03"H) |
| Item Weight | 9.6 ounces (0.6 Pounds) |
| Model Number | m126 |
| Media Type | Negatives, Slide, Photo |
| Scanner Type | Film |
| Connectivity Technology | USB |
| Resolution | 7200 DPI (Interpolated to 22MP) |
| Optical Sensor Technology | CMOS |
| Minimum System Requirements | Windows 7 (for PC connection) |
| Built-in Memory | 128MB |
| LCD Screen | 2.4 inches Color LCD |
| Supported Film Types | 35mm/135, 110, 126KPK, Super 8 Films/Slides/Negatives |
10. Warranty and Support
For warranty information and technical support, please refer to the contact details provided on the product packaging or the official DIGITNOW website. Keep your purchase receipt as proof of purchase for any warranty claims.
Related documentsm126

Ask a question about this manual
Ask about setup, troubleshooting, compatibility, parts, safety, or missing instructions. Manuals+ will review the question and use this page’s manual context to help answer it.