
1. Introduction
This manual provides essential instructions for the safe and efficient operation of your USCutter MH721 Vinyl Cutter and 15" x 15" Digital Heat Press Machine. Please read this manual thoroughly before initial use to ensure proper setup, operation, and maintenance. This combination system is designed for creating custom signs, decals, and heat transfers for apparel.

Image 1.1: The USCutter MH721 Vinyl Cutter and 15" x 15" Heat Press Machine.
2. Safety Information
Always observe the following safety precautions to prevent injury or damage to the equipment:
- Electrical Safety: Ensure the power supply matches the machine's requirements. Do not operate with damaged cords or plugs.
- Heat Press Safety: The heat platen reaches high temperatures. Avoid direct contact with the heated surfaces during operation and cool-down. Use caution when opening and closing the press.
- Vinyl Cutter Safety: The cutting blade is extremely sharp. Handle with care and keep fingers clear of the blade area during operation and blade changes.
- Ventilation: Operate both machines in a well-ventilated area.
- Supervision: Do not leave the machines unattended during operation.
- Children and Pets: Keep children and pets away from the equipment.
3. Package Contents
Verify that all items are present in the package:
- USCutter MH721 Vinyl Cutter
- 15" x 15" Digital Heat Press Machine
- VinylMaster Cut Software (License Card/CD)
- Power Cords
- USB Cable
- Blade Holder and Blades
- Pen Holder
- Stand for Vinyl Cutter (assembly required)
- User Manuals
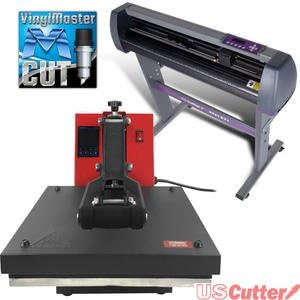
Image 3.1: Example of product packaging and VinylMaster software card.
4. Setup Instructions
4.1. Vinyl Cutter Setup
- Unpacking: Carefully remove the vinyl cutter and all components from the packaging.
- Stand Assembly: Assemble the stand according to the separate assembly guide provided with the cutter. Ensure all screws are tightened securely.
- Placement: Place the assembled cutter on a stable, level surface.
- Blade Installation: Insert a blade into the blade holder, ensuring it is properly seated. Adjust the blade depth so only the tip is exposed. Insert the blade holder into the cutter carriage.
- Connect Power: Plug the power cord into the cutter and then into a grounded electrical outlet.
- Connect to Computer: Connect the cutter to your computer using the provided USB cable. Alternatively, a serial (COM) port connection can be used.

Image 4.1: The control panel of the USCutter MH721 Vinyl Cutter.

Image 4.2: Close-up of the vinyl cutter blade holder.

Image 4.3: Rear view of the vinyl cutter showing USB and COM ports.
4.2. Heat Press Setup
- Unpacking: Remove the heat press from its packaging.
- Placement: Place the heat press on a sturdy, heat-resistant surface. Ensure there is adequate clearance around the machine for ventilation and safe operation.
- Power Connection: Plug the heat press power cord into a grounded electrical outlet.

Image 4.4: Front view of the 15" x 15" Digital Heat Press Machine.

Image 4.5: The heat press machine with the platen open.
5. Operating Instructions
5.1. Vinyl Cutter Operation
- Software Installation: Install the VinylMaster Cut software using the provided license key. Follow the on-screen instructions.
- Loading Material: Place your vinyl material onto the cutter's feed rollers. Adjust the pinch rollers to hold the material firmly without creasing. Ensure the material is straight.
- Setting Origin: Move the cutter head to your desired starting point on the vinyl. Press the Origin button on the control panel to set the origin point.
- Adjusting Speed and Pressure: Use the control panel to set the cutting speed and pressure appropriate for your material. Test cuts are recommended to find optimal settings.
- Creating and Sending Designs: Use VinylMaster Cut to create or import your design. Ensure the design is sized correctly. Send the design to the cutter from the software.
- Cutting Process: The cutter will begin processing the design. Monitor the cutting process.
- Unloading Material: Once cutting is complete, press Offline/Pause, then carefully remove the cut material.
Video: USCutter MH Vinyl Cutter Overview
Video 5.1: This video provides an overview of the USCutter MH Vinyl Cutter, demonstrating its capabilities and basic functions.
5.2. Heat Press Operation
- Power On: Turn on the heat press using the power switch.
- Set Temperature and Time: Use the digital control panel to set the desired temperature and pressing time according to your heat transfer material's specifications. Allow the machine to reach the set temperature.
- Adjust Pressure: Adjust the pressure knob to achieve the correct pressure for your material. A firm, even pressure is usually required.
- Pre-Press (Optional): For garments, pre-press the item for 5-10 seconds to remove moisture and wrinkles.
- Position Transfer: Place your heat transfer material onto the item (e.g., T-shirt) on the lower platen. Ensure it is correctly aligned.
- Pressing: Close the heat press handle firmly. The timer will start automatically.
- Remove Item: Once the timer alarms, open the press and carefully remove the item. Follow the transfer material's instructions for hot or cold peel.
6. Maintenance
6.1. Vinyl Cutter Maintenance
- Cleaning: Regularly clean the cutter's surface and rollers with a soft, dry cloth. Remove any vinyl scraps or adhesive residue.
- Blade Replacement: Replace dull blades promptly to ensure clean cuts. Refer to the blade replacement guide for detailed steps.
- Pinch Rollers: Keep pinch rollers clean and free of debris to maintain proper material feeding.
6.2. Heat Press Maintenance
- Cleaning Platens: Clean the upper and lower platens regularly with a non-abrasive cleaner suitable for heated surfaces. Ensure the machine is cool before cleaning.
- Teflon Sheet: Use a Teflon sheet or parchment paper between the heat platen and your material to prevent residue buildup and protect the platen.
- Lubrication: Periodically check and lubricate moving parts as recommended by the manufacturer.
7. Troubleshooting
7.1. Vinyl Cutter Troubleshooting
- Cutter Not Responding: Check USB/COM cable connection, power supply, and ensure the cutter is online. Verify driver installation on your computer.
- Poor Cut Quality: Adjust blade depth, speed, and pressure. Replace dull blades. Ensure vinyl is loaded correctly and pinch rollers are engaged.
- Vinyl Skewing: Ensure vinyl is loaded straight and pinch rollers are evenly spaced and applying sufficient pressure.
7.2. Heat Press Troubleshooting
- Uneven Heat: Allow sufficient time for the platen to heat up evenly. Ensure the platen is clean.
- Transfer Not Adhering: Verify correct temperature, time, and pressure settings for your transfer material. Ensure the garment is pre-pressed.
- Machine Not Heating: Check power connection and ensure the power switch is on. Consult the manufacturer if issues persist.
8. Specifications
8.1. USCutter MH721 Vinyl Cutter
- Feed Width: 28.3 inches
- Cut Width: 24.8 inches
- Pinch Rollers: 3 (fully adjustable)
- Software Included: VinylMaster Cut
- Connectivity: USB, Serial (COM)
- Compatibility: Windows OS (Not compatible with Apple/Mac computers)
8.2. 15" x 15" Digital Heat Press Machine
- Platen Size: 15" x 15"
- Maximum Temperature: 350 °F
- Power Source: AC adapter
- Product Dimensions: 23.5"L x 23.5"W x 15.5"H
9. Warranty and Support
For technical assistance, troubleshooting, or warranty inquiries, please contact USCutter customer support. Free US-based technical support is available via phone and web-based resources.
USCutter Support: www.uscutter.com/support

