
1. Introduction
Thank you for choosing the Einhell RT-AG 230/180 Angle Grinder. This manual provides important information regarding the safe operation, setup, maintenance, and troubleshooting of your new tool. Please read this manual thoroughly before using the angle grinder and keep it for future reference. Proper use and care will ensure long-lasting performance and safety.
2. Safety Instructions
Always observe basic safety precautions when using electric tools to reduce the risk of fire, electric shock, and personal injury. Keep this manual handy for quick reference.
General Power Tool Safety Warnings:
- Work Area Safety: Keep work area clean and well lit. Do not operate power tools in explosive atmospheres, such as in the presence of flammable liquids, gases or dust.
- Electrical Safety: Power tool plugs must match the outlet. Do not modify the plug in any way. Avoid body contact with earthed or grounded surfaces.
- Personal Safety: Stay alert, watch what you are doing and use common sense. Use personal protective equipment such as eye protection, hearing protection, dust mask, and heavy-duty gloves.
- Tool Use and Care: Do not force the power tool. Use the correct power tool for your application. Disconnect the plug from the power source before making any adjustments, changing accessories, or storing power tools.
Specific Angle Grinder Safety Warnings:
- Always use the auxiliary handle provided with the tool.
- Ensure the wheel guard is securely attached and correctly positioned for the operation.
- Do not use cutting-off wheels for grinding operations.
- Do not use damaged or incorrect accessories.
- Allow the wheel to reach full speed before contacting the workpiece.
- Be aware of kickback and take precautions to avoid it.
3. Package Contents
Upon opening the package, please ensure all items are present and undamaged. If any parts are missing or damaged, contact your retailer immediately.
- Einhell RT-AG 230/180 Angle Grinder Unit
- Auxiliary Handle
- Wheel Guard
- Flange Nut Wrench
- User Manual
4. Product Overview
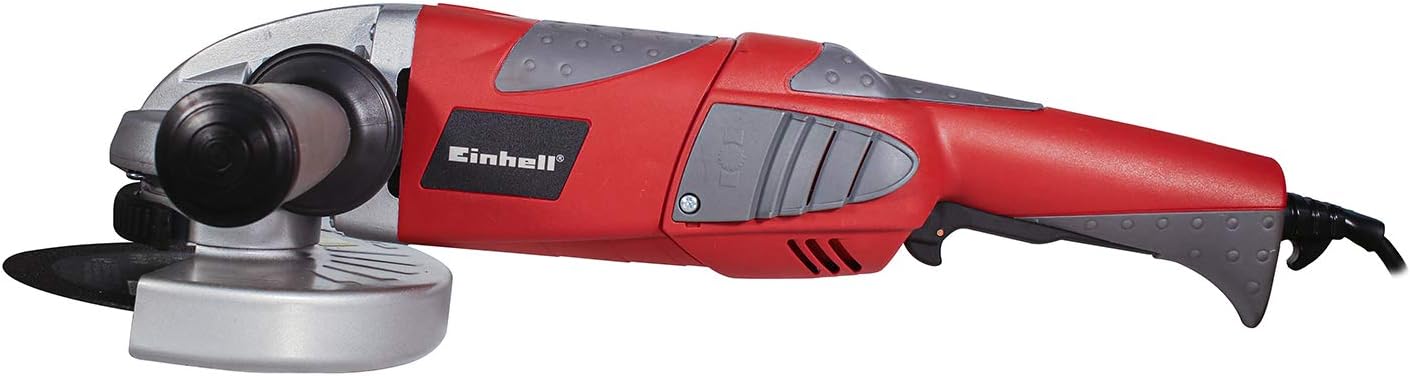
Familiarize yourself with the components of your Einhell Angle Grinder before operation.



5. Setup
5.1 Attaching the Auxiliary Handle
The auxiliary handle can be screwed into one of the three available positions on the gear head (left, right, or top) to provide optimal grip and control for various applications. Ensure it is tightened securely before use.
5.2 Adjusting the Wheel Guard
The wheel guard is essential for safety. It can be adjusted quickly without tools. Loosen the clamping lever, rotate the guard to the desired position to protect against sparks and debris, and then tighten the clamping lever firmly.
5.3 Mounting/Changing the Grinding Disc
- Ensure the tool is unplugged from the power source.
- Press and hold the spindle lock button.
- Use the provided flange nut wrench to loosen the clamping nut counter-clockwise.
- Remove the old disc (if applicable) and clean the flanges.
- Place the new grinding or cutting disc onto the lower flange, ensuring it sits flush.
- Screw on the clamping nut and tighten it firmly with the wrench while holding the spindle lock button. Do not overtighten.
- Release the spindle lock button.
6. Operating
6.1 Switching On/Off
- To Switch On: Push the ON/OFF switch forward. For continuous operation, press the front part of the switch down until it locks.
- To Switch Off: For continuous operation, press the rear part of the switch. For momentary operation, simply release the switch.
6.2 Holding the Tool
Always hold the angle grinder firmly with both hands, one on the main handle and one on the auxiliary handle. Maintain a stable stance and good balance.
6.3 Basic Grinding and Cutting Techniques
- Allow the disc to reach full operating speed before contacting the workpiece.
- Apply light, even pressure. Do not force the tool, as this can lead to overheating and damage.
- For grinding, hold the disc at a slight angle (typically 15-30 degrees) to the workpiece.
- For cutting, hold the disc perpendicular to the workpiece and make straight, steady cuts. Avoid twisting or bending the disc.
- Always work away from your body and ensure sparks are directed away from flammable materials.
7. Maintenance
Regular maintenance ensures the longevity and safe operation of your angle grinder.
7.1 Cleaning
- Always unplug the tool before cleaning.
- Keep the ventilation slots clean to prevent motor overheating. Use a soft brush or compressed air.
- Wipe the tool housing with a damp cloth. Do not use harsh cleaning agents or solvents.
7.2 Carbon Brush Replacement
This tool uses carbon brushes. If the motor sparks excessively or the tool stops working, the carbon brushes may need replacement. This should be performed by a qualified technician or an authorized service center.
7.3 Storage
Store the angle grinder in a dry, secure place, out of reach of children. Protect it from dust and moisture.
8. Troubleshooting
Below are common issues and their potential solutions. If the problem persists, contact customer support.
| Problem | Possible Cause | Solution |
|---|---|---|
| Tool does not start | No power supply; Faulty switch; Worn carbon brushes | Check power outlet/cord; Check switch operation; Have carbon brushes inspected/replaced |
| Excessive sparking at motor | Worn carbon brushes; Dirty commutator | Have carbon brushes inspected/replaced; Have commutator cleaned by technician |
| Tool overheats | Blocked ventilation slots; Overloading the tool | Clean ventilation slots; Reduce pressure/load during operation |
| Excessive vibration | Damaged or unbalanced disc; Loose auxiliary handle | Replace disc; Tighten auxiliary handle |
9. Specifications
Technical data for the Einhell RT-AG 230/180 Angle Grinder:
| Specification | Value |
|---|---|
| Manufacturer | Einhell |
| Part Number | RT-AG 230/180, 127V, 7'' |
| Color | Red |
| Style | Angle |
| Power Source | Corded Electric |
| Voltage | 127 Volts |
| Wattage | 2000 W |
| Item Package Quantity | 1 |
| Batteries Required? | No |
| Item Weight | 6.2 Kilograms |
| Product Dimensions | 54 x 14.5 x 16.5 cm |
| Model Number | RT-AG 230/180, 127V, 7'' |
| ASIN | B076XCCRR2 |
10. Warranty and Support
Einhell products are manufactured to high-quality standards and undergo strict quality controls. For information regarding warranty terms and conditions, please refer to the warranty card included with your product or visit the official Einhell website. For technical support, spare parts, or service inquiries, please contact Einhell customer service or an authorized service center in your region. Keep your purchase receipt as proof of purchase for any warranty claims.
