
1. Introduction
The CCLIFE 12V Ignition Timing Light is a precision tool designed for accurately setting and checking the ignition timing on gasoline engines. This device is compatible with all 12V gasoline vehicles, including automobiles, motorcycles, ATVs, RVs, and boats, that utilize a 12V ignition system. Its bright xenon light ensures high visibility even in daylight conditions, and the ergonomic handle provides comfortable use.

Image: The CCLIFE 12V Ignition Timing Light, a red handheld device with attached power cables and inductive pickup.

Image: A collage illustrating the wide application of the timing light across various vehicles including cars, boats, trucks, ATVs, motorcycles, and RVs.
2. Safety Instructions
Always observe the following safety precautions when using the CCLIFE Ignition Timing Light:
- Wear appropriate eye protection (safety glasses) and hand protection (gloves) during operation.
- Ensure the engine is off and cool before connecting or disconnecting the timing light.
- Keep hands, tools, and clothing clear of moving engine parts (fans, belts, pulleys) when the engine is running.
- Avoid contact with hot engine components and exhaust systems.
- Do not use the timing light in wet conditions or near flammable liquids or gases.
- Ensure proper ventilation when working on an engine.
- Connect the power clamps correctly: red to positive (+), black to negative (-). Incorrect connection can damage the device or vehicle electrical system.
- The timing light is designed for 12V DC systems only. Do not connect to other voltage systems.
3. Product Components
The CCLIFE Ignition Timing Light consists of the following main components:
- Timing Light Unit: The main handheld device with a xenon flash tube.
- Power Cables: Red and black cables with alligator clips for connecting to the vehicle's 12V battery.
- Inductive Pickup Clamp: A separate clamp that attaches to the spark plug wire to detect ignition pulses.

Image: The CCLIFE Timing Light showing the main unit, power cables with red and black alligator clips, and the inductive pickup clamp.
4. Setup Instructions
Follow these steps to prepare the timing light for use:
- Prepare the Vehicle: Ensure the vehicle is parked on a level surface with the parking brake engaged. Consult your vehicle's service manual for specific ignition timing procedures and safety warnings.
- Connect Power: Attach the red alligator clip of the timing light to the positive (+) terminal of the vehicle's 12V battery. Attach the black alligator clip to the negative (-) terminal of the battery or a suitable ground point on the chassis.
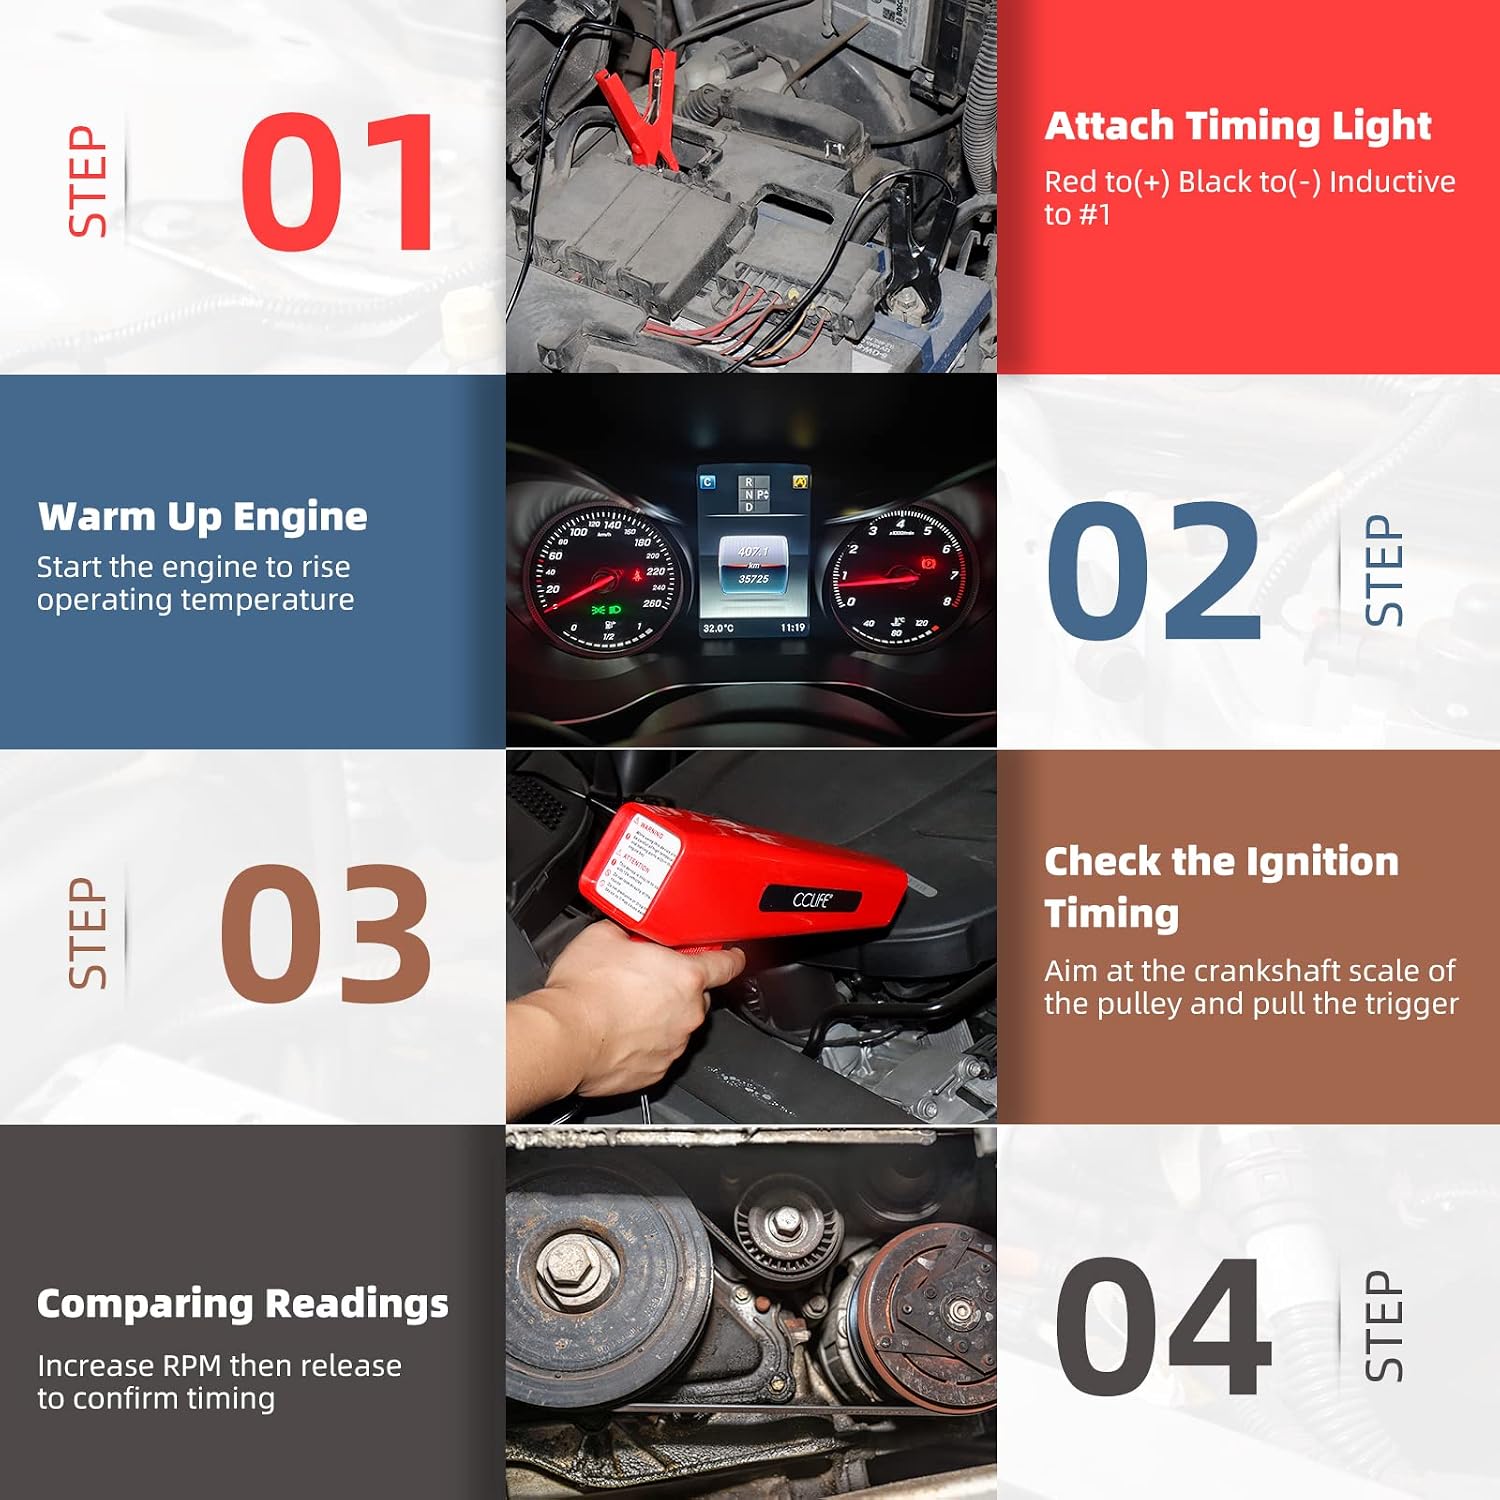
Image: Step 1 of the setup process, showing the red and black alligator clips connected to a car battery terminals.
- Attach Inductive Pickup: Locate the No. 1 spark plug wire. Open the inductive pickup clamp and securely attach it around the No. 1 spark plug wire. Ensure the arrow on the clamp (if present) points towards the spark plug.
- Warm Up Engine: Start the engine and allow it to reach its normal operating temperature. This is crucial for accurate timing measurements.
Image: Step 2 of the setup process, showing a car dashboard with the engine temperature gauge indicating normal operating temperature.
5. Operating Instructions
Once the timing light is set up and the engine is warm, proceed with checking the ignition timing:
- Locate Timing Marks: Identify the timing marks on the engine's crankshaft pulley and the engine block. These marks are typically a notch or line on the pulley and a scale on the engine block. Consult your vehicle's service manual for the exact location and specifications.
- Aim the Timing Light: With the engine running at the specified idle RPM (refer to your vehicle's manual), aim the timing light at the crankshaft pulley's timing marks.
- Activate the Light: Press and hold the trigger on the timing light. The xenon light will flash, illuminating the timing marks. The flash synchronizes with the ignition pulse of the No. 1 spark plug.

Image: A hand holding the red timing light, aiming it towards an engine's pulley system to check ignition timing.
Image: Step 3 of the operation process, showing a hand holding the timing light and aiming it at the crankshaft pulley to check timing marks.
- Read the Timing: Observe the position of the timing mark on the crankshaft pulley relative to the scale on the engine block. Compare this reading to the manufacturer's specified ignition timing for your vehicle.
- Adjust Timing (if necessary): If the timing is incorrect, adjust it according to your vehicle's service manual. This usually involves loosening the distributor clamp and rotating the distributor until the timing marks align correctly while the timing light is flashing.
- Confirm Timing: After any adjustments, re-check the timing to ensure it is within specifications. Some vehicles may require checking timing at different RPMs.
Image: Step 4 of the operation process, showing an engine's pulley system, representing the comparison of timing readings.
- Disconnect: Once timing is confirmed, turn off the engine. Disconnect the inductive pickup clamp from the spark plug wire, then disconnect the power clamps from the battery.
6. Maintenance
To ensure the longevity and proper functioning of your CCLIFE Ignition Timing Light, follow these simple maintenance guidelines:
- Cleaning: After each use, wipe the timing light unit and cables with a clean, dry cloth to remove any oil, grease, or dirt. Do not use harsh chemicals or abrasive cleaners.
- Storage: Store the timing light in a dry, cool place, away from direct sunlight and extreme temperatures. Keep it in its original packaging or a protective case to prevent damage.
- Cable Inspection: Periodically inspect the power cables and inductive pickup for any signs of wear, cuts, or damage. Do not use the device if the cables are damaged.
- Battery Clamps: Ensure the alligator clips are clean and free of corrosion for optimal electrical contact.
7. Troubleshooting
If you encounter issues with your timing light, refer to the following common problems and solutions:
| Problem | Possible Cause | Solution |
|---|---|---|
| Timing light does not flash. |
|
|
| Inaccurate timing readings. |
|
|
| Light is dim or inconsistent. |
|
|
8. Specifications
Technical details for the CCLIFE Ignition Timing Light:
- Model: 9357
- Voltage: 12 Volts DC
- Bulb Type: Xenon
- Power: 10 Watts
- Dimensions (L x W x H): Approximately 29 x 28.5 x 7.5 cm (11.4 x 11.2 x 3 inches)
- Item Weight: Approximately 670 grams (1.48 lbs)
- Color: Bright red housing
- Power Source: Electric cable (via 12V vehicle battery)

Image: Diagram showing the dimensions of the CCLIFE Timing Light: 23.5 cm length, 16.5 cm height, and cable lengths of 140 cm and 155 cm.
9. Warranty & Support
CCLIFE products are manufactured to high-quality standards. For specific warranty information, please refer to the documentation included with your purchase or visit the official CCLIFE website. In case of technical issues or questions regarding the use of your timing light, please contact CCLIFE customer support through their official channels. Keep your purchase receipt as proof of purchase for warranty claims.
For further assistance, you may visit the CCLIFE Brand Store on Amazon.