
Introduction
This manual provides detailed instructions for the proper use and care of your kimire 312P Digital Camcorder. Please read this manual thoroughly before operating the device to ensure optimal performance and longevity. Keep this manual for future reference.
Product Overview
The kimire 312P is a compact digital camcorder designed for recording high-definition video and capturing still images. It features a 2.7-inch TFT LCD screen with 270-degree rotation, 16X digital zoom, and a 24-megapixel still image resolution.
Components and Controls
Familiarize yourself with the various parts and controls of your camcorder as illustrated below:

Figure 1: Front and side view of the camcorder with key components labeled. This includes the lens, fill light, 2.7-inch screen, AV cable jack, USB cable jack, W/T (Zoom) buttons, Take Photo button, Working Light, Record/Stop button, TV/USB Jack, Power/OK button, Menu button, and Up/Down navigation buttons.
- Lens: Captures images and video.
- Fill Light: Provides additional illumination in low-light conditions.
- 2.7-inch LCD Screen: Rotates 270 degrees for flexible viewing and self-recording.
- W/T Buttons (Zoom): Controls the 16X digital zoom (Wide/Telephoto).
- Take Photo Button: Press to capture still images.
- Record/Stop Button: Press to start or stop video recording.
- Menu Button: Accesses the camcorder's settings menu.
- Power/OK Button: Turns the camcorder on/off and confirms selections in the menu.
- Up/Down Buttons: Navigates through menu options.
- AV Cable Jack: For connecting to a television.
- USB Cable Jack: For connecting to a computer or charging.
- TV/USB Jack: Combined port for TV output and USB connection.
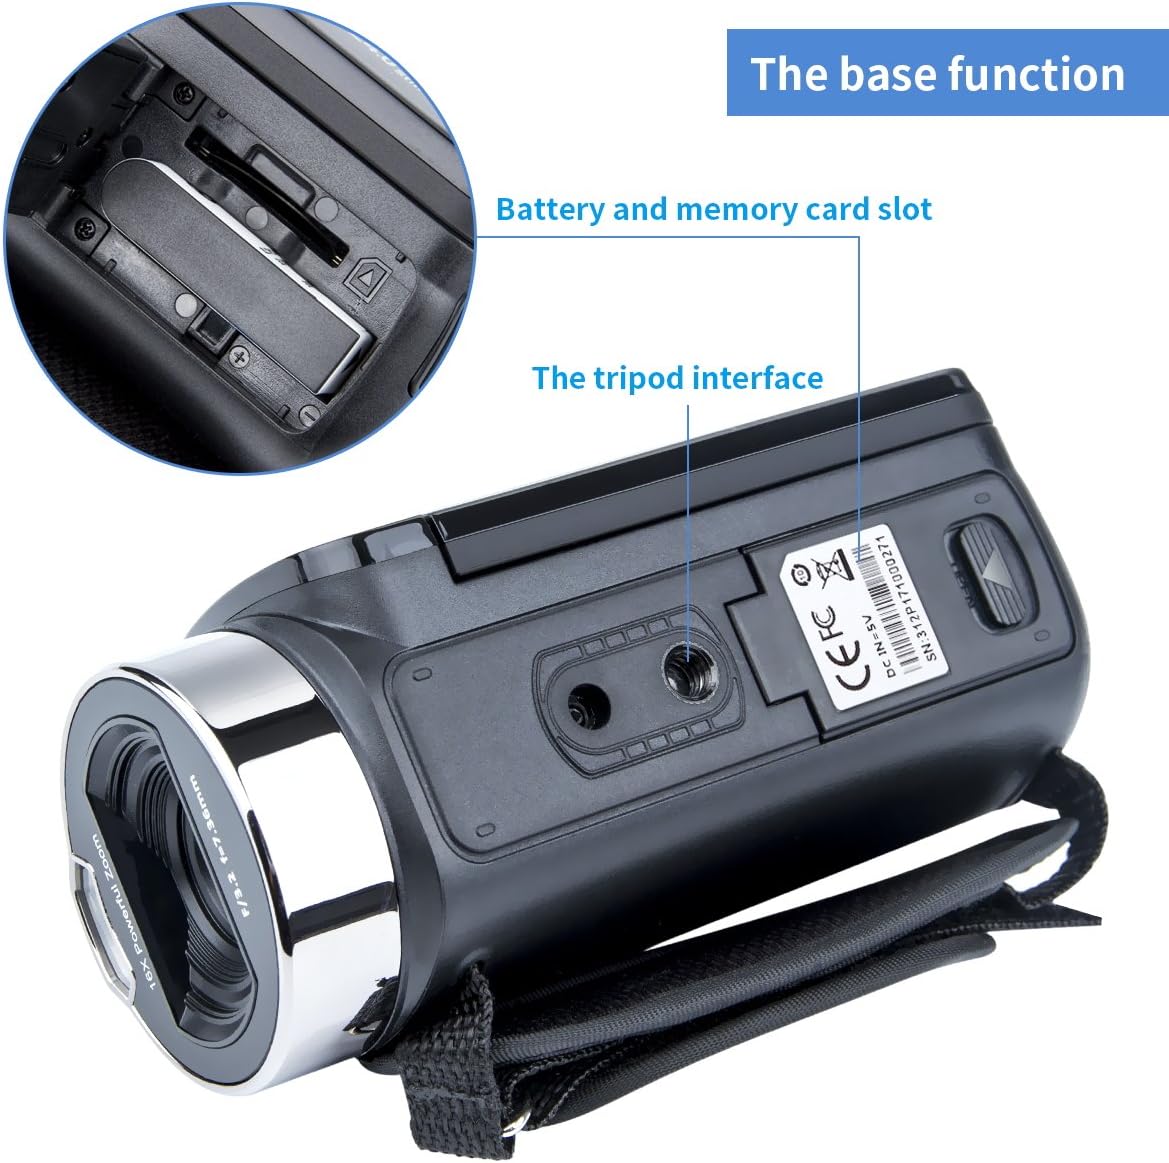
Figure 2: Underside view of the camcorder, highlighting the battery and memory card slot, and the tripod interface.
- Battery and Memory Card Slot: Compartment for the rechargeable battery and SD/MMC card.
- Tripod Interface: Standard screw mount for attaching the camcorder to a tripod (tripod not included).
Setup
1. Battery Installation and Charging
- Open the battery compartment cover located on the underside of the camcorder (refer to Figure 2).
- Insert the provided NP-40, 3.7V 1200 mAh Li-ion battery into the compartment, ensuring correct polarity.
- Close the battery compartment cover securely.
- To charge the battery, connect the camcorder to a power source using the supplied USB cable. The charging indicator will illuminate.
- A full charge typically takes 2.5-3.5 hours. Ensure the camcorder is powered off before replacing the battery.
2. SD Card Installation and Formatting
A compatible SD/MMC card (4GB to 32GB) is required for storing photos and videos (SD card not included).
- Open the memory card slot cover (located next to the battery compartment, refer to Figure 2).
- Insert the SD card into the slot until it clicks into place.
- It is crucial to format the SD card before first use to prevent system malfunctions.
- Turn on the camcorder.
- Press the MENU button.
- Navigate through the menu options to find the "Format" function.
- Press the OK button to confirm and format the SD card.
- If you encounter issues formatting the card with the camcorder, connect the memory card to a computer and format it there.
Operating Instructions
1. Powering On/Off
- To power on the camcorder, press and hold the POWER/OK button.
- To power off, press and hold the POWER/OK button again. The camcorder also features an auto power-off function to conserve battery.
2. Recording Videos
- Turn on the camcorder.
- Press the MENU button.
- Navigate to "Movie Size" and select FHD1920X1080 for high-definition video recording.
- Press the Record/Stop button to begin recording. The working light will illuminate.
- Press the Record/Stop button again to stop recording.
3. Taking Photos
- Turn on the camcorder.
- Press the MENU button.
- Navigate to the photo resolution setting and select 24M (6000X4500) for maximum image quality.
- Ensure "Photo Quality" is set to "Super Fine" in the menu for best results.
- Press the Take Photo button to capture a still image.
4. Using Digital Zoom
The camcorder features 16X digital zoom.
- Press the W button to zoom out (Wide).
- Press the T button to zoom in (Telephoto).
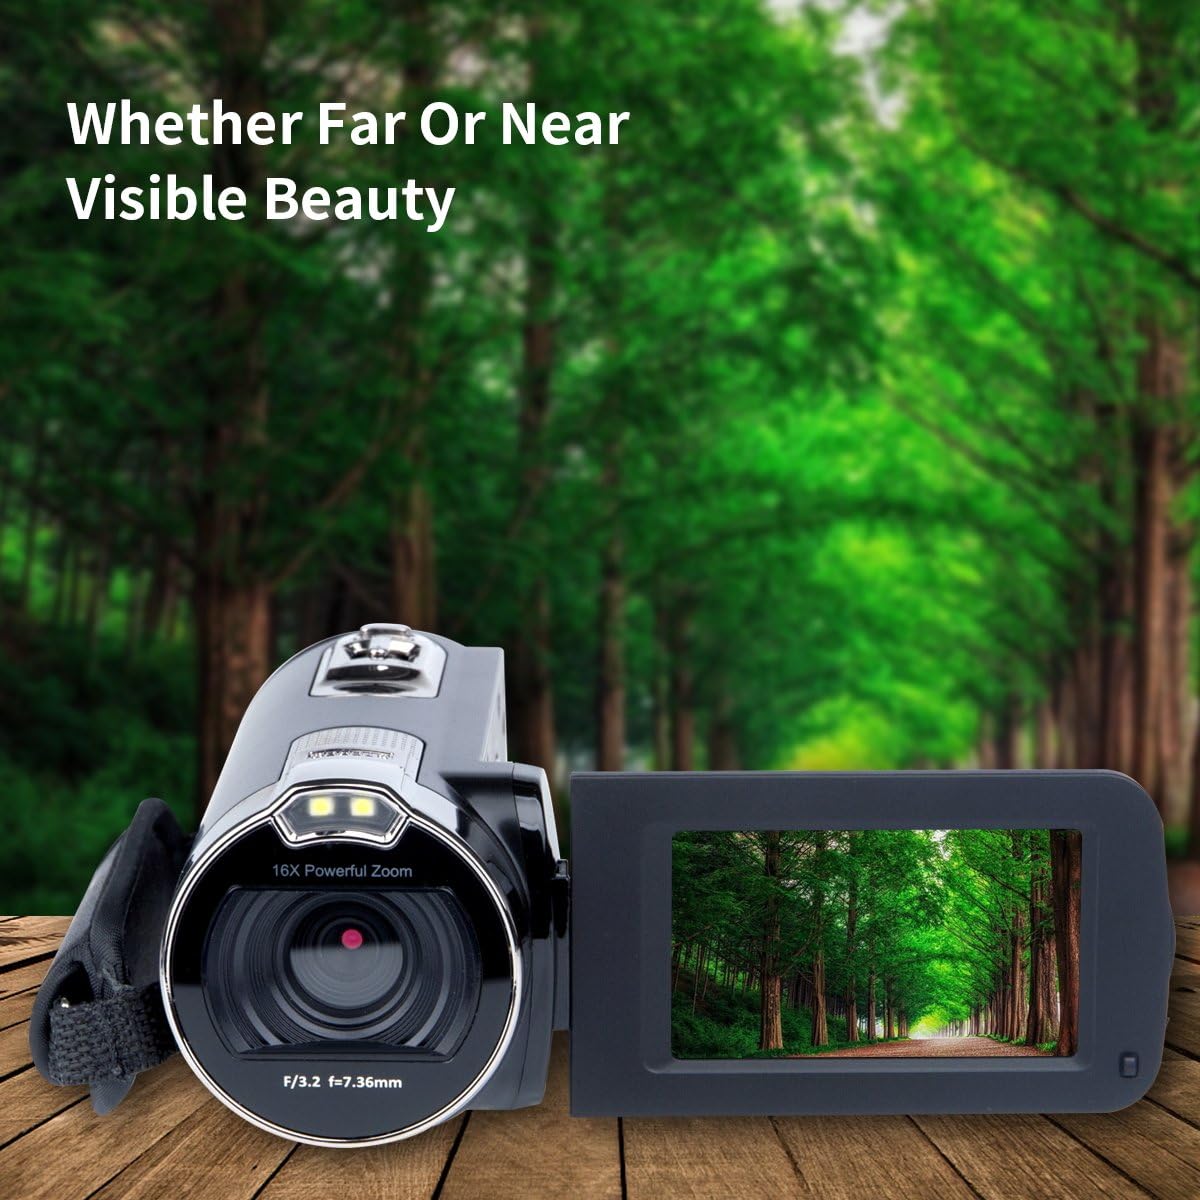
Figure 3: The camcorder in use, demonstrating the visual effect of the digital zoom feature.
5. Anti-Shake Function
To minimize blur caused by camera shake, activate the anti-shake function:
- Press the MENU button.
- Navigate to "Anti-shake" and select "On".
6. White Balance Settings
Adjust white balance to match lighting conditions for accurate color reproduction:
- Press the MENU button.
- Navigate to "White Balance" and choose from options like: Auto, Sunshine, Cloudy, Fluorescent Lamp, Tungsten Lamp.
7. Connecting to TV or PC
You can view your recordings on a TV or transfer files to a computer.

Figure 4: Illustration of connecting the camcorder to a television using the AV cable and to a computer using the USB cable.
- To TV: Use the provided AV cable. Connect one end to the camcorder's AV jack and the other end to the corresponding AV input ports on your television. Select the correct input source on your TV.
- To PC: Use the provided USB cable. Connect the smaller end to the camcorder's USB jack and the larger end to a USB port on your computer. The camcorder will appear as a removable disk, allowing you to transfer files.
Maintenance
- Cleaning: Use a soft, dry cloth to clean the camcorder body. For the lens, use a specialized lens cleaning cloth and solution. Avoid abrasive cleaners or solvents.
- Storage: When not in use for extended periods, remove the battery and store the camcorder in a cool, dry place away from direct sunlight and extreme temperatures.
- Battery Care: Recharge the battery regularly, even if not in use, to maintain its lifespan. Avoid fully discharging the battery frequently.
- SD Card Care: Handle SD cards carefully. Avoid bending or exposing them to static electricity.
Troubleshooting
| Problem | Possible Cause / Solution |
|---|---|
| Camcorder does not power on. |
|
| Cannot record video or take photos. |
|
| Images/Videos are blurry or shaky. |
|
| Poor color reproduction. |
|
| No sound in recorded videos. |
|
Specifications
| Feature | Detail |
|---|---|
| Brand | kimire |
| Model Number | 4332103531 (312P) |
| Video Capture Resolution | 1080p (FHD1920X1080) |
| Effective Still Resolution | 24 Megapixels (6000X4500) |
| Digital Zoom | 16X |
| Screen Size | 2.7 inches TFT LCD (16:9) with 270-degree rotation |
| Image Sensor | CMOS |
| Storage Media | SD/MMC card (4GB to 32GB, not included) |
| Battery | NP-40, 3.7V 1200 mAh Li-ion battery (included) |
| Battery Average Life | 2.5-3.5 hours (recording) |
| Connectivity | USB 2.0, TV output (PAL/NTSC) |
| Special Features | Fill-in infrared LED light, Face Capture, Anti-shake, Internal Microphone, Speaker, Multi-Languages |
| Operating System Requirements | Windows 7/2002/XP/Vista |
| Dimensions | Approx. 5 inches (L) x 2.2 inches (W) x 2.2 inches (H) |

Figure 5: Product dimensions of the kimire 312P Digital Camcorder.
Warranty and Support
For warranty information and technical support, please refer to the documentation included with your purchase or contact kimire customer service directly. Contact details are typically found on the product packaging or the official kimire website.
Included Accessories
The following items are included in the package:
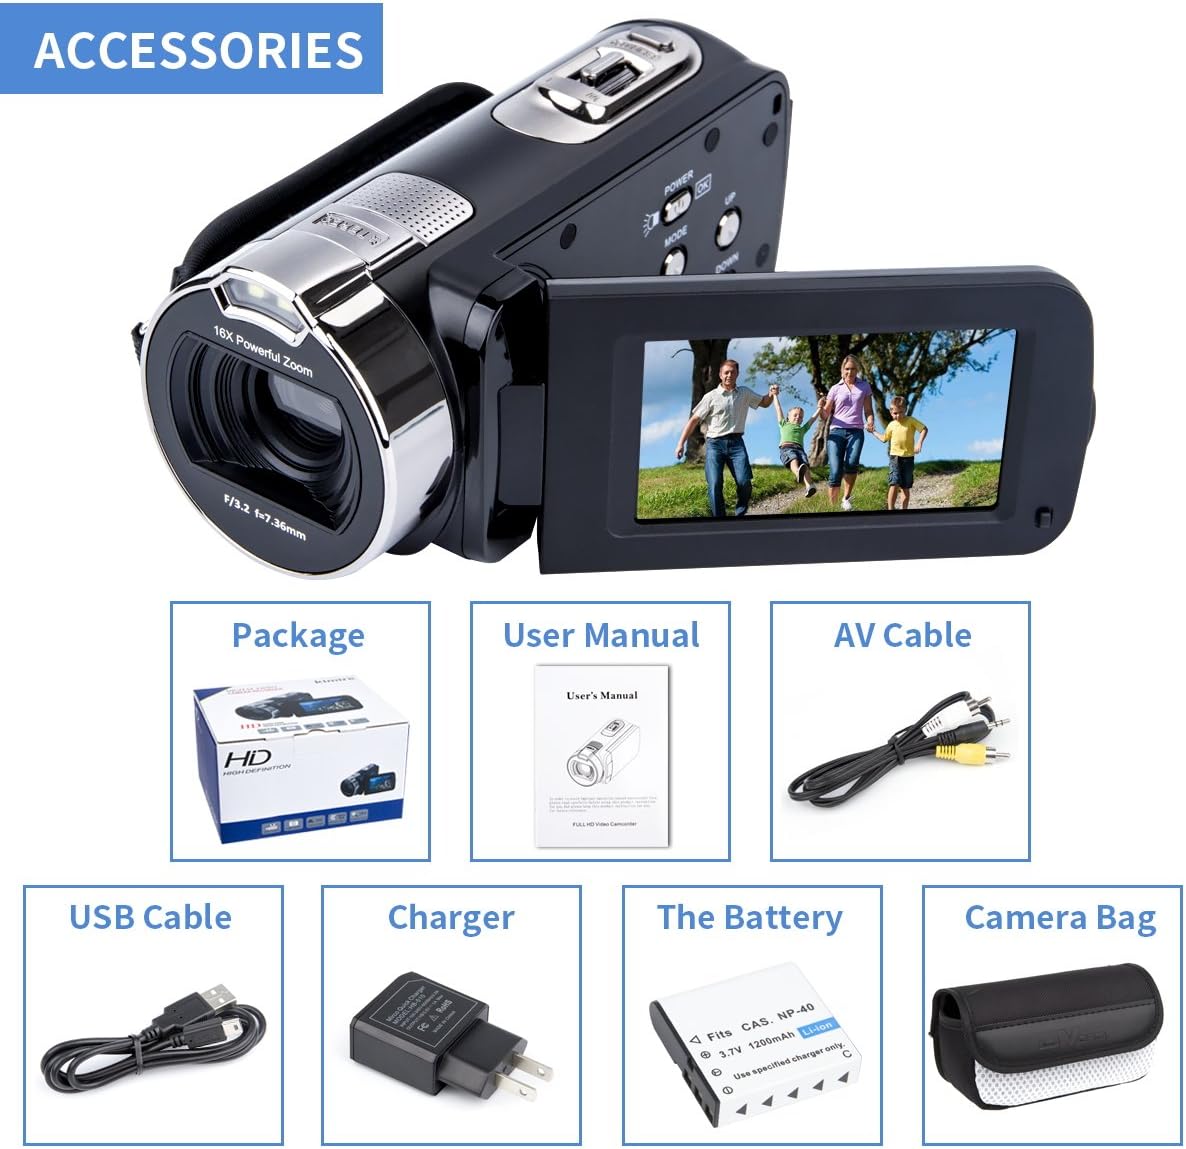
Figure 6: All accessories included with your kimire 312P Digital Camcorder.
- kimire 312P Digital Camcorder
- User Manual
- NP-40 Li-ion Battery
- USB Cable
- AV Cable
- Power Adapter (Charger)
- Camera Bag