
1. Introduction
1.1 About Your TELESTAR MAX T2 HD Receiver
The TELESTAR MAX T2 HD receiver combines state-of-the-art DVB-T2 and DVB-C HD receiver technology with multimedia and network capabilities. This device is designed to receive both free and encrypted TV and radio programs compliant with the DVB-T2 HDTV HEVC standard, as well as free-to-air DVB-C cable programs.
Its USB interface supports playback of various media formats, including video, audio, and images. When connected to a home network via LAN, the MAX T2 HD provides access to current weather data. The receiver also features a four-digit LED display, a Scart connection, and user-friendly functions such as EPI program information, parental control, and a Plug & Play installation assistant. An energy-saving power supply ensures minimal power consumption.
1.2 Key Features
- Reception: DVB-T2 HD receiver with freenet TV support for all DVB-T2 channels, and reception of free DVB-C HD cable channels.
- freenet TV: Integrated Irdeto decryption system for freenet TV channels, including 3 months of freenet TV credit.
- Multimedia: USB Media Player for photos, videos, and music.
- Display: Numeric 4-digit LED display.
- Connectivity: Weather app access via internet (LAN connection required).
- Ease of Use: Simple installation and operation with a comprehensive assistant, EPG program information with multi-day preview.
- Design: High-quality, robust metal casing with durable technology.
- Energy Efficiency: Energy-saving power supply.
- Connections: 1x HDMI, 1x Scart, 1x USB, 1x LAN, 1x Optical S/PDIF Audio Output, 1x RCA (L/R) Audio Output, 1x 3.5 mm Jack AV Out.
2. Safety Information
Please read all safety instructions carefully before operating the device. Keep this manual for future reference.
- Power Supply: Use only the provided power adapter. Ensure the voltage matches your local power supply.
- Ventilation: Do not block ventilation openings. Ensure adequate space around the receiver for proper airflow to prevent overheating.
- Water and Moisture: Do not expose the receiver to rain, moisture, or dripping/splashing liquids. Do not place objects filled with liquids, such as vases, on the apparatus.
- Cleaning: Disconnect the power before cleaning. Use a soft, dry cloth. Do not use liquid or aerosol cleaners.
- Placement: Place the receiver on a stable, flat surface. Avoid placing it near heat sources or in direct sunlight.
- Servicing: Do not attempt to service this product yourself. Refer all servicing to qualified service personnel.
3. Package Contents
Verify that all items are present in the package:
- TELESTAR MAX T2 HD Receiver
- Remote Control (including 2 x AAA batteries)
- Power Adapter
- User Manual
4. Product Overview
4.1 Front Panel
The front panel features the 4-digit LED display and basic control buttons (if any). The smart card slot is located on the top of the device, accessible from the front.
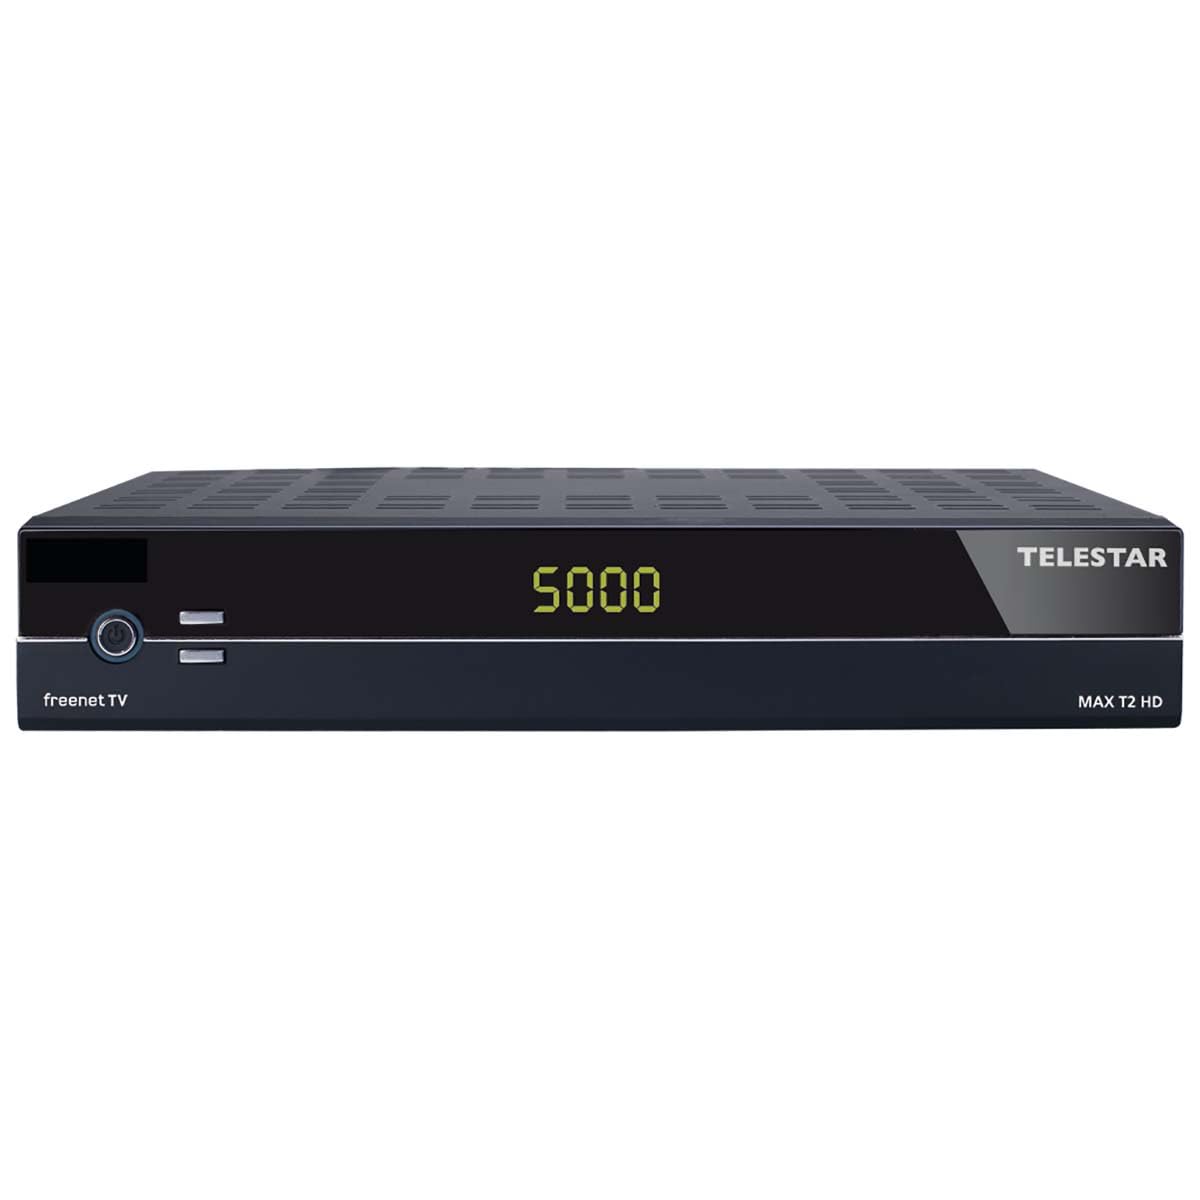
Image: Front view of the TELESTAR MAX T2 HD receiver. This shows the compact black unit with its front display and controls.
4.2 Rear Panel
The rear panel provides all necessary connection ports for your television and other devices.

Image: Rear panel of the TELESTAR MAX T2 HD receiver. From left to right, ports include ANT IN, USB, ETHERNET, HDMI, S/PDIF (optical), TV SCART, and RCA Audio (R/L).
4.3 Remote Control
The remote control allows you to operate all functions of your TELESTAR MAX T2 HD receiver conveniently.

Image: Remote control for the TELESTAR MAX T2 HD receiver. Key buttons include Power, Menu, Timer, Audio, Zoom, Playback controls, EPG, OK, Channel Up/Down, Volume Up/Down, and a numeric keypad.
5. Setup
5.1 Connecting Your Receiver
- Antenna/Cable Connection: Connect your DVB-T2 antenna or DVB-C cable to the 'ANT IN' port on the rear panel.
- TV Connection (HDMI): Connect an HDMI cable from the 'HDMI' port on the receiver to an HDMI input on your television.
- TV Connection (Scart): Alternatively, for older TVs, connect a Scart cable from the 'TV SCART' port on the receiver to the Scart input on your television.
- Network Connection (Optional): For internet features like the weather app, connect an Ethernet cable from the 'ETHERNET' port on the receiver to your router or network switch.
- Power Connection: Connect the power adapter to the 'AC IN' port on the receiver and then plug it into a wall outlet.
5.2 First Time Installation
Upon first power-on, the receiver will guide you through an installation wizard:
- Language Selection: Select your preferred language using the remote control and press OK.
- Country Selection: Choose your country.
- Channel Scan: The receiver will automatically scan for available DVB-T2 or DVB-C channels. This process may take several minutes.
- freenet TV Activation: If you intend to use freenet TV, follow the on-screen instructions to activate your included 3 months of service. Ensure your smart card is inserted correctly (chip down).
- Time Zone: Set the correct time zone.
- Finish: Once the scan is complete, you can start watching TV.
6. Operating Instructions
6.1 Basic Operation
- Power On/Off: Press the POWER button on the remote control.
- Channel Selection: Use the P+ / P- buttons to change channels sequentially, or enter the channel number directly using the numeric keypad.
- Volume Control: Use the VOL+ / VOL- buttons to adjust the volume.
- Menu Navigation: Press the MENU button to access the main menu. Use the arrow keys (UP/DOWN/LEFT/RIGHT) to navigate and OK to confirm. Press EXIT to return to the previous screen or live TV.
6.2 Using the USB Media Player
- Insert a USB storage device (e.g., USB stick or external hard drive) into the 'USB' port on the rear panel.
- Access the Media Player function from the main menu.
- Browse your files (videos, music, photos) and select the desired content for playback.
6.3 Weather App
If your receiver is connected to the internet via LAN, you can access the weather app:
- Navigate to the 'Weather' application in the main menu.
- View current weather data and forecasts for selected locations.
6.4 EPG (Electronic Program Guide)
Press the EPG button on the remote control to view the Electronic Program Guide. This provides a multi-day preview of TV programs, allowing you to plan your viewing.
6.5 Parental Control
The receiver includes parental control features to restrict access to certain channels or programs. Access these settings via the main menu to set up a PIN and manage restrictions.
7. Maintenance
7.1 Cleaning
To clean your receiver, first disconnect it from the power supply. Use a soft, dry, lint-free cloth to wipe the exterior. Do not use abrasive cleaners, waxes, or solvents as they may damage the finish.
7.2 Software Updates
Periodically check the manufacturer's website or the receiver's menu for available software updates. Keeping your receiver's software up-to-date ensures optimal performance and access to the latest features.
8. Troubleshooting
If you encounter issues with your TELESTAR MAX T2 HD receiver, refer to the following common problems and solutions:
| Problem | Possible Cause | Solution |
|---|---|---|
| No power | Power cable disconnected; power outlet faulty. | Check power cable connection. Try a different power outlet. |
| No signal / Black screen | Antenna/cable not connected; incorrect input selected on TV; no channels scanned. | Check antenna/cable connection. Select correct HDMI/Scart input on your TV. Perform a channel scan. |
| Remote control not working | Batteries depleted; line of sight blocked; remote faulty. | Replace batteries. Ensure no obstructions between remote and receiver. |
| No internet connection for weather app | LAN cable disconnected; router issue; network settings incorrect. | Check LAN cable connection. Restart your router. Verify network settings in the receiver's menu. |
| Slow startup or channel switching | Normal operation for some receivers; background processes. | This may be normal behavior. Ensure no unnecessary USB devices are connected. |
If the problem persists after trying these solutions, please contact customer support.
9. Specifications
| Feature | Specification |
|---|---|
| Brand | TELESTAR |
| Model Number | 5310499 |
| Item Type Designation | DVB-T2 Receiver |
| Connectivity Technology | HDMI, Scart, USB, LAN |
| Video Encoding | HEVC |
| Audio Output Mode | Stereo, Surround |
| Number of Audio Channels | 2.0 |
| Special Features | USB Media Player, Weather App, EPG Program Info |
| Compatible Devices | TVs, USB Audio Devices |
| Color | Black |
| Item Dimensions (D x W x H) | 12.7 x 21 x 4.4 cm |
| Weight | 490 grams |
| Country of Origin | China |
10. Warranty and Support
10.1 Product Warranty
The TELESTAR MAX T2 HD receiver comes with a 2-year manufacturer's warranty. Please retain your proof of purchase for warranty claims. The warranty covers defects in materials and workmanship under normal use.
10.2 Customer Support
For technical assistance, troubleshooting beyond this manual, or warranty inquiries, please contact TELESTAR customer support. Refer to the contact information provided with your product packaging or visit the official TELESTAR website for support details.


