Introduction
This manual provides detailed instructions for the installation, operation, and maintenance of your AECOJOY Lead-Free Brass Water Pressure Regulator, Model AE017. This device is designed to protect your RV's plumbing system and connected appliances from high water pressure, ensuring a consistent and safe water supply. Please read this manual thoroughly before use to ensure proper function and longevity of the product.
Safety Information
- Always ensure water supply is turned off before installing or performing maintenance on the regulator.
- Do not overtighten connections, as this can damage threads or seals.
- Regularly inspect the regulator and connections for leaks or damage.
- Ensure the pressure gauge is functioning correctly to monitor water pressure.
- This product is designed for use with potable water systems.
Product Overview
The AECOJOY AE017 Water Pressure Regulator features a durable lead-free brass construction and is equipped with a pressure gauge for easy monitoring. It is compatible with U.S. 3/4" NH thread water sources, making it suitable for RV and other plumbing applications.

Image: AECOJOY Water Pressure Regulator with its key components highlighted, including the pressure gauge, adjustment knob, and threaded connections.
Key Features:
- Lead-Free Brass Construction: Meets NSF lead-free requirements (<0.25%).
- Integrated Pressure Gauge: Provides clear pressure readings up to 160 PSI.
- Adjustable Pressure: Allows users to set desired water pressure.
- NH 3/4" Thread: Compatible with standard U.S. water sources.
- Removable Valve Spool: Facilitates easy cleaning and replacement.
Setup and Installation
Follow these steps to properly install your water pressure regulator:
- Turn off Water Supply: Locate the main water shut-off valve and turn off the water supply to your RV or plumbing system.
- Connect to Water Source: Attach the inlet side of the regulator (typically marked with an arrow indicating flow direction) to the water spigot or city water connection. Ensure a secure, hand-tight connection, then use a wrench for a quarter turn if needed. Do not overtighten.
- Connect Hose: Attach your RV's freshwater hose to the outlet side of the regulator. Again, ensure a secure, hand-tight connection.
- Turn on Water Supply: Slowly turn on the main water supply. Check all connections for leaks. If leaks are present, turn off the water, tighten connections slightly, and recheck.
- Verify Pressure: Observe the pressure gauge to confirm the current water pressure.
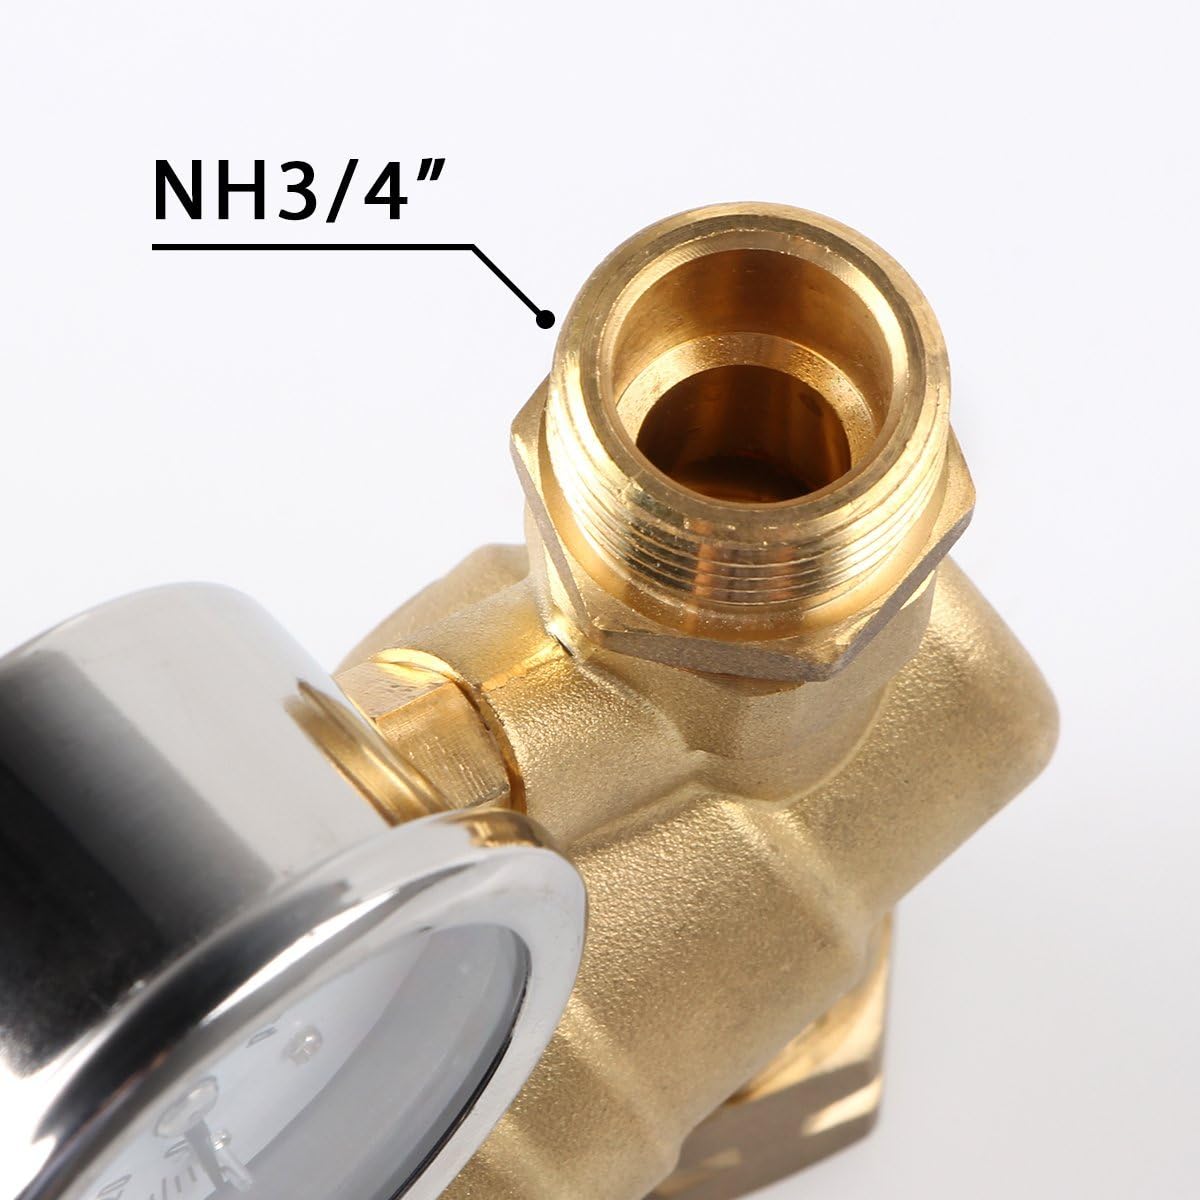
Image: Close-up view of the NH 3/4" threaded inlet connection of the regulator.

Image: Close-up view of the regulator's outlet connection, ready for hose attachment.
Operating Instructions
The AECOJOY Water Pressure Regulator allows you to adjust the outgoing water pressure to a safe level for your system, typically between 40-60 PSI for RVs.
- Reading the Gauge: The integrated gauge displays the regulated water pressure in PSI. Ensure the water is flowing (e.g., by opening a faucet) when checking the pressure for an accurate reading.
- Adjusting Pressure: To adjust the pressure, locate the black adjustment knob on top of the regulator.
- Turn the knob clockwise to increase the pressure.
- Turn the knob counter-clockwise to decrease the pressure.
- Make small adjustments and observe the gauge. Open a faucet briefly after each adjustment to release any built-up pressure and get an accurate reading.
- Once the desired pressure is set, close the faucet and ensure the gauge holds the pressure steady.
Maintenance
Regular maintenance ensures optimal performance and extends the life of your regulator.
- Filter Screen Cleaning: The inlet connection includes a filter screen. Periodically inspect and clean this screen to prevent debris from entering the regulator. To clean, turn off the water, disconnect the regulator, remove the screen, rinse it under clean water, and reinsert.
- Valve Spool Maintenance: The internal valve spool is removable for cleaning or replacement. If you notice inconsistent pressure or reduced flow, the spool may need cleaning. Turn off the water, disconnect the regulator, and carefully remove the spool according to the product diagram (if provided with packaging). Clean any mineral deposits or debris and reassemble.
- Winterization: In freezing temperatures, disconnect and drain the regulator to prevent damage from ice expansion. Store in a dry, protected area.
Troubleshooting
| Problem | Possible Cause | Solution |
|---|---|---|
| No water flow or very low flow | Regulator adjusted too low; clogged filter screen; kinked hose. | Increase pressure setting; clean filter screen; check hose for obstructions. |
| Pressure gauge reads zero or stuck | No water pressure; gauge malfunction; air in the system. | Ensure water supply is on; open a faucet to bleed air; replace gauge if faulty. |
| Water pressure fluctuates | Inconsistent source pressure; debris in valve spool; faulty regulator. | Monitor source pressure; clean valve spool; consider replacing regulator if issue persists. |
| Leaks at connections | Loose connections; damaged O-rings/washers; damaged threads. | Tighten connections; replace O-rings/washers; inspect threads for damage. |
Specifications
- Model Number: AE017
- Material: Lead-Free Brass
- Thread Type: NH 3/4"
- Maximum Adjustable Pressure: 160 PSI
- Compatibility: U.S. Standard Water Sources, RV Freshwater Systems
Warranty Information
AECOJOY products are manufactured to high-quality standards. For specific warranty details, please refer to the warranty card included with your product packaging or contact AECOJOY customer support. Keep your purchase receipt as proof of purchase for any warranty claims.
Customer Support
If you have any questions, require assistance, or encounter issues not covered in this manual, please contact AECOJOY customer support. Refer to the contact information provided in your product packaging or visit the official AECOJOY website for support options.


