
Introduction
Thank you for purchasing the allen + roth Wintonburg 9-Light Aged Bronze Chandelier. This manual provides essential information for the safe installation, operation, and maintenance of your new lighting fixture. Please read these instructions thoroughly before beginning installation and retain them for future reference.
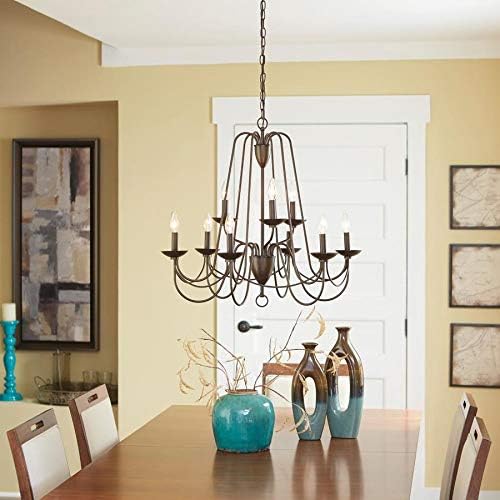
Image: The Wintonburg 9-Light Chandelier elegantly installed in a dining room setting, showcasing its aged bronze finish and nine faux candlestick lights.
Safety Information
WARNING: To avoid electric shock, always disconnect power at the main circuit breaker or fuse box before beginning installation or performing any maintenance. Ensure the fixture is properly grounded.
- All electrical connections must be in accordance with local codes, ordinances, or the National Electric Code (NEC). Consult a qualified electrician if you are unfamiliar with proper electrical wiring connections.
- Use only the specified bulb type and wattage to prevent overheating and potential fire hazards.
- Do not install this fixture in wet or damp locations. This fixture is rated for dry locations only.
- This product is ETL listed, indicating it has met minimum requirements of widely accepted product safety standards.
- California Proposition 65 Warning: This product may contain chemicals known to the State of California to cause cancer, birth defects, or other reproductive harm.
Package Contents
Verify that all components are present before discarding packaging materials. If any parts are missing or damaged, do not attempt to assemble or install the fixture.
- Chandelier Fixture (A)
- Mounting Hardware Kit (B) - Includes mounting strap, screws, wire nuts, and ground screw.
- Adjustable Chain (C)
Note: Nine 60-watt max candelabra (E-12) base bulbs are required and sold separately.

Image: A clear, front-facing view of the Wintonburg 9-Light Chandelier, highlighting its aged bronze finish and the arrangement of its nine candlestick light bases.
Setup and Installation
- Turn Off Power: Before starting installation, ensure the power to the junction box is turned OFF at the circuit breaker or fuse box.
- Prepare Mounting: Attach the mounting strap (part of Kit B) to the outlet box using the provided screws. Ensure the strap is securely fastened.
- Adjust Chain Length: Determine the desired hanging height for your chandelier. Use pliers to open and remove chain links as needed to achieve the correct length. The fixture is designed for adjustable height.
- Wiring Connections:
- Connect the bare copper or green ground wire from the fixture to the ground wire from the outlet box using a wire nut.
- Connect the white wire from the fixture to the white (neutral) wire from the outlet box using a wire nut.
- Connect the black wire from the fixture to the black (hot) wire from the outlet box using a wire nut.
- Carefully tuck all wires into the outlet box.
- Mount Fixture: Secure the canopy (part of the fixture) to the mounting strap, ensuring all wires are safely enclosed. The fixture is designed to be installed as an up-light only.
- Install Bulbs: Screw nine 60-watt maximum candelabra (E-12) base bulbs into the sockets. B10 shape bulbs are recommended. Do not exceed the maximum wattage.
- Restore Power: Once installation is complete and all connections are secure, restore power at the circuit breaker.
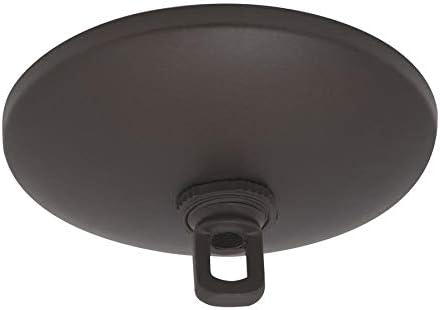
Image: A close-up view of the aged bronze ceiling canopy and mounting hardware, illustrating the component that attaches the chandelier to the ceiling junction box.
Operating Instructions
The Wintonburg Chandelier is operated by a standard wall switch connected to the fixture's electrical circuit.
- Turning On/Off: Use the wall switch to control the power to the chandelier.
- Dimmable Feature: This fixture is dimmable. To utilize the dimming function, ensure you have a compatible dimmer switch installed and are using dimmable candelabra (E-12) base bulbs.
Maintenance
Regular maintenance will help preserve the appearance and functionality of your chandelier.
- Cleaning: To clean the fixture, turn off the power and wipe with a soft, dry cloth. Do not use abrasive cleaners, solvents, or polishes as they may damage the finish.
- Bulb Replacement: Before replacing bulbs, turn off the power to the fixture and allow bulbs to cool completely. Carefully unscrew the old bulb and replace it with a new 60-watt max candelabra (E-12) base bulb.

Image: A detailed close-up of the chandelier's faux candlestick lights, showing the E-12 base sockets where bulbs are installed.
Troubleshooting
If you experience issues with your chandelier, refer to the following common problems and solutions:
| Problem | Possible Cause | Solution |
|---|---|---|
| Light does not turn on. | No power to the fixture. Loose wiring connection. Faulty bulb. | Check circuit breaker or fuse. Ensure all wire connections are secure. Replace bulb. |
| Light flickers. | Loose bulb. Incompatible dimmer switch or non-dimmable bulbs. Loose wiring connection. | Tighten bulb. Ensure dimmer switch is compatible and bulbs are dimmable. Check wiring connections. |
Specifications
| Brand: | allen + roth |
| Model Number: | B10091 |
| Dimensions (L x W x H): | 27.95" x 27.95" x 26.02" |
| Item Weight: | 15.47 pounds |
| Material: | Bronze, Glass |
| Finish: | Aged Bronze |
| Number of Light Sources: | 9 |
| Bulb Type: | Candelabra (E-12) base |
| Recommended Bulb Shape: | B10 |
| Max Wattage per Bulb: | 60 watts |
| Power Source: | Corded Electric |
| Special Features: | Dimmable, Adjustable Height |
| Mounting Type: | Ceiling Mount, Up-light only |
| Safety Listing: | ETL Listed |
| UPC: | 811874020915 |
Warranty and Support
For warranty information, please refer to the documentation provided at the time of purchase or contact the retailer where the product was acquired. Specific warranty terms and conditions may vary.
For technical support or assistance with parts, please contact the manufacturer, allen + roth, or your retailer. Have your model number (B10091) and proof of purchase ready when contacting support.
