1. Introduction
This manual provides detailed instructions for the installation, operation, and maintenance of your LEDVANCE Sylvania 74246 1x4 ft. Integrated LED Edge-Lit Panel Light with Emergency Battery Backup. Please read this manual thoroughly before installation and retain it for future reference. This product is designed for indoor use and provides efficient, cool white illumination with an integrated emergency power source.
2. Safety Information
Observe the following safety precautions to prevent injury or damage to the product:
- Electrical Safety: Always disconnect power at the circuit breaker before installation, maintenance, or servicing. Ensure all wiring complies with national and local electrical codes.
- Qualified Personnel: Installation and servicing should only be performed by a qualified electrician.
- Handling: Handle the LED panel with care to avoid damage to the light source or frame.
- Environment: This product is designed for indoor use only. Do not expose to moisture or extreme temperatures.
- Emergency Battery: The emergency battery backup system requires periodic testing to ensure proper function. Refer to the operation section for testing procedures.
- Voltage: Ensure the supply voltage matches the product's specified voltage (277 Volts).
3. Package Contents
Verify that all components are present before beginning installation:
- 1x LEDVANCE Sylvania 1x4 ft. Integrated LED Edge-Lit Panel Light with Emergency Battery Backup
- Installation Guide (this manual)
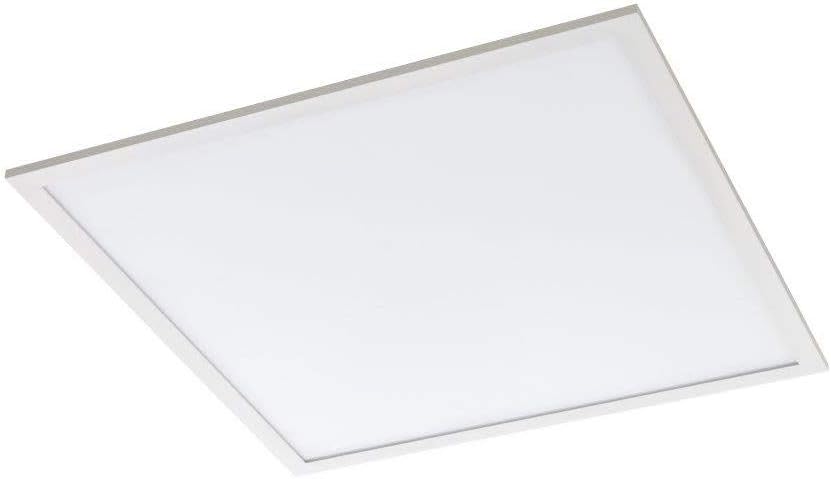
Figure 1: LEDVANCE Sylvania 1x4 ft. Integrated LED Edge-Lit Panel Light. A top-down view of the LEDVANCE Sylvania 1x4 ft. Integrated LED Edge-Lit Panel Light. The panel is white with a thin silver-colored frame, designed for ceiling installation.
4. Specifications
| Feature | Detail |
|---|---|
| Brand | LEDVANCE Sylvania |
| Model Number | 74246 |
| Dimensions | 1 ft. x 4 ft. |
| Wattage | 32 Watts |
| Brightness | 3300 Lumens |
| Color Temperature (CCT) | 4000 Kelvin (Cool White) |
| Voltage | 277 Volts |
| Light Source Type | Integrated LED |
| Material | Aluminum |
| Installation Type | Surface Mount (also suitable for recessed T-grid ceilings) |
| Emergency Backup | Integrated Battery Backup |
| Indoor/Outdoor Usage | Indoor Only |
| Efficiency | 103.125 lumens per watt |
| Item Weight | 5.99 pounds |
5. Installation Instructions
Important: Installation must be performed by a qualified electrician and in accordance with all applicable electrical codes.
5.1 Pre-Installation Checklist
- Ensure power is OFF at the circuit breaker.
- Verify the supply voltage is 277V.
- Confirm all package contents are present and undamaged.
- Gather necessary tools (e.g., screwdriver, wire strippers, drill, mounting hardware if not included for specific mounting type).
5.2 Mounting Options
This panel light supports surface mount installation. For recessed T-grid ceiling installations, additional clips (not included) may be required.
5.3 Wiring Instructions
- Disconnect Power: Turn off power at the main circuit breaker.
- Access Wiring Compartment: Locate and open the wiring compartment on the back of the LED panel.
- Connect Wires:
- Connect the black wire from the fixture to the live (hot) wire from the power supply.
- Connect the white wire from the fixture to the neutral wire from the power supply.
- Connect the green or bare copper wire from the fixture to the ground wire from the power supply.
- For the emergency battery backup, ensure the dedicated unswitched AC power line is connected as per local codes to allow continuous charging.
- Secure Connections: Use appropriate wire connectors (e.g., wire nuts) to secure all connections.
- Close Compartment: Carefully tuck all wires into the wiring compartment and close the cover securely.
5.4 Mounting the Panel
- Positioning: Carefully position the LED panel in the desired location.
- Secure Mounting: For surface mount, use appropriate screws and anchors (not included) to secure the panel directly to the ceiling or wall structure. Ensure the mounting is robust enough to support the panel's weight (approx. 5.99 lbs).
- Final Check: Double-check all connections and mounting security.
6. Operation
6.1 Normal Operation
- Power On: Once installation is complete and verified, restore power at the circuit breaker.
- Switch On: Operate the light using the wall switch connected to the fixture. The panel will illuminate with 4000K cool white light.
6.2 Emergency Battery Backup Function
The integrated emergency battery backup provides illumination during power outages.
- Upon loss of normal AC power, the panel will automatically switch to battery power, providing reduced lumen output for a specified duration (typically 90 minutes).
- The battery charges automatically when AC power is present.
6.3 Testing the Emergency Function
Regular testing is crucial to ensure the emergency battery backup is functioning correctly.
- Monthly Test (30 seconds): Press and hold the test button (if present, typically a small button on the side of the fixture or driver housing) for 30 seconds. The light should switch to emergency mode. Release the button; the light should return to normal operation.
- Annual Test (90 minutes): Once a year, perform a full discharge test. Turn off the AC power to the fixture for 90 minutes. The light should remain illuminated in emergency mode for the entire duration. Restore AC power after the test.
- Indicator Light: A small LED indicator light (if present) typically shows the battery status: green for charged, red for charging or fault. Consult the specific driver instructions for detailed indicator meanings.
7. Maintenance
The LEDVANCE Sylvania LED panel light requires minimal maintenance.
- Cleaning: Ensure power is off before cleaning. Wipe the surface of the panel with a soft, damp cloth. Do not use abrasive cleaners or solvents, as these can damage the finish or optical components.
- Inspection: Periodically inspect the fixture for any signs of damage, loose wiring, or wear.
- LEDs: The integrated LEDs are designed for long life and are not user-replaceable.
- Battery Replacement: The emergency battery has a finite lifespan. If the unit fails the annual 90-minute test, the battery may need replacement. Contact qualified service personnel for battery replacement.
8. Troubleshooting
Before attempting any troubleshooting, ensure power is disconnected at the circuit breaker.
| Problem | Possible Cause | Solution |
|---|---|---|
| Light does not turn on (normal operation) |
|
|
| Light does not turn on during power outage (emergency mode) |
|
|
| Light flickers or dims inconsistently |
|
|
9. Warranty and Support
Warranty Information: For warranty details, please refer to the documentation included with your product or visit the official LEDVANCE Sylvania website. The product is typically covered by a manufacturer's warranty against defects in materials and workmanship.
Customer Support: For technical assistance, troubleshooting, or warranty claims, please contact LEDVANCE Sylvania customer service:
- Phone (US & Canadian Customers): 1-800-LIGHTBULB (1-800-544-4828)
- Website: www.ledvanceus.com (or relevant regional website)
Please have your model number (74246) and purchase date available when contacting support.


