
FREESEA FS28-50W
FREESEA FS28-50W Aquarium Heater User Manual
Model: FS28-50W | Brand: FREESEA
Introduction
Thank you for choosing the FREESEA FS28-50W Aquarium Heater. This submersible heater is designed to maintain a stable temperature in your aquarium, suitable for 1-10 gallon freshwater, saltwater, betta, and turtle tanks. Please read this manual thoroughly before installation and operation to ensure safe and optimal performance.
Important Safety Instructions
- Always ensure the heater is 100% fully submerged in water during operation. Operating the heater out of water will cause damage and poses a safety risk.
- Unplug the heater from the power outlet before performing any maintenance, cleaning, or water changes in the aquarium.
- Do not operate the heater if the power cord or plug is damaged.
- This appliance is intended for indoor use only.
- Keep out of reach of children.
- Ensure the voltage specified on the heater matches your local power supply.
- Avoid placing the heater directly on the substrate if it can be buried, as this may impede heat dissipation.
- Do not attempt to repair the heater yourself. Refer all servicing to qualified personnel.
Product Overview
The FREESEA FS28-50W Aquarium Heater features an external temperature controller for easy adjustment and a digital LED display for real-time temperature monitoring. It includes multiple safety features to protect your aquatic environment.
Key Features:
- 50W Power: Suitable for 1-10 gallon aquariums.
- External Temperature Controller: Easy and precise temperature adjustment from 63℉ to 94℉ (17℃ to 34℃).
- Digital LED Display: Shows current water temperature and error codes.
- Double Safety Protection: Automatic shut-off when out of water (E1 error) and overheating protection above 94℉ (E2 error).
- Memory Function: Retains set temperature after power interruption.
- Fully Submersible Design: Can be placed vertically or horizontally.

Figure 1: FREESEA FS28-50W Aquarium Heater. This image displays the main unit of the heater with its digital temperature display, connected to the power cord and external controller. A betta fish is shown in the background, indicating its intended use.
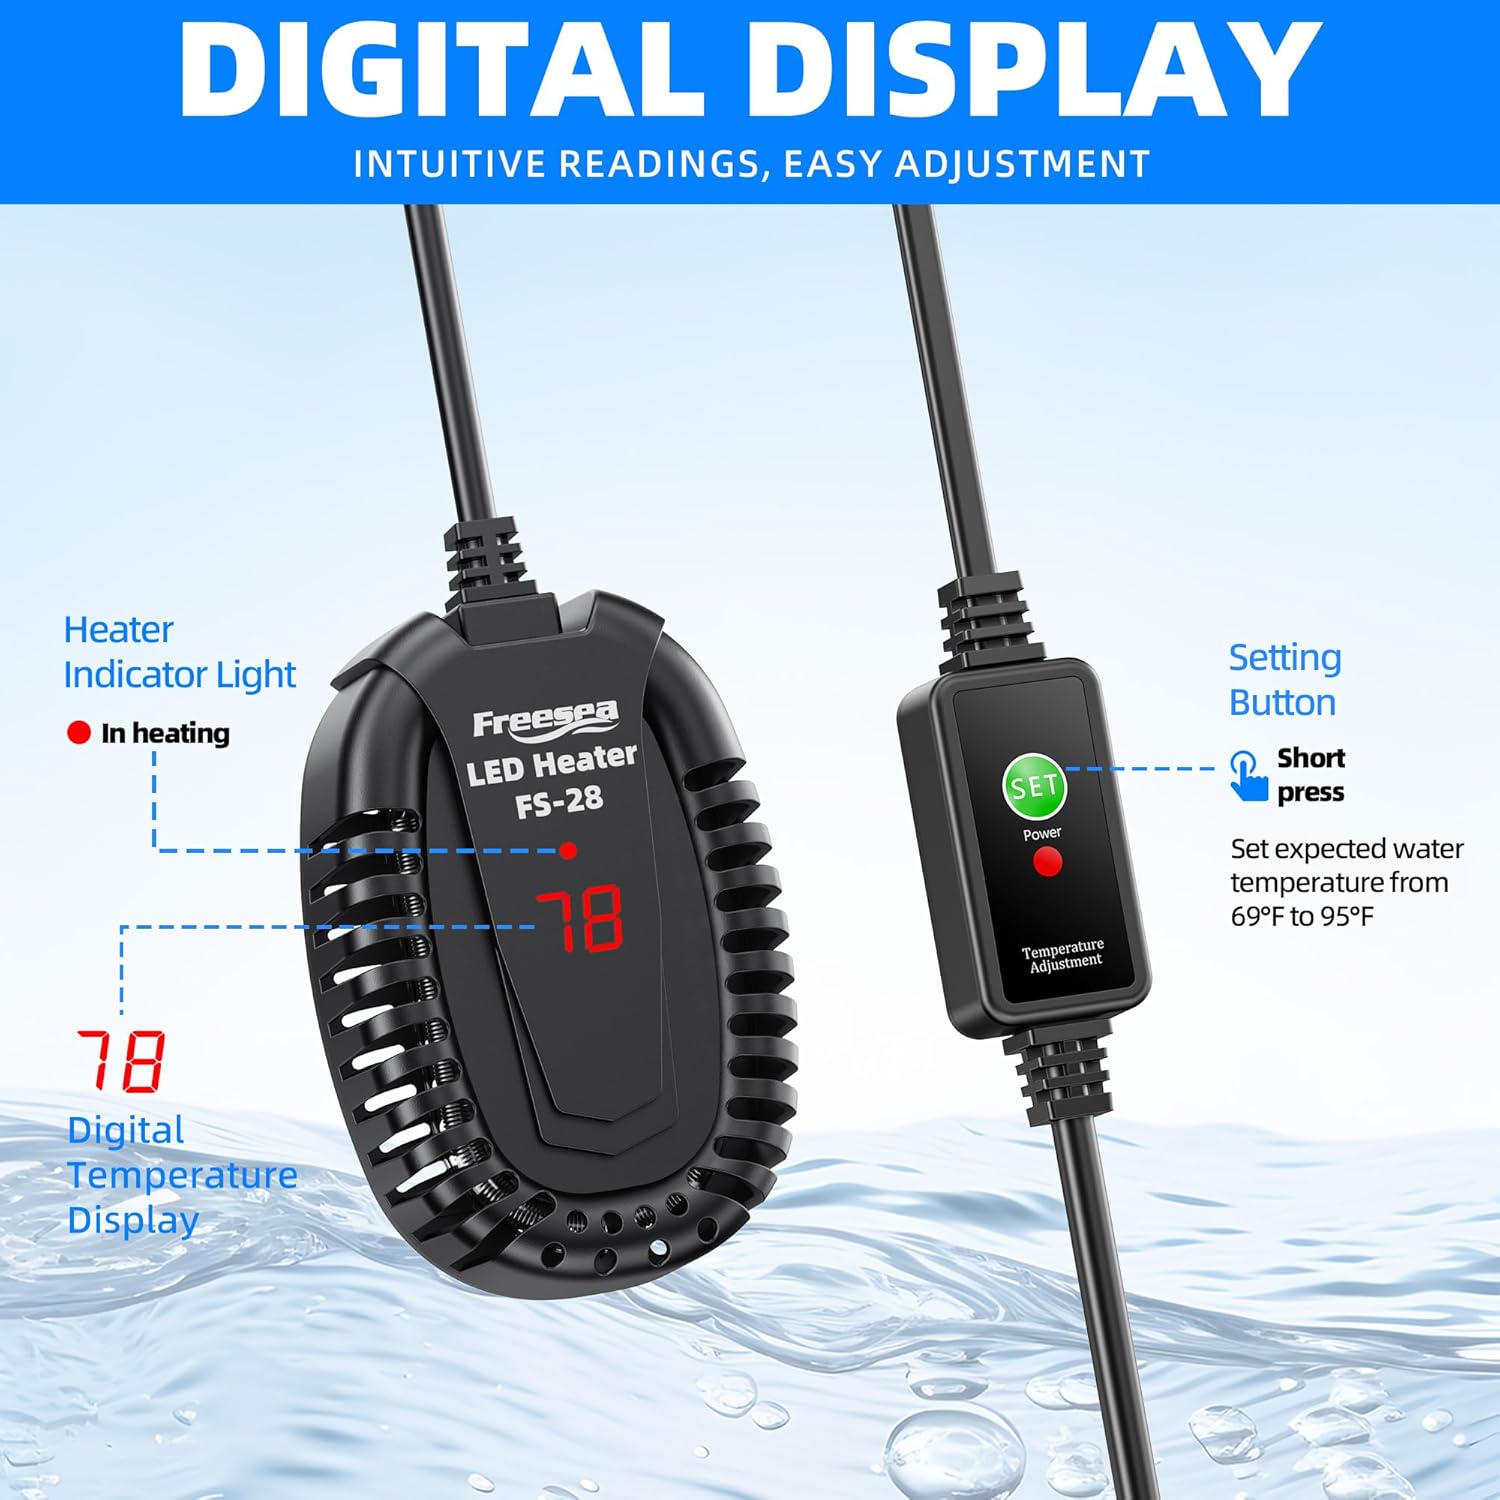
Figure 2: Digital Display and External Controller. This image highlights the LED digital temperature display on the heater unit and the external controller with its 'SET' button and power indicator light. It shows how to adjust the temperature.

Figure 3: Double Safety Protection. This image illustrates the auto power-off feature (E1 error when out of water) and overheating protection (E2 error when temperature exceeds 95℉), showing the internal components and safety mechanisms.
Specifications
| Feature | Detail |
|---|---|
| Model Number | FS28-50W |
| Power | 50 Watts |
| Voltage | 110-120V |
| Frequency | 60Hz |
| Temperature Range | 63℉ - 94℉ (17℃ - 34℃) |
| Recommended Tank Size | 1-10 Gallons |
| Heater Dimensions (approx.) | 4.7 x 2.6 x 1.4 inches |
| Power Cord Length | 5 feet (approx. 6.5 feet total length including controller) |
| Material | Glass (heating element), Plastic (housing) |
| Item Weight | 8.1 ounces |
Setup Instructions
- Unpack: Carefully remove the heater and all accessories from the packaging. Inspect for any damage.
- Placement:
- Attach the heater to the inside wall of your aquarium using the provided suction cups.
- Ensure the heater is positioned in an area with good water circulation for even heat distribution.
- The heater can be installed vertically or horizontally. If installing horizontally, ensure it is not buried in the substrate.
- The heater must be completely submerged in water at all times. Do not allow any part of the heater to be exposed to air during operation.
- Controller Placement: Mount the external temperature controller on the outside edge of the tank or in a convenient location where it is easily accessible and dry.
- Wait for Temperature Equalization: After placing the heater in the tank, wait approximately 15-20 minutes for the heater's temperature sensor to equalize with the water temperature before plugging it in.
- Power Connection: Plug the heater into a suitable power outlet (110-120V, 60Hz). Ensure a drip loop is formed with the power cord to prevent water from running down the cord to the outlet.

Figure 4: Installation Methods. This diagram illustrates correct (fully submerged, vertical or horizontal) and incorrect (partially submerged, controller in water) installation positions for the heater.
Operating Instructions
- Power On: Once plugged in, the LED display on the heater will show the current water temperature. The indicator light on the external controller will illuminate.
- Set Temperature:
- Press the 'SET' button on the external controller. The displayed temperature will flash.
- Each press of the 'SET' button will cycle through the available temperature settings from 63℉ to 94℉ (17℃ to 34℃).
- Stop pressing when your desired temperature is displayed. The heater will automatically save the setting after a few seconds of inactivity and return to displaying the current water temperature.
- Heating Indicator: When the heater is actively heating, a red indicator light above the digital display on the heater unit will be illuminated.
- Temperature Stability: The heater will work to maintain the set temperature. Allow several hours for the aquarium water to reach the desired temperature, especially after initial setup or large water changes.
- Memory Function: In case of a power outage, the heater will remember your last set temperature and resume heating to that setting once power is restored.
Maintenance
- Disconnect Power: Always unplug the heater from the power outlet before performing any maintenance or cleaning.
- Cleaning: Periodically clean the heater's surface to remove algae or mineral deposits. Use a soft cloth or sponge and aquarium-safe cleaning tools. Do not use harsh chemicals or abrasive materials.
- Inspection: Regularly inspect the heater for any signs of damage, such as cracks in the glass or frayed power cords. If damage is found, discontinue use immediately and replace the unit.
- Suction Cups: Check the suction cups periodically to ensure they are securely holding the heater in place. If they lose their grip, clean them and the tank surface, or replace them if necessary.
Troubleshooting
| Problem | Possible Cause | Solution |
|---|---|---|
| Heater not turning on / No display | No power, faulty outlet, damaged cord. | Check power connection. Test outlet with another device. Inspect power cord for damage. |
| Display shows "E1" | Heater is not fully submerged in water. | Ensure the heater is completely underwater. If water level is low, add water to the tank. |
| Display shows "E2" | Overheating protection activated (water temperature above 94℉ / 34℃). | Check actual water temperature with a separate thermometer. If too high, unplug the heater and allow water to cool. Ensure proper water circulation around the heater. |
| Water temperature fluctuates significantly | Poor water circulation, heater too small for tank, external factors (room temperature). | Ensure good water flow around the heater. Verify heater wattage is appropriate for tank size. Minimize external temperature fluctuations. |
| Heater not reaching set temperature | Heater wattage insufficient for tank size/temperature difference, faulty unit. | Confirm heater wattage is suitable for your tank (50W for 1-10 gallons). Allow sufficient time for heating. If problem persists, contact customer support. |
Warranty and Customer Support
FREESEA is committed to providing high-quality products and excellent customer service. If you encounter any issues with your FREESEA FS28-50W Aquarium Heater or have questions regarding its operation, please do not hesitate to contact our professional after-sales service team.
For warranty details and support, please refer to the contact information provided with your purchase or visit the official FREESEA website. Our team is available to assist you with any concerns.
Ask a question about this manual
Ask about setup, troubleshooting, compatibility, parts, safety, or missing instructions. Manuals+ will review the question and use this page’s manual context to help answer it.