
Propel Zipp Nano 2.0
Propel Zipp Nano 2.0 Drone User Manual
Model: Zipp Nano 2.0
Brand: Propel
1. Introduction
This manual provides essential information for the safe and effective operation of your Propel Zipp Nano 2.0 Drone. Please read this manual thoroughly before operating the drone to ensure proper usage and to prevent damage or injury.
The Propel Zipp Nano 2.0 is a high-performance 2.4 GHz indoor/outdoor drone designed for stable flight and exciting aerial maneuvers. It features a built-in 6-axis gyroscopic chip for stability, multiple speed settings, and the ability to perform 360-degree stunt rolls.
2. Safety Precautions
Always prioritize safety when operating the drone. Failure to follow these guidelines may result in injury or damage to the drone or property.
- Do not operate the drone near people, animals, or obstacles.
- Keep hands, hair, and loose clothing away from rotating propellers.
- Ensure the drone is fully charged before each flight.
- Do not fly in strong winds or adverse weather conditions.
- Supervise children during operation. This product contains small parts and is not suitable for children under 3 years due to choking hazard.
- Do not attempt to modify or repair the drone yourself. Contact customer support for assistance.

Image: Back of the product packaging, highlighting features and a warning about small parts.
3. Package Contents
Verify that all items are present in your package:
- Propel Zipp Nano 2.0 Drone (Red)
- 2.4 GHz Digital Remote Control
- USB Charging Cable
- Spare Replacement Parts (Propellers)

Image: The Propel Zipp Nano 2.0 Drone and its remote control visible within the clear retail packaging.
4. Setup
4.1 Charging the Drone Battery
The drone is powered by an internal rechargeable battery. Use the provided USB charging cable to charge the drone.
- Connect the small end of the USB charging cable to the drone's charging port.
- Connect the large end of the USB charging cable to a USB power source (e.g., computer USB port, USB wall adapter).
- The charging indicator light on the USB cable will illuminate during charging and turn off when fully charged.
- Charging typically takes approximately 30-45 minutes. Do not overcharge.
4.2 Installing Remote Control Batteries
The remote control requires 2 "AAA" batteries (not included).
- Locate the battery compartment on the back of the remote control.
- Open the battery compartment cover.
- Insert 2 "AAA" batteries, ensuring correct polarity (+/-).
- Close the battery compartment cover securely.

Image: The remote control for the Propel Zipp Nano 2.0 Drone, showing its various buttons and joysticks.
4.3 Pairing the Drone and Remote Control
To establish a connection between the drone and the remote control:
- Place the drone on a flat, level surface.
- Turn on the drone by sliding the power switch. The drone's LED lights will flash.
- Turn on the remote control.
- Push the left joystick (throttle) all the way up, then pull it all the way down.
- The drone's LED lights will turn solid, indicating successful pairing.
5. Operating the Drone
5.1 Flight Controls
Familiarize yourself with the remote control layout and functions:
- Left Joystick (Throttle/Yaw):
- Push up to increase altitude (throttle).
- Push down to decrease altitude.
- Push left/right to rotate the drone (yaw).
- Right Joystick (Pitch/Roll):
- Push up/down to move forward/backward (pitch).
- Push left/right to move left/right (roll).
- Speed Button: Cycles through 3 different speed settings (slow, medium, high).
- Stunt Button: Press to initiate 360-degree stunt rolls (see 5.4).
- T-Mode Button: Activates T-Mode for beginner pilots, providing more stable and controlled flight.
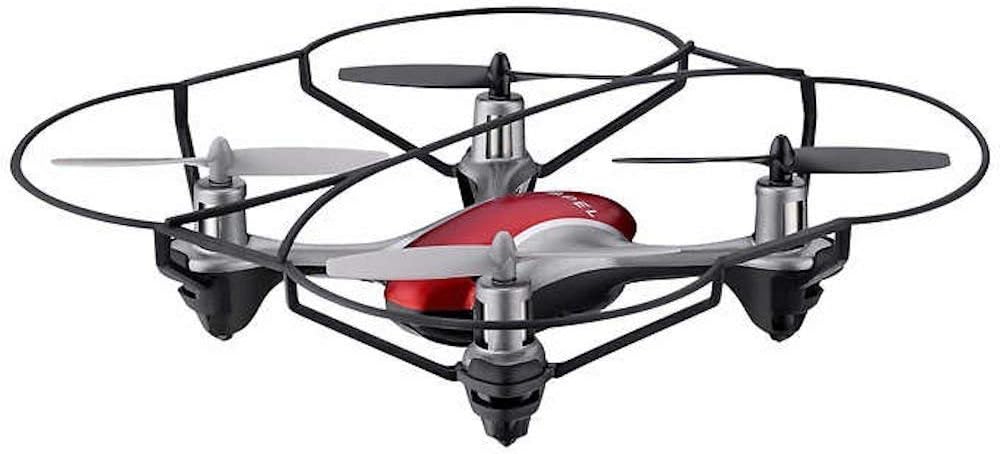
Image: The Propel Zipp Nano 2.0 Drone, showcasing its compact design and propeller guards.
5.2 Take-off and Landing
- Take-off: After pairing, slowly push the left joystick (throttle) up to lift off.
- Landing: Slowly pull the left joystick (throttle) down until the drone lands gently.
5.3 Altitude Hold
The Zipp Nano 2.0 features an air pressure sensor that helps lock altitude in mid-air, making it easier to control and hover stably.
5.4 360-Degree Stunt Rolls
To perform a stunt roll:
- Ensure the drone is flying at a sufficient height (at least 6-8 feet).
- Press the dedicated Stunt Button on the remote control.
- Immediately push the right joystick in the desired direction (forward, backward, left, or right) to execute the roll.

Image: An angled view of the Propel Zipp Nano 2.0 Drone, highlighting its sleek design and protective frame.
6. Maintenance
- Cleaning: Use a soft, dry cloth to clean the drone and remote control. Do not use harsh chemicals or water.
- Propeller Replacement: If propellers become damaged, replace them with the provided spare parts. Carefully remove the damaged propeller and snap the new one into place, ensuring correct orientation.
- Storage: When not in use, store the drone and remote control in a cool, dry place away from direct sunlight.
7. Troubleshooting
| Problem | Possible Cause | Solution |
|---|---|---|
| Drone does not respond to remote control. | Not paired, low drone battery, low remote control batteries. | Re-pair the drone and remote. Charge drone battery. Replace remote control batteries. |
| Drone flies erratically or drifts. | Not calibrated on a level surface, damaged propeller, strong wind. | Ensure drone is placed on a flat surface for pairing. Check for damaged propellers and replace if necessary. Fly in calm conditions. |
| Drone does not lift off. | Low drone battery, propellers not spinning correctly. | Charge drone battery fully. Check for obstructions around propellers. |
8. Specifications
| Feature | Detail |
|---|---|
| Brand | Propel |
| Model Name | Propel 2.4 ghz (Zipp Nano 2.0) |
| Connectivity Technology | Radio Frequency (2.4 GHz) |
| Operational Range | Up to 200 feet |
| Gyroscope | Built-in 6-axis gyroscopic chip |
| Speed Settings | 3 (Slow, Medium, High) |
| Special Features | 360-degree stunt rolls, Altitude Hold, T-Mode for beginners |
| Material Type(s) | Plastic, Carbon Fibre |
| Product Dimensions | 13.97 x 3.81 x 13.97 cm |
| Item Weight | 453.59 g (1 Pound) |
| Color | Red |
| Skill Level | Beginner |
9. Warranty and Support
Propel offers unlimited replacement parts for one year from the date of purchase. For warranty claims, technical support, or to order replacement parts, please refer to the contact information provided on the product packaging or the official Propel website.
Keep your purchase receipt as proof of purchase for warranty purposes.
Related documentsZipp Nano 2.0

Ask a question about this manual
Ask about setup, troubleshooting, compatibility, parts, safety, or missing instructions. Manuals+ will review the question and use this page’s manual context to help answer it.