
1. Introduction
This manual provides essential instructions for the safe and effective use of your RYOBI 18-Volt ONE+ Cordless Full Size Glue Gun (Model P305P128). Please read this manual thoroughly before operating the tool and retain it for future reference. This tool is designed for various gluing applications, offering cordless convenience with the RYOBI ONE+ 18-Volt battery system.
2. Important Safety Information
WARNING: Read all safety warnings and instructions. Failure to follow the warnings and instructions may result in electric shock, fire, and/or serious injury.
2.1 General Tool Safety
- Always wear appropriate personal protective equipment, including safety glasses, when operating the glue gun.
- Do not operate power tools in explosive atmospheres, such as in the presence of flammable liquids, gases, or dust.
- Keep children and bystanders away while operating a power tool. Distractions can cause you to lose control.
2.2 Electrical Safety
- Do not expose the glue gun or charger to rain or wet conditions. Water entering a power tool will increase the risk of electric shock.
- Use only the charger specified by the manufacturer for the battery pack. A charger that is suitable for one type of battery pack may create a risk of fire when used with another battery pack.
2.3 Personal Safety
- Stay alert, watch what you are doing, and use common sense when operating a power tool. Do not use a tool while you are tired or under the influence of drugs, alcohol, or medication.
- Avoid accidental starting. Ensure the switch is in the off-position before inserting the battery pack.
- Do not overreach. Keep proper footing and balance at all times. This enables better control of the power tool in unexpected situations.
2.4 Glue Gun Specific Safety
- The nozzle and melted glue become very hot during operation. Avoid contact with skin to prevent burns.
- Do not touch the hot nozzle or melted glue.
- Always place the glue gun on a stable, heat-resistant surface when not in use or during cool-down.
- Use only glue sticks recommended for this type of glue gun.
- Never leave the operating glue gun unattended.
- Ensure adequate ventilation when working with hot glue.

Image: Side view of the RYOBI 18-Volt ONE+ Cordless Full Size Glue Gun, showing the warning label regarding reading the operator's manual and avoiding exposure to rain or moisture.
3. Package Contents
Verify that all items listed below are included in your package. If any parts are missing or damaged, contact customer service.
- RYOBI 18-Volt ONE+ Cordless Full Size Glue Gun (Model P305)
- RYOBI 18-Volt ONE+ Lithium-Ion Battery (1.3Ah)
- RYOBI 18-Volt ONE+ Dual Chemistry IntelliPort Charger
- (3) Glue Sticks
- Operator's Manual (this document)

Image: The complete RYOBI 18-Volt ONE+ Cordless Full Size Glue Gun bundle, showing the glue gun, a lithium-ion battery, a battery charger, and three glue sticks.
4. Setup
4.1 Charging the Battery
- Connect the charger to a standard electrical outlet.
- Slide the RYOBI 18-Volt ONE+ Lithium-Ion Battery into the charger. Ensure it is fully seated.
- The charger's indicator lights will show the charging status. Refer to the charger's specific manual for detailed light patterns.
- Once fully charged, remove the battery from the charger.

Image: The RYOBI 18-Volt ONE+ Dual Chemistry IntelliPort Charger with its power adapter, ready for battery insertion.

Image: A RYOBI 18-Volt ONE+ Lithium-Ion Battery pack, showing its 1.5Ah capacity and charge indicator lights.
4.2 Installing the Battery
- Ensure the glue gun's power switch is in the "OFF" position.
- Align the charged RYOBI 18-Volt ONE+ battery with the battery port on the base of the glue gun.
- Slide the battery into the port until it clicks securely into place.
- To remove, press the release latches on the battery and slide it out.

Image: The underside of the RYOBI 18-Volt ONE+ Cordless Full Size Glue Gun, illustrating the battery insertion slot.
4.3 Loading Glue Sticks
- Insert a full-size glue stick into the opening at the rear of the glue gun.
- Push the glue stick forward until it stops. Do not force it.
- The glue gun is designed to accept standard full-size glue sticks.

Image: The RYOBI 18-Volt ONE+ Cordless Full Size Glue Gun with a glue stick inserted into the rear feed opening.
5. Operating Instructions
5.1 Powering On and Heating Up
- Ensure a charged battery is installed and a glue stick is loaded.
- Flip the power switch to the "ON" position. The LED indicator light will illuminate, signaling that the glue gun is heating.
- Allow approximately 1-2 minutes for the glue gun to reach its operating temperature. The LED light will remain on during heating and operation.
5.2 Applying Glue
- Once heated, gently squeeze the trigger to dispense melted glue from the nozzle.
- Apply glue to the desired surface. Work quickly, as hot glue sets rapidly.
- Release the trigger to stop the flow of glue.
- When finished, place the glue gun on its stand or a heat-resistant surface.

Image: A user applying hot glue with the RYOBI 18-Volt ONE+ Cordless Full Size Glue Gun to secure electronic components on a circuit board.
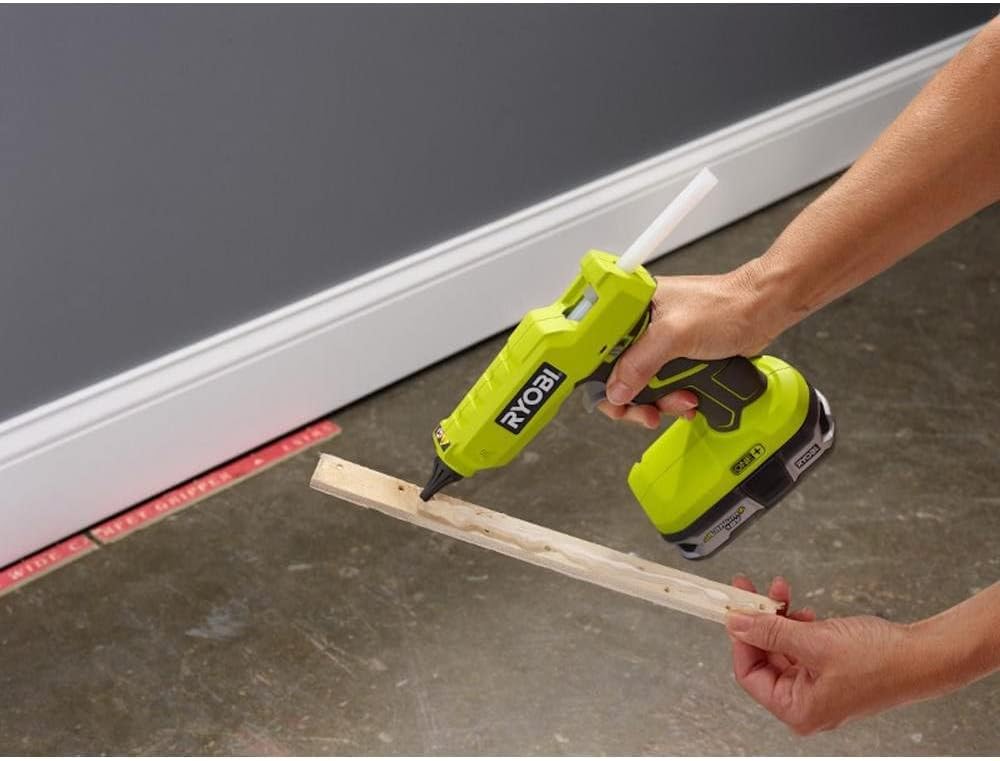
Image: A user applying hot glue with the RYOBI 18-Volt ONE+ Cordless Full Size Glue Gun to a piece of wood trim, demonstrating its use in home improvement tasks.
5.3 Powering Off
- When you are finished using the glue gun, flip the power switch to the "OFF" position. The LED indicator light will turn off.
- Allow the glue gun to cool completely before storing.
- For extended storage, remove the battery pack from the tool.
6. Maintenance
6.1 Cleaning
- Always ensure the glue gun is unplugged (battery removed) and completely cool before cleaning.
- Wipe the exterior of the tool with a clean, damp cloth. Do not use harsh chemicals or abrasive cleaners.
- Do not attempt to clean the nozzle while it is hot.
- Periodically check the glue stick feed mechanism for any obstructions or dried glue.
6.2 Storage
- Store the glue gun in a dry, secure location out of reach of children.
- Ensure the tool is cool before storing.
- Remove the battery pack from the tool before storing for any extended period.
7. Troubleshooting
| Problem | Possible Cause | Solution |
|---|---|---|
| Glue gun does not heat up. | Battery not installed correctly or discharged. Power switch is off. | Ensure battery is fully charged and properly seated. Turn the power switch to "ON". |
| Glue does not dispense. | Not enough heat. Glue stick not fully inserted. Nozzle clogged. | Allow more time for heating (1-2 minutes). Push glue stick further into the feed opening. If clogged, allow to cool, then carefully remove any hardened glue from the nozzle (do not use metal objects). |
| Glue drips excessively. | Normal for some hot glue guns. Glue gun is too hot. | Place on a protective mat. Ensure you are using appropriate glue sticks. |
| Short battery runtime. | Battery not fully charged. Battery is old or damaged. | Ensure battery is fully charged before use. Consider replacing the battery if it consistently has short runtime. |
8. Specifications
- Model: P305P128 (Glue Gun P305, Battery P128)
- Brand: RYOBI
- Power Source: 18-Volt ONE+ Lithium-Ion Battery
- Voltage: 18 Volts
- Wattage: 129.6 watts
- Item Weight: 2.56 Pounds (approximate, with battery)
- Compatible Material: Various (standard full-size glue sticks)
- UPC: 707089601561
- Manufacturer: Ryobi
- Package Dimensions: 12.13 x 7.17 x 3.43 inches
- First Available: August 30, 2017
9. Warranty and Support
RYOBI tools are backed by a manufacturer's warranty. For specific warranty details, registration, or technical support, please refer to the documentation included with your product or visit the official RYOBI website. Keep your purchase receipt as proof of purchase for warranty claims.
For customer service inquiries, please contact RYOBI directly through their official support channels.

