Introduction
This manual provides detailed instructions for the safe and effective use of your AstroAI Digital Tire Pressure Gauge with Inflator, Model ATG250. This device is designed for accurate tire pressure measurement and inflation, featuring a digital display and robust construction. Proper use ensures optimal tire performance and longevity.
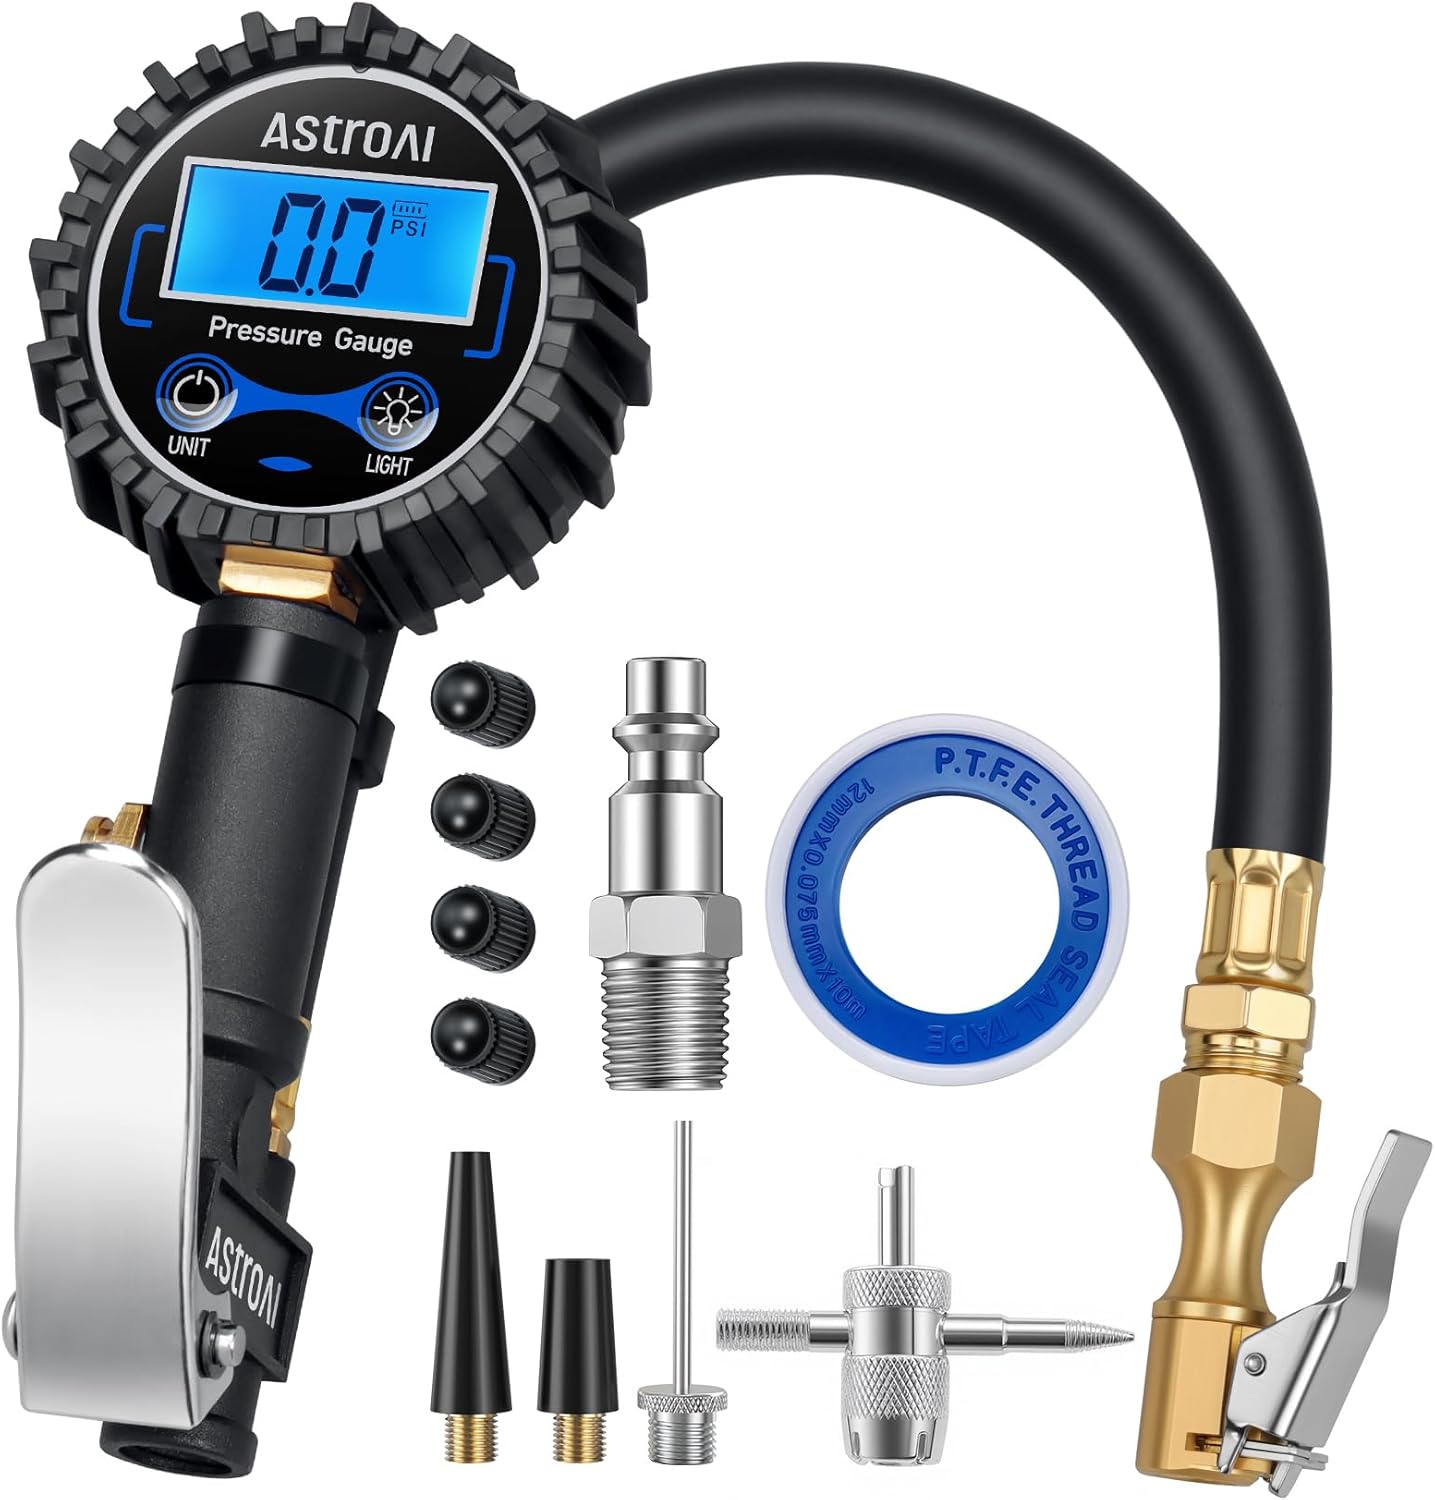
Image: The AstroAI Digital Tire Pressure Gauge with Inflator, showcasing the main unit, hose, and various included accessories.
Product Features
- Advanced Accuracy: Professionally calibrated to return an accurate reading within 1% of the exact tire pressure.
- Multiple Units: Accurately measures in PSI, KPA, Bar, and Kg/cm^2.
- All-in-One Design: Includes an inflator, straight locking chuck, gauge, hose, and bleed valve.
- Wide Compatibility: Ideal for cars, bicycles (with Schrader valve), motorcycles, RVs, and more. Compatible with ¼” NPT air compressors output and ¼" NPT Quick-Connect Fitting.
- Enhanced Safety: Promotes properly inflated tires for better performance, reduced risk of flats/explosions, and improved fuel efficiency.
- Superior Construction: Built with high-quality, heavy-duty stainless steel and brass components for lasting performance.
- Battery Saving: Automatically turns on and off after 20 seconds of inactivity to preserve battery life.
- Air Bleeder Valve: Built-in valve to quickly decrease pressure in overinflated tires.
Setup
1. Battery Installation
The device requires 1 Lithium Metal battery (included). The battery compartment is typically located on the back of the digital display. Ensure correct polarity when inserting the battery.
2. Connecting to an Air Compressor
- Ensure your air compressor is turned off and depressurized.
- Connect the ¼” NPT Quick-Connect Fitting of the inflator to your air compressor's output hose. Ensure a secure connection to prevent air leaks.
3. Attaching the Chuck to the Tire Valve
The inflator features a straight locking chuck. Push the chuck firmly onto the tire's Schrader valve stem until it locks into place. You should hear a slight click or feel it secure. This ensures a tight seal for accurate readings and efficient inflation.

Image: The AstroAI Digital Tire Pressure Gauge with various accessories, including different chucks and adapters, highlighting its versatility.
Operating Instructions
1. Power On/Off and Unit Selection
- The device automatically turns on when connected to a tire valve or when the trigger is pressed.
- Press the 'UNIT' button to cycle through the available measurement units: PSI, KPA, Bar, and Kg/cm^2.
- The device will automatically turn off after 20 seconds of inactivity to conserve battery life.
2. Reading Tire Pressure
Once the chuck is securely attached to the tire valve, the current tire pressure will be displayed on the LED backlit screen. For an accurate reading, ensure the inflator is not actively inflating or deflating.

Image: A close-up of the AstroAI Digital Tire Pressure Gauge displaying an accurate measurement of 36 PSI on a car tire.
3. Inflating Tires
With the inflator connected to both the air compressor and the tire valve, pull the trigger to begin inflating. The digital display will show the pressure in real-time. Release the trigger to stop inflation and view the current static pressure.
4. Deflating Tires
If a tire is overinflated, press the built-in air bleeder valve to release air. The digital display will update as pressure decreases.

Image: Demonstrates the 2-in-1 functions of the inflator, showing how to control inflation by holding the trigger and one-key deflation using the air bleed valve.
5. Backlight Function
Press the 'LIGHT' button to toggle the LED backlight on or off for improved visibility in low-light conditions.
Video: An official demonstration by AstroAI Direct showcasing the features and operation of the Digital Tire Inflator with Pressure Gauge.
Video: A user guide from EnDark demonstrating how to use the tire inflator with a pressure gauge, including inflation and deflation steps.
Maintenance
1. Battery Replacement
When the display dims or becomes unresponsive, it's time to replace the battery. Open the battery compartment, remove the old battery, and insert a new Lithium Metal battery, ensuring correct polarity. Close the compartment securely.
2. Cleaning and Storage
Wipe the device with a soft, dry cloth to remove dirt and debris. Do not use abrasive cleaners or immerse the device in water. Store the inflator in a cool, dry place away from direct sunlight and extreme temperatures.
Troubleshooting
- Inaccurate Readings: Ensure the chuck is securely attached to the valve stem without any air leaks. Check if the device is set to the correct unit of measurement.
- Air Leakage: Verify that all connections (compressor to inflator, inflator to tire valve) are tight. Inspect the chuck and hose for any damage or wear.
- Display Not Working: Check the battery level and replace if necessary. Ensure the battery is inserted with correct polarity.
Specifications
| Feature | Detail |
|---|---|
| Brand | AstroAI |
| Model Number | ATG250 |
| Material | Brass, Stainless Steel |
| Measurement Range | 3-250 PSI (0.2-17.2 Bar; 0.21-1724 Kpa; 0.2-17.5 kg/cm^2) |
| Display Resolution | 0.1 PSI |
| Accuracy | ±1% |
| Power Source | 1 Lithium Metal battery (included) |
| Auto On/Off | Yes (20 seconds inactivity) |
| Product Dimensions | 8.26 x 3.15 x 3.34 inches |
| Item Weight | 8 ounces |
Support
For any questions, concerns, or technical assistance, please contact AstroAI customer service. Our US-based team is dedicated to providing professional 'customer first' service.
Visit the AstroAI Store for more information and product offerings.


