
Introduction
Thank you for choosing the BRILONER 2049-025 2-Spot Ceiling Lamp. This manual provides essential information for the safe installation, operation, and maintenance of your new lighting fixture. Please read these instructions carefully before installation and retain them for future reference.
Safety Instructions
- Electrical Safety: Installation must be performed by a qualified electrician or a competent person in accordance with local electrical codes and regulations. Always disconnect power at the main circuit breaker before installation, maintenance, or bulb replacement.
- Voltage: Ensure the supply voltage matches the lamp's requirements (240V AC).
- Bulb Type: Use only E14 base bulbs with a maximum wattage of 40W per spot. Do not exceed the specified wattage to prevent overheating and potential fire hazards.
- Environment: This lamp is designed for indoor use only. Do not expose it to moisture or extreme temperatures.
- Handling: Handle the lamp with care. Avoid dropping or subjecting it to strong impacts.
Package Contents
Carefully unpack the box and ensure all components are present and undamaged. If any parts are missing or damaged, do not attempt to install the lamp. Contact your retailer for assistance.
- 1 x BRILONER 2-Spot Ceiling Lamp (Model 2049-025)
- Mounting hardware (screws, dowels, terminal block)
- Instruction Manual
Note: Light bulbs are not included and must be purchased separately.
Setup and Installation
Follow these steps for safe and proper installation of your ceiling lamp.
- Prepare for Installation:
- Turn off the main power supply at the circuit breaker to prevent electrical shock.
- Ensure the mounting surface is clean, dry, and structurally sound to support the weight of the lamp.
- Mark Drilling Points:
- Hold the lamp's mounting plate against the ceiling at the desired installation location.
- Mark the positions for drilling holes using a pencil.
- Drill Holes and Insert Dowels:
- Drill holes at the marked positions using an appropriate drill bit for your ceiling material.
- Insert the provided dowels into the drilled holes.
- Connect Wiring:
- Carefully connect the household electrical wires to the lamp's terminal block. Ensure correct polarity: Live (L) to Live, Neutral (N) to Neutral, and Earth (E) to Earth.
- Double-check all connections for security.
- Mount the Lamp:
- Align the lamp's mounting plate with the drilled holes and secure it to the ceiling using the provided screws.
- Ensure the lamp is firmly attached and stable.
- Install Light Bulbs:
- Screw E14 base bulbs (max 40W each) into the lamp sockets. Do not overtighten.
- Restore Power:
- Once installation is complete and all connections are secure, restore power at the main circuit breaker.
- Test the lamp to ensure it functions correctly.
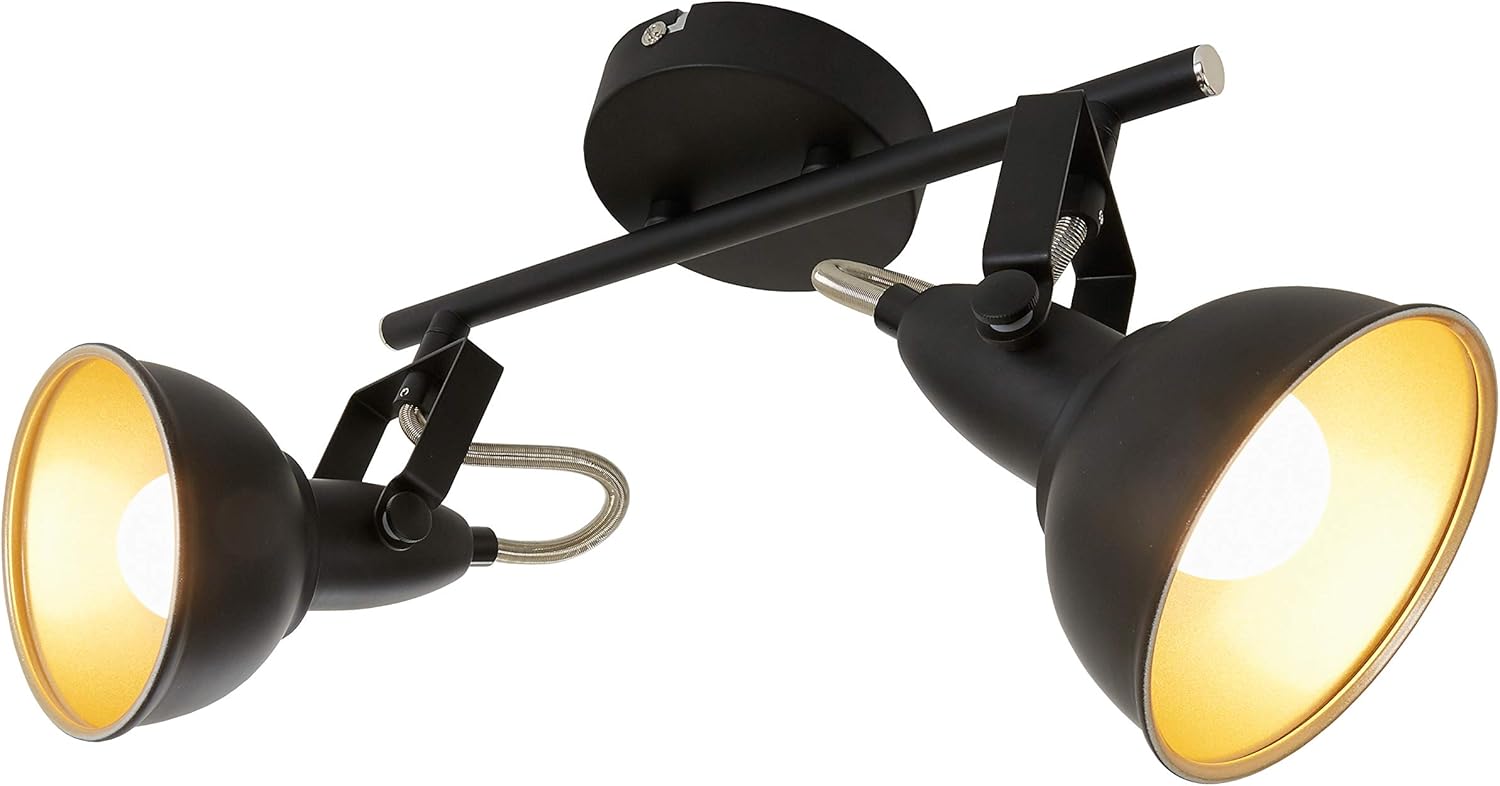
Image 1: BRILONER 2-Spot Ceiling Lamp installed on a ceiling.

Image 2: Technical drawing showing the dimensions (304mm length, 181mm height) of the lamp.
Operating Instructions
The BRILONER 2-Spot Ceiling Lamp features adjustable spotlights, allowing you to direct light where needed.
- Turning On/Off: Operate the lamp using your standard wall switch connected to the fixture.
- Adjusting Spotlights: Each spotlight can be individually adjusted. Gently pivot and rotate the spotlight heads to achieve the desired lighting angle. The spotlights offer 350° horizontal rotation and 90° vertical rotation.
Video 1: Demonstration of spotlight adjustability, showing 350° horizontal and 90° vertical rotation, and E14 bulb compatibility. This video illustrates the adjustable features of similar E14 spot lamps.
Maintenance
Regular maintenance ensures the longevity and optimal performance of your lamp.
- Cleaning: Disconnect power before cleaning. Wipe the lamp with a soft, dry cloth. Do not use abrasive cleaners, solvents, or polishes, as these can damage the finish.
- Bulb Replacement: Always disconnect power before replacing bulbs. Allow old bulbs to cool completely before removal. Replace with new E14 base bulbs, ensuring they do not exceed 40W per spot.
- Inspection: Periodically check the lamp for any signs of damage, loose connections, or wear. If any issues are found, disconnect power and consult a qualified electrician.
Troubleshooting
If you encounter issues with your lamp, refer to the following common problems and solutions:
| Problem | Possible Cause | Solution |
|---|---|---|
| Lamp does not light up |
|
|
| Light flickers |
|
|
| Lamp overheats |
|
|
Specifications
| Brand: | BRILONER |
| Model Number: | 2049-025 |
| Product Dimensions (L x W x H): | 30.4 x 18.1 x 10 cm |
| Material: | Metal |
| Color: | Black (with gold interior) |
| Number of Light Sources: | 2 |
| Bulb Base: | E14 |
| Max Wattage per Bulb: | 40W |
| Voltage: | 240V AC |
| Light Source Type: | LED compatible (bulbs not included) |
| Control Method: | Wall switch (Touch control mentioned in specs refers to a general feature, not specific to this model's operation) |
| Mounting Type: | Ceiling mounting, Semi-flush mounting |
| Indoor/Outdoor Use: | Indoor |
| Special Features: | Adjustable spotlights, Energy-saving (with appropriate bulbs) |
Warranty and Support
Specific warranty information for this product is not provided in this manual. For details regarding warranty coverage, duration, or to obtain technical support, please refer to the documentation included with your purchase or contact your retailer directly. Keep your proof of purchase for any warranty claims.


