
1. Introduction and Overview
The LILLIPUT A7s is a 7-inch field monitor designed for professional filmmakers and photographers. It features a 1920x1200 native resolution IPS display and supports 4K HDMI signal input and loop output. This monitor provides a clear view of images without the need for downsampling or interpolation, making it suitable for Ultra HD applications.
Key features include a high brightness of 500cd/m² and a contrast ratio of 1000:1, ensuring visibility in various lighting conditions. The monitor also includes user-definable function buttons (F1 & F2) for quick access to auxiliary functions such as peaking, underscan, and check field. A control dial allows for easy adjustment of settings like sharpness, saturation, tint, and volume.

Figure 1: LILLIPUT A7s Monitor with Sun Shade
This image shows the LILLIPUT A7s 7-inch monitor from the front, with the sun shade attached. The screen displays the LILLIPUT logo and "4K camera assist" text. A hot shoe mount is visible at the bottom.
2. What's in the Box
Please check the contents of your package to ensure all items are present:
- 1 x LILLIPUT A7S Monitor
- 1 x Foldable Sun Shade
- 1 x Silicon Rubber Case
- 1 x Battery Plate (LP-E6 type)
- 1 x HDMI A/C Cable
- 1 x Hot Shoe Mount
3. Product Features
- Display: 7-inch IPS panel with 1920x1200 native resolution.
- Brightness: 500cd/m² for clear outdoor viewing.
- Contrast Ratio: 1000:1 for detailed image reproduction.
- Viewing Angle: 170°/170° (H/V) for wide visibility.
- Video Input/Output: 4K HDMI 1.4 30Hz input and loop output.
- Audio: Integrated speaker and earphone slot.
- Power: DC 7-24V input, compatible with LP-E6 battery plate.
- Advanced Functions: Peaking, Pixel Zoom, Histogram, Underscan, Check Field, False Color, Exposure Balance, Markers, Center Marker.
- User-Definable Buttons: F1 and F2 for custom shortcuts.
4. Setup Guide
4.1 Attaching the Sun Shade
The foldable sun shade helps reduce glare and improve screen visibility in bright conditions. Align the sun shade with the grooves around the monitor's bezel and gently press to secure it in place.
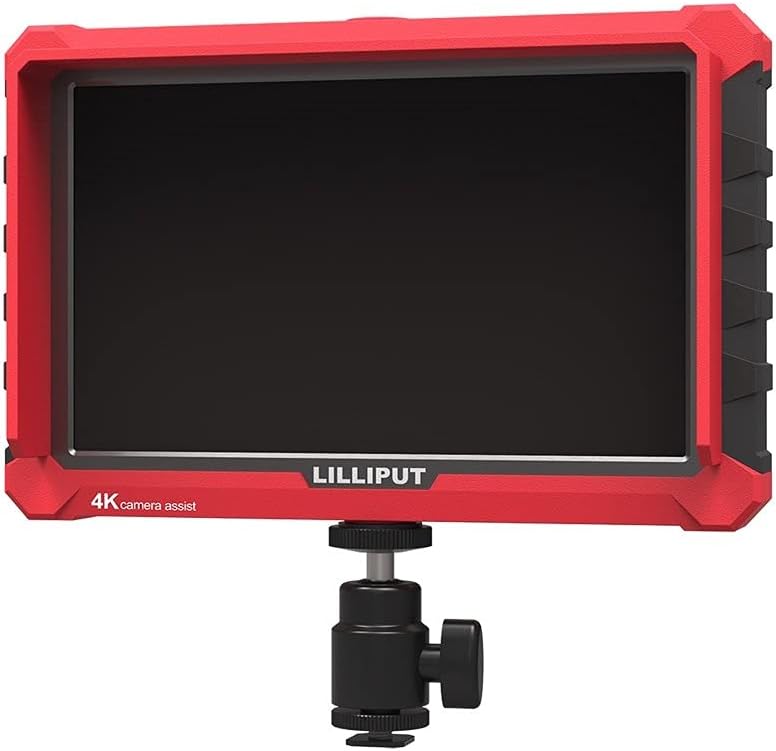
Figure 2: Monitor with Sun Shade Attached
This image shows the LILLIPUT A7s monitor with its foldable sun shade attached, viewed from an angle. The sun shade provides protection from glare.
4.2 Powering the Monitor
The A7s monitor can be powered via a DC input or a compatible battery.
- DC Power: Connect a DC 7-24V power adapter (not included) to the DC input port on the monitor.
- Battery Power: Attach the provided LP-E6 battery plate to the monitor's battery slot. Insert a compatible LP-E6 battery into the plate. Ensure the battery is fully charged before use.
4.3 Connecting Video Sources
Use the supplied HDMI A/C cable to connect your camera or video source to the HDMI input port on the monitor. The monitor also features an HDMI loop output, allowing you to pass the video signal to another display or device.
4.4 Mounting the Monitor
Attach the hot shoe mount to your camera's hot shoe or a compatible rig. Secure the monitor to the hot shoe mount using its 1/4-inch screw thread. Adjust the angle for optimal viewing.
5. Operating Instructions
5.1 Power On/Off
Press and hold the power button (usually located on the side or bottom of the monitor) for a few seconds to turn the monitor on or off.
5.2 Menu Navigation
The monitor features a control dial for menu navigation and setting adjustments. Rotate the dial to browse menu options and press the dial to select an option or confirm a setting. Once in a menu, rotate the dial to change values and press to confirm.
5.3 User-Definable Function Buttons (F1, F2)
The F1 and F2 buttons can be customized to quickly access frequently used auxiliary functions. To assign a function:
- Enter the main menu.
- Navigate to the "Function Key Settings" or similar option.
- Select F1 or F2 and choose the desired function (e.g., Peaking, Underscan, Check Field, False Color).
- Exit the menu. The assigned function can now be activated by pressing the corresponding F button.
5.4 Adjusting Image Settings
Access the "Picture Settings" or "Display Settings" menu to adjust parameters such as:
- Brightness: Controls the overall luminance of the screen.
- Contrast: Adjusts the difference between the brightest and darkest areas.
- Saturation: Modifies the intensity of colors.
- Sharpness: Enhances edge definition.
- Tint: Adjusts the color balance (often for NTSC video).
- Volume: Controls the audio output level from the speaker or earphone jack.
6. Maintenance
6.1 Cleaning the Monitor
- Screen: Use a soft, lint-free cloth specifically designed for electronics screens. For stubborn smudges, lightly dampen the cloth with water or a screen-cleaning solution. Do not spray liquid directly onto the screen.
- Body: Wipe the monitor body with a soft, dry cloth. Avoid using harsh chemicals or abrasive materials.
6.2 Storage
When not in use, store the monitor in a dry, cool environment. The recommended storage temperature range is -30°C to 70°C (-22°F to 158°F). Protect the screen from scratches and impacts. Using the silicon rubber case can provide additional protection.
7. Troubleshooting
- Monitor does not power on:
- Ensure the battery is fully charged and correctly inserted, or the DC power adapter is securely connected and providing the correct voltage (7-24V).
- Verify the power button is pressed and held for the required duration.
- No video signal:
- Check that the HDMI cable is securely connected to both the camera/source and the monitor's HDMI input.
- Confirm the camera/source is outputting a video signal and is set to the correct resolution/format compatible with the monitor (up to 4K 30Hz).
- Try a different HDMI cable to rule out cable issues.
- Monitor power cycles repeatedly:
- This can occur if the power supply unit (PSU) is underrated or insufficient for the monitor's power consumption, especially when an input signal is connected. Ensure your DC power adapter provides adequate amperage (e.g., 1A or higher, as specified).
- If using a battery, ensure it is fully charged and in good condition.
- Image quality issues (e.g., incorrect colors, blurriness):
- Adjust the brightness, contrast, saturation, and sharpness settings in the monitor's menu.
- Ensure the camera's output settings match the monitor's capabilities.
- Perform a factory reset if available in the menu.
8. Specifications
| Feature | Specification |
|---|---|
| Display Screen | 7" IPS |
| Physical Resolution | 1920x1200 |
| Aspect Ratio | 16:10 |
| Brightness | 500cd/m² |
| Contrast | 1000:1 |
| Viewing Angle | 170°/170° (H/V) |
| HDMI Input | 1 (4K 30Hz compatible) |
| HDMI Output | 1 (Loop output) |
| Speaker | 1 |
| Ear Phone Slot | 1 |
| Current | 1A |
| Input Voltage | DC 7-24V |
| Battery Plate | LP-E6 |
| Power Consumption | ≤12W |
| Operating Temperature | -20°C to 60°C (-4°F to 140°F) |
| Storage Temperature | -30°C to 70°C (-22°F to 158°F) |
| Dimensions (LWD) | 182.1 x 124 x 20.5mm (7.17 x 4.88 x 0.81 inches) |
| Weight | 320g (11.3 ounces) |
| ASIN | B074ZJDJ9Q |
| Model Number | A7S |
9. Warranty and Support
For warranty information and technical support, please refer to the official LILLIPUT website or contact your local distributor. Keep your purchase receipt as proof of purchase for any warranty claims.
Manufacturer: LILLIPUT
For further assistance, you may visit the LILLIPUT Store on Amazon.


