
Introduction
This manual provides detailed instructions for the safe and efficient operation of your Dr.meter HT-401 Air Mattress Pump. Please read this manual thoroughly before first use and retain it for future reference.

Figure 1: Dr.meter HT-401 Air Mattress Pump and included accessories.
The Dr.meter HT-401 is a versatile portable electric air pump designed for quick inflation and deflation of various inflatable items. It offers three power options: AC 110V, DC 12V, and battery operation, making it suitable for both indoor and outdoor use. The pump comes with three different nozzle sizes to accommodate most inflatable valves.
Package Contents
Verify that all items listed below are included in your package:
- 1 x Dr.meter Electric Air Pump (HT-401)
- 1 x Car Adapter (DC 12V)
- 1 x DC Adapter (AC 110V)
- 3 x Detachable Nozzles (S: 0.25", M: 0.68", L: 0.84")
- 1 x User Manual
Specifications
| Feature | Detail |
|---|---|
| Model Number | HT-401 |
| Power Source Options | AC 110V, DC 12V, 8 x AA Batteries (not included) |
| Maximum Air Pressure (AC/DC) | 4 kPa (0.58 PSI) |
| Maximum Air Pressure (Battery) | 3 kPa (0.43 PSI) |
| Air Flow Capacity | 200 LPM |
| Product Dimensions | 4.7"L x 3.8"W x 4.7"H |
| Item Weight | 7.8 ounces (220 Grams) |
| Material | Plastic |
| Color | Black |

Figure 2: Key performance metrics of the Dr.meter HT-401 Air Pump.

Figure 3: Physical dimensions of the pump and its various nozzles.
Safety Instructions
- Do not operate the pump continuously for more than 30 minutes to prevent overheating and extend product life. Allow the pump to rest for 5-10 minutes after each use.
- Keep the pump away from water and moisture. Do not immerse the pump in water.
- Do not block the air intake or outlet during operation.
- Keep out of reach of children.
- Ensure the correct voltage is used when connecting to AC power.
- Do not use the pump to inflate high-pressure items such as tires, balloons, or sports balls. This pump is designed for low-pressure, high-volume inflatables.

Figure 4: Examples of suitable and unsuitable items for inflation with this pump.
Setup
Choosing a Power Source:
The Dr.meter HT-401 offers three power options:
- AC 110V/220V (Home Use): For powerful 4kPa performance. Connect the provided AC adapter to a wall outlet.
- DC 12V (Car Use): For on-the-go inflation with 4kPa performance. Connect the provided car adapter to your vehicle's 12V outlet.
- 8 x AA Batteries (Portable Use): For portable 3kPa air pressure. Insert 8 AA batteries (not included) into the battery compartment, ensuring correct polarity.
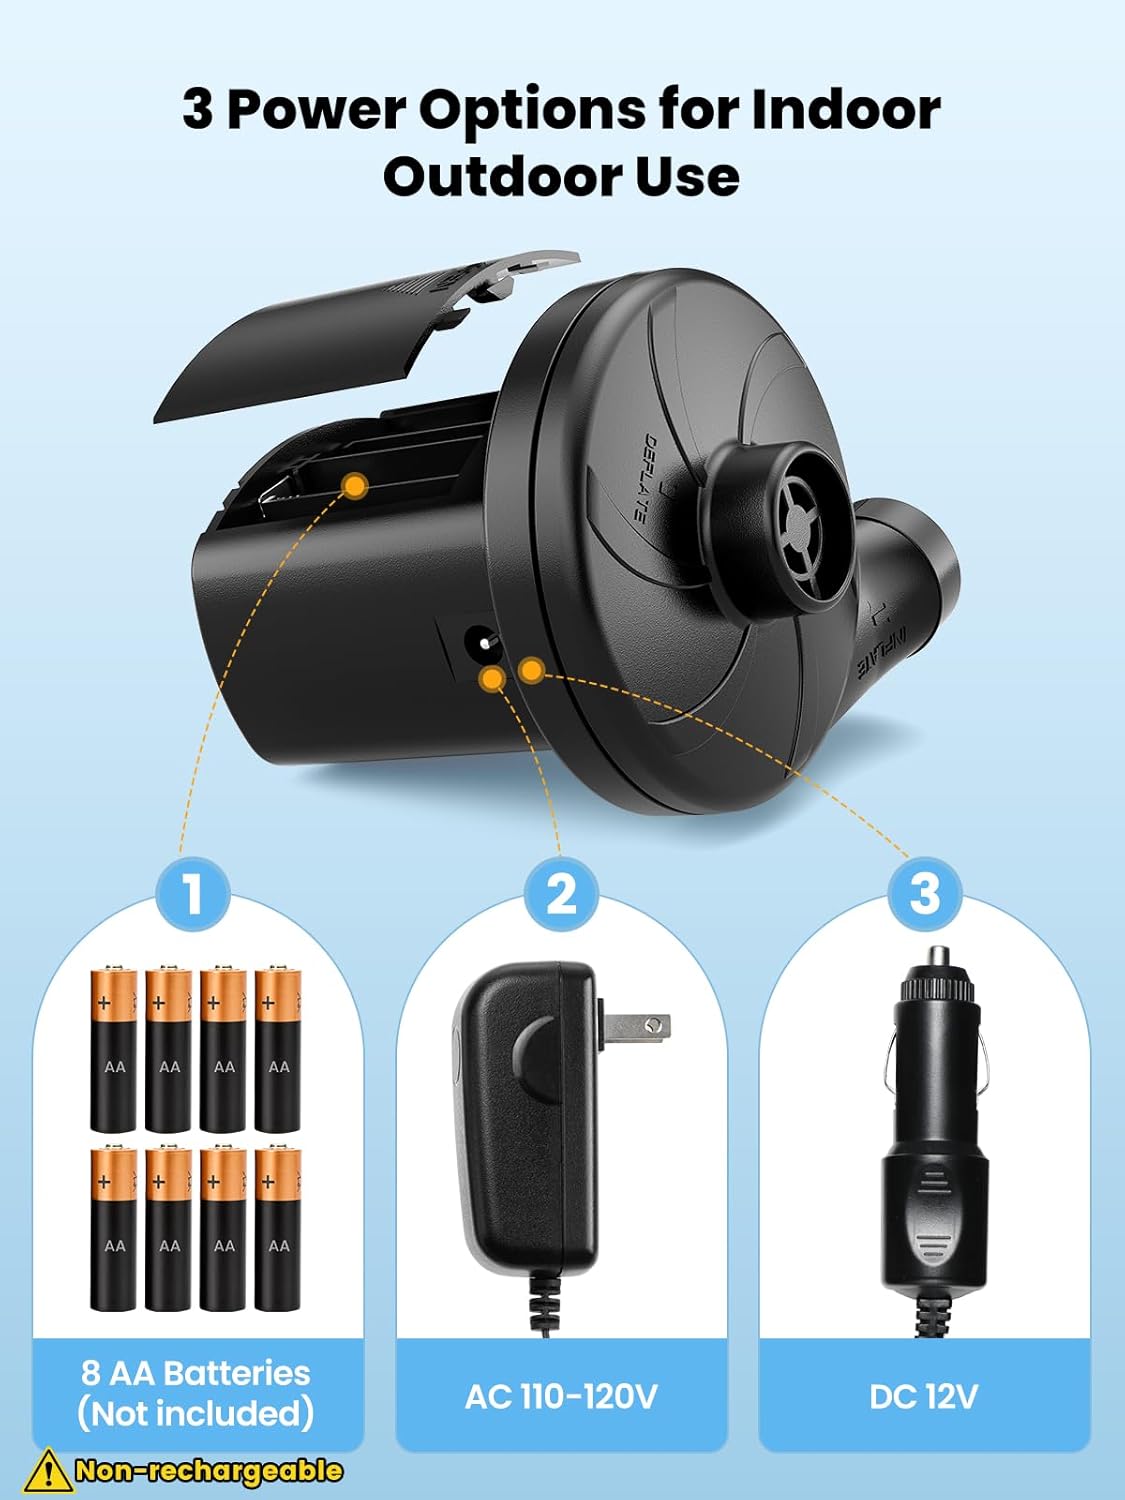
Figure 5: The three available power options for the pump.
Attaching the Correct Nozzle:
Select the appropriate nozzle size for the valve of the item you wish to inflate or deflate. The pump includes three sizes:
- Small Nozzle (0.25"): Ideal for swimming rings and small inflatable toys.
- Medium Nozzle (0.68"): Ideal for snow tubes and inflatable pools.
- Large Nozzle (0.84"): Ideal for large inflatables, airbeds, and rafts.
Firmly insert the chosen nozzle into the inflation or deflation port of the pump.
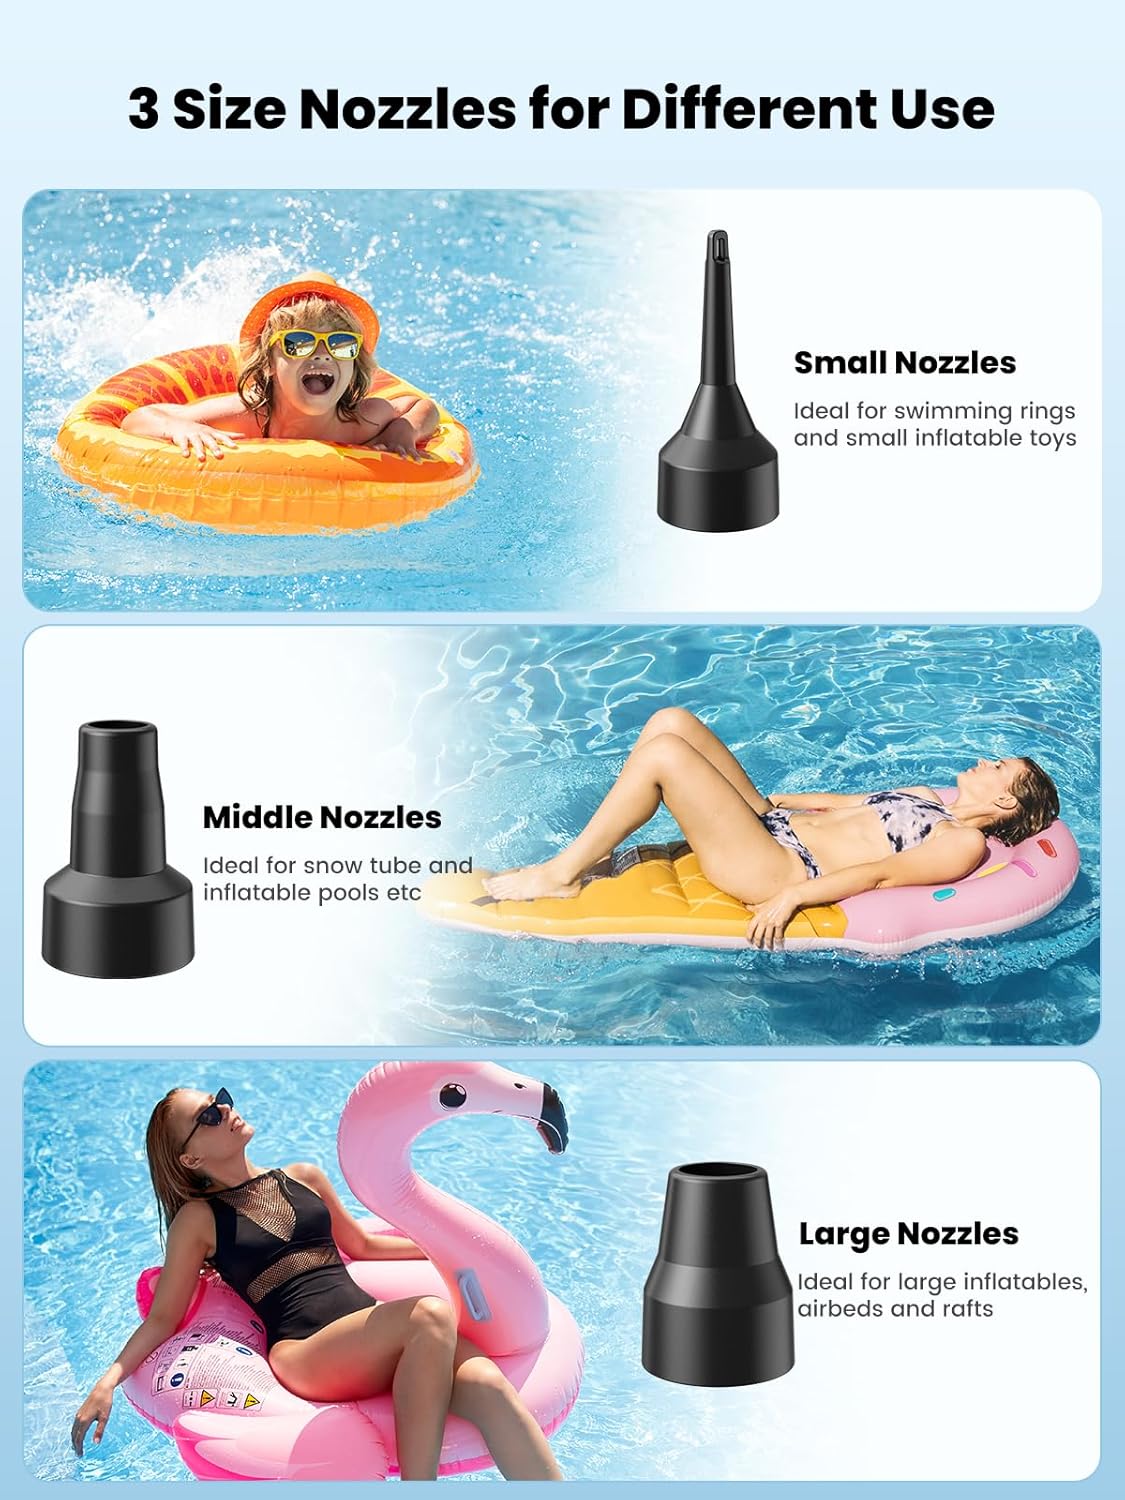
Figure 6: The three versatile nozzles included with the pump.
Operating Instructions
Inflation:
- Ensure the pump is connected to a power source (AC, DC, or batteries).
- Attach the appropriate nozzle to the inflation port (usually marked with an arrow pointing outwards).
- Insert the nozzle firmly into the valve of the item you wish to inflate.
- Press the power switch to turn on the pump.
- Inflate the item to the desired firmness. Do not over-inflate.
- Once inflated, turn off the pump and remove the nozzle. Secure the item's valve.
Deflation:
- Ensure the pump is connected to a power source.
- Attach the appropriate nozzle to the deflation port (usually marked with an arrow pointing inwards).
- Insert the nozzle firmly into the valve of the item you wish to deflate.
- Press the power switch to turn on the pump.
- Allow the pump to extract air until the item is fully deflated.
- Once deflated, turn off the pump and remove the nozzle. Secure the item's valve.

Figure 7: Proper connection for inflation (top) and deflation (bottom).

Figure 8: A visual guide to the quick setup and operation of the pump.
Maintenance
- Cleaning: Wipe the pump exterior with a soft, dry cloth. Do not use abrasive cleaners or immerse in water.
- Storage: Store the pump and its accessories in a cool, dry place away from direct sunlight and extreme temperatures. Ensure the pump is clean and dry before storage.
- Battery Care: If using batteries, remove them if the pump will not be used for an extended period to prevent leakage.
Troubleshooting
| Problem | Possible Cause | Solution |
|---|---|---|
| Pump does not turn on. | No power supply; loose connection; dead batteries. | Check power connection. Ensure batteries are correctly inserted and charged, or replace them. |
| Low air pressure. | Incorrect nozzle size; pump overheating; low battery power. | Ensure nozzle fits snugly. Allow pump to cool down. Replace batteries or switch to AC/DC power. |
| Pump overheats quickly. | Continuous operation for too long. | Turn off the pump and let it cool for 5-10 minutes before resuming use. |
Warranty and Support
Dr.meter products are designed for reliability and performance. For warranty information, technical support, or any inquiries regarding your HT-401 Air Mattress Pump, please refer to the contact information provided on the product packaging or visit the official Dr.meter website.
Please retain your proof of purchase for warranty claims.