
1. Product Overview
The Xilence Performance C A404T is an efficient CPU cooler designed to provide optimal thermal management for AMD processors. This manual provides detailed instructions for installation, operation, and maintenance to ensure proper functionality and longevity of your cooler.
1.1. Package Contents
- Xilence Performance C A404T CPU Cooler (Fan and Heatsink assembly)
- Thermal Paste
- Mounting Screws and Brackets for AMD Sockets

Figure 1.1: All components included with the Xilence Performance C A404T CPU Cooler, including the fan and heatsink assembly, thermal paste, and various mounting hardware.
2. Safety Information
Please read and understand all safety instructions before installing or operating the CPU cooler. Failure to do so may result in personal injury or damage to your system components.
- Always disconnect power from your computer before performing any installation or maintenance.
- Handle the cooler and other components with care to avoid damage.
- Sharp edges may be present on heatsink fins. Exercise caution during handling.
- Thermal paste is non-toxic but avoid contact with skin and eyes. Wash hands thoroughly after application.
- Ensure proper grounding to prevent electrostatic discharge (ESD) damage to sensitive components.
3. Installation Guide
This section details the steps for installing the Xilence Performance C A404T CPU Cooler on compatible AMD motherboards. The cooler supports AMD sockets AM4, AM3, AM2, AM2+, FM2+, FM2, and FM1.
3.1. Preparation
- Power off your computer and disconnect the power cable.
- Open your computer case to access the motherboard and CPU socket.
- If replacing an existing cooler, carefully remove it and clean any old thermal paste from the CPU's integrated heat spreader (IHS) using isopropyl alcohol and a lint-free cloth.
- Ensure the CPU is properly seated in its socket and the retention arm is locked.
3.2. Applying Thermal Paste
Proper application of thermal paste is crucial for efficient heat transfer.
- Apply a small, pea-sized dot of thermal paste to the center of the CPU's IHS.
- Do not spread the paste manually; the pressure from the cooler will distribute it evenly.
3.3. Mounting the Cooler
- Attach the appropriate AMD mounting brackets to the base of the heatsink using the provided screws. Refer to Figure 3.1 for bracket orientation.
- Carefully align the cooler with the mounting holes on the motherboard's CPU retention module.
- Place the cooler onto the CPU, ensuring the mounting brackets engage with the motherboard's retention clips or screw holes.
- Secure the cooler by tightening the screws in a diagonal pattern until snug. Do not overtighten.
- Connect the cooler's 4-pin power cable to the CPU_FAN header on your motherboard. Ensure the connector is fully seated.
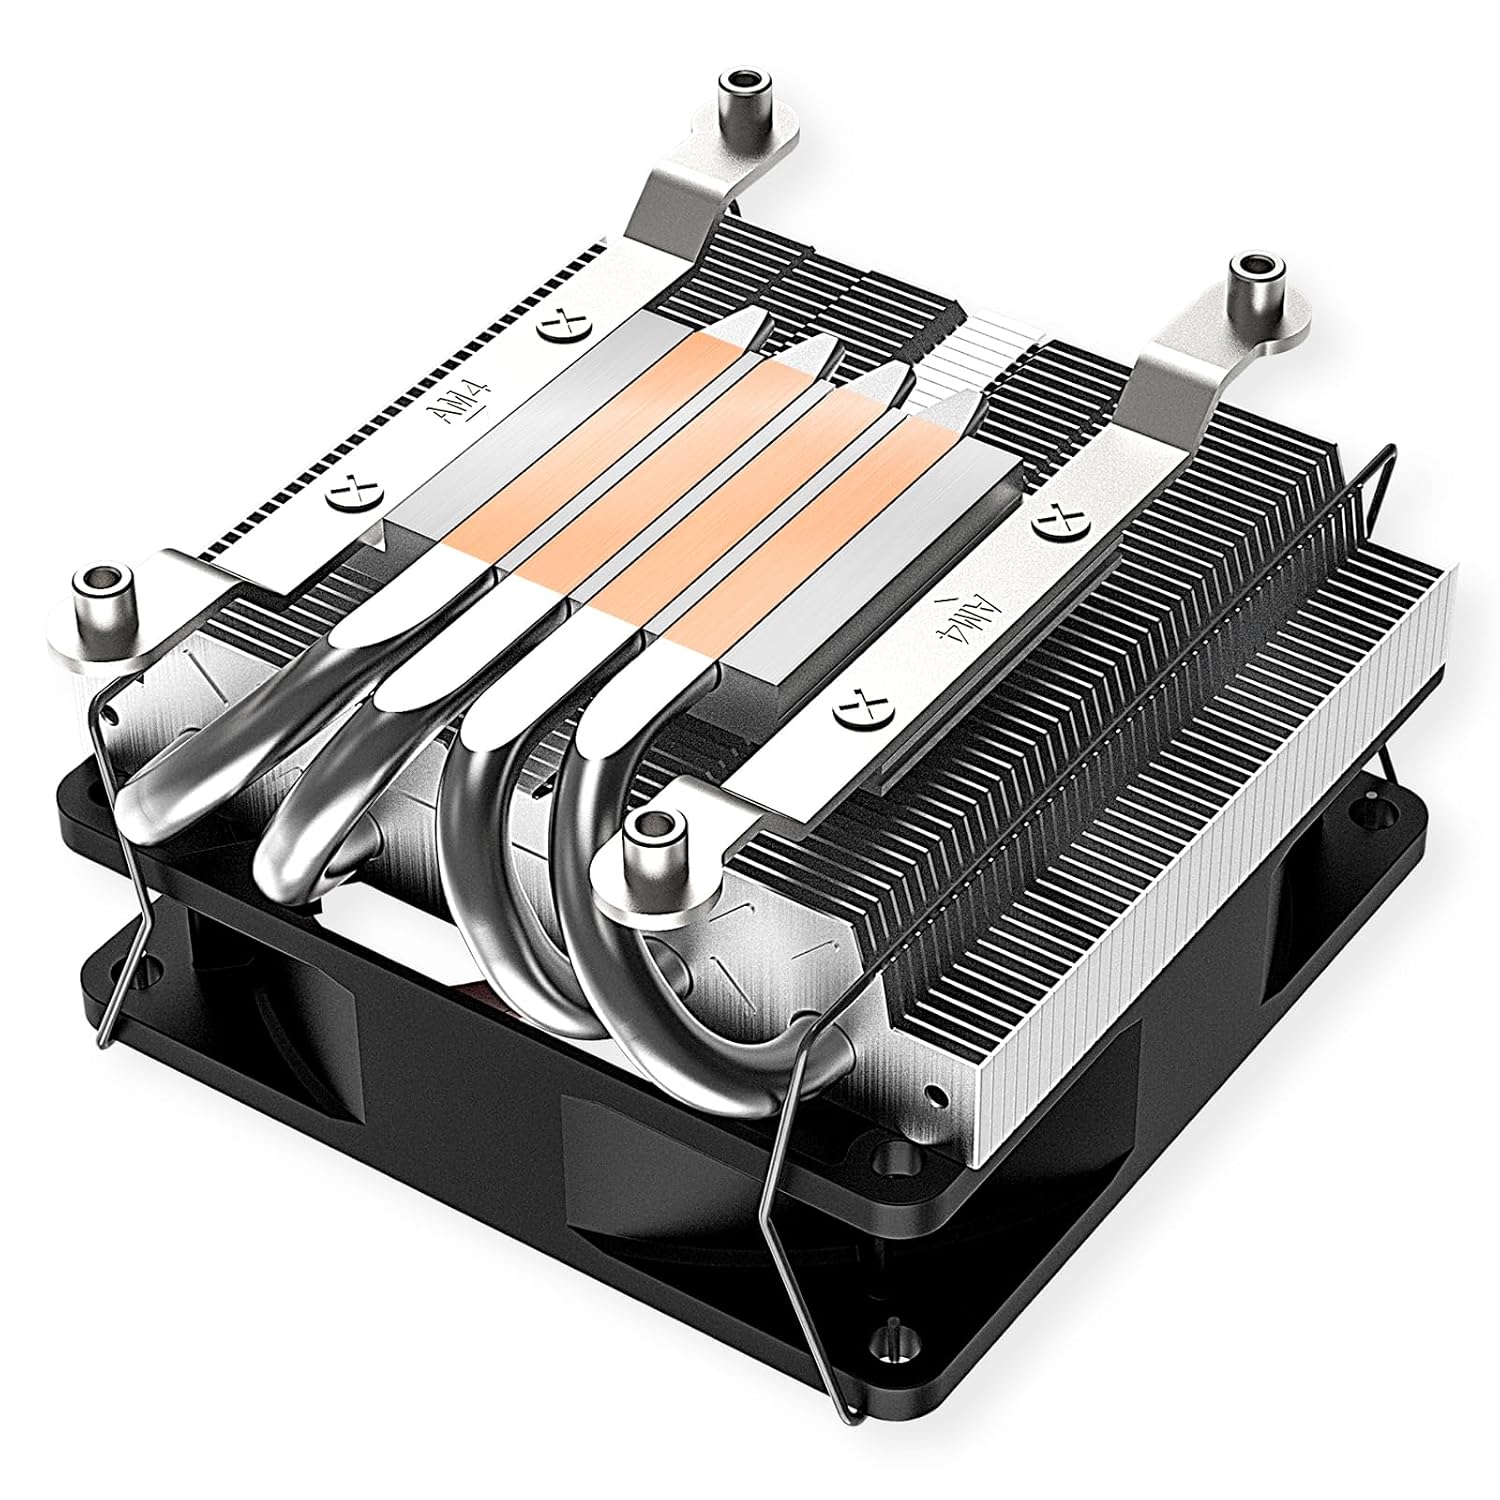
Figure 3.1: The underside of the cooler showing the heat pipes and the attachment points for the AMD mounting brackets.

Figure 3.2: An angled view of the assembled cooler, highlighting the fan, heatsink fins, and the four copper heat pipes.
3.4. Post-Installation
- Close your computer case.
- Reconnect the power cable and power on your computer.
- Enter your system's BIOS/UEFI to verify that the CPU fan is detected and spinning at an appropriate speed. Monitor CPU temperatures during initial operation.
4. Operating Instructions
The Xilence Performance C A404T CPU Cooler operates automatically once installed and connected to the motherboard's CPU_FAN header. The fan speed is typically controlled by the motherboard's BIOS/UEFI settings based on CPU temperature, ensuring optimal cooling performance and noise levels.
- Fan Speed Control: Most modern motherboards offer fan control options in their BIOS/UEFI. You can adjust fan curves to prioritize quiet operation or maximum cooling performance.
- Temperature Monitoring: Use motherboard monitoring software or BIOS/UEFI to keep track of your CPU temperatures. Ensure temperatures remain within safe operating limits, especially under load.
5. Maintenance
Regular maintenance helps ensure the longevity and optimal performance of your CPU cooler.
- Dust Removal: Periodically (e.g., every 3-6 months), power off your computer and use compressed air to clean dust from the heatsink fins and fan blades. Hold the fan blades gently to prevent over-spinning during cleaning.
- Fan Inspection: Check the fan for any obstructions or signs of wear. Ensure it spins freely and quietly.
- Thermal Paste: The thermal paste typically lasts for several years. If you notice consistently high CPU temperatures, consider reapplying fresh thermal paste after cleaning the CPU and cooler base.

Figure 5.1: Top view of the cooler, showing the red fan blades and the Xilence logo. Regular cleaning of these blades is recommended.
6. Troubleshooting
If you encounter issues with your Xilence Performance C A404T CPU Cooler, refer to the following common problems and solutions:
- Fan Not Spinning:
- Check if the 4-pin power cable is securely connected to the CPU_FAN header on the motherboard.
- Verify fan control settings in BIOS/UEFI. Some motherboards may stop fans at very low temperatures for silent operation.
- Inspect for any physical obstructions preventing the fan from spinning.
- High CPU Temperatures:
- Ensure the cooler is securely mounted and making good contact with the CPU.
- Verify that thermal paste was applied correctly and is not dried out. Reapply if necessary.
- Clean any dust accumulation from the heatsink fins and fan.
- Check case airflow. Ensure sufficient intake and exhaust fans are present.
- Excessive Noise:
- Check for loose screws or vibrations.
- Clean the fan blades and heatsink to remove dust that might cause imbalance.
- Adjust fan speed curves in BIOS/UEFI to reduce RPM at lower temperatures.
7. Specifications
Detailed technical specifications for the Xilence Performance C A404T CPU Cooler (Model: XC040).
| Feature | Specification |
|---|---|
| Brand | Xilence |
| Model Number | XC040 |
| Product Dimensions | 3.94 x 3.94 x 0.79 inches (approx. 100 x 100 x 20 mm) |
| Item Weight | 10.79 ounces (approx. 306 grams) |
| Power Connector Type | 4-Pin PWM |
| Voltage | 12 Volts |
| Wattage (TDP) | 125 watts |
| Cooling Method | Air Cooling (Fan) |
| Compatible Devices / Sockets | AMD Sockets AM4/AM3/AM2/AM2+/FM2+/FM2/FM1 |
| Material | Aluminum fins, Copper heat pipes, Plastic fan housing |
| Maximum Rotational Speed | 2500 RPM |
| Date First Available | August 4, 2017 |
8. Warranty and Support
Xilence products are designed for reliability and performance. For specific warranty terms and conditions, please refer to the warranty information provided with your purchase or visit the official Xilence website.
For technical support, product inquiries, or warranty claims, please contact Xilence customer service through their official support channels. You can typically find contact information on the Xilence website or in the product packaging.
Online Resources: For additional information, FAQs, and driver downloads, please visit the official Xilence website.


