
Introduction
This manual provides comprehensive instructions for the setup, operation, and maintenance of your Brifit WA3 Digital Hygrometer Thermometer. This device is designed to accurately monitor indoor temperature and humidity levels, providing essential environmental data for various applications.
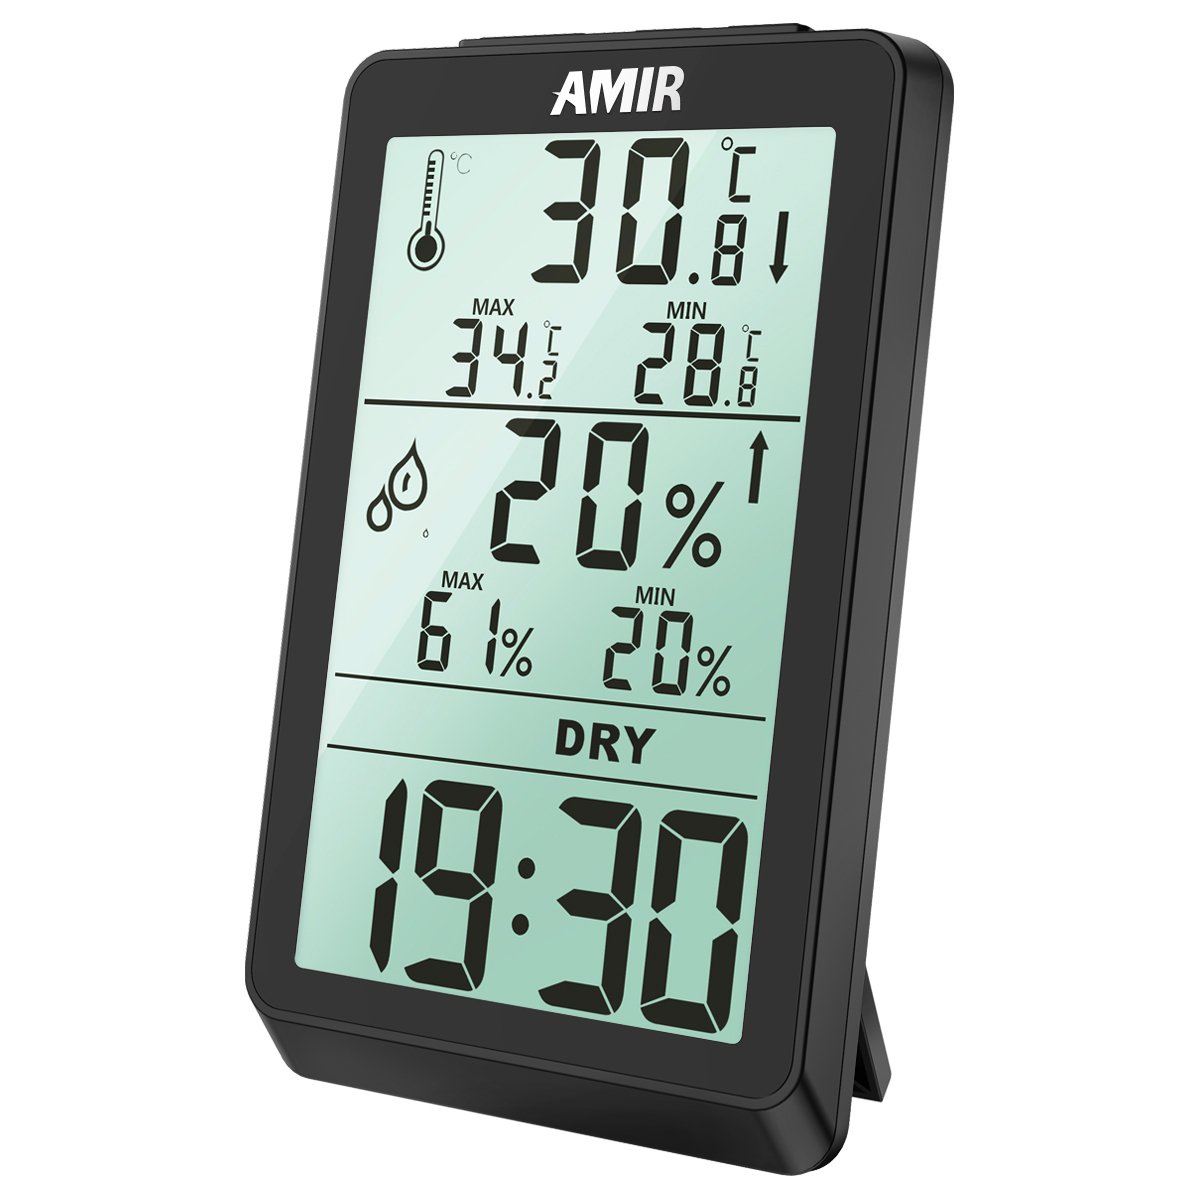
Figure 1: Brifit WA3 Digital Hygrometer Thermometer front view, showing current temperature, humidity, and time.
Product Features
- Large LCD display for clear readings of temperature, humidity, and time.
- Records maximum and minimum temperature and humidity values.
- Comfort level indicator (DRY, OK, WET).
- Multiple placement options: tabletop stand and wall-mountable design.
- Temperature unit selection (°C/°F).

Figure 2: Examples of the Brifit WA3 Digital Hygrometer Thermometer in use across different environments.
Setup
1. Battery Installation
The Brifit WA3 requires batteries for operation (not included).
- Locate the battery compartment on the back of the device.
- Open the battery compartment cover.
- Insert the required batteries, ensuring correct polarity (+ and -).
- Close the battery compartment cover securely.
2. Placement
The device offers two placement options:
- Tabletop: Extend the integrated stand on the back of the unit to place it on any flat surface.
- Wall Mount: Use the keyhole slot on the back of the unit to hang it on a nail or screw on a wall.

Figure 3: Illustration of the wall mount keyhole and the tabletop stand for device placement.
3. Initial Power-On
Once batteries are installed, the device will power on automatically and display current temperature, humidity, and time. Allow a few minutes for the readings to stabilize.
Operating Instructions
1. Display Overview

Figure 4: Detailed breakdown of the hygrometer interface, indicating each displayed element.
- Temperature: Current temperature in °C or °F. Includes MAX/MIN records and trend indicator.
- Humidity: Current relative humidity percentage. Includes MAX/MIN records and trend indicator.
- Comfort Level: Indicates environmental comfort based on humidity.
- DRY: Humidity < 40%
- OK: 40% < Humidity < 70%
- WET: Humidity > 70%
- Time: Current time in 12-hour or 24-hour format.
2. Setting Time and Temperature Unit
Specific buttons for setting time and changing temperature units are typically located on the back or side of the device. Refer to the physical unit for exact button labels (e.g., "MODE", "ADJ", "°C/°F").
- To change Temperature Unit (°C/°F): Press the dedicated °C/°F button once.
- To set Time:
- Press and hold the "MODE" button (or similar) until the time display flashes.
- Use the "ADJ" button (or similar) to adjust the hour.
- Press "MODE" again to switch to minute adjustment, then use "ADJ" to set minutes.
- Press "MODE" once more to confirm and exit time setting.
- Note: Some units may have separate buttons for 12/24 hour format selection.
3. MAX/MIN Records
The device automatically records the maximum and minimum temperature and humidity values since the last reset.
- Viewing MAX/MIN: Press the "MAX/MIN" button (or similar) once to display maximum values. Press again to display minimum values. Press a third time to return to current readings.
- Resetting MAX/MIN: While MAX or MIN values are displayed, press and hold the "MAX/MIN" button (or similar) for a few seconds until the values reset.
Maintenance
1. Cleaning
To clean the device, wipe it gently with a soft, dry cloth. Do not use abrasive cleaners, solvents, or immerse the device in water.
2. Battery Replacement
When the display becomes dim or unresponsive, it is time to replace the batteries. Follow the battery installation steps outlined in the "Setup" section. Dispose of used batteries responsibly according to local regulations.
3. Storage
If the device will not be used for an extended period, remove the batteries to prevent leakage and store it in a cool, dry place away from direct sunlight.
Troubleshooting
| Problem | Possible Cause | Solution |
|---|---|---|
| No display or dim display | Low or dead batteries; incorrect battery installation. | Replace batteries with new ones, ensuring correct polarity. |
| Inaccurate readings | Device placed near heat sources, vents, or in direct sunlight; sensor obstruction. | Relocate the device to a stable environment away from extreme conditions. Ensure sensors are clear. |
| Clock gains time | Internal clock drift (observed in some units). | Periodically reset the time as needed. This is a known characteristic for some units. |
| MAX/MIN values not resetting | Button not held long enough. | Ensure the MAX/MIN button is pressed and held for several seconds while MAX/MIN values are displayed. |
Specifications
| Feature | Detail |
|---|---|
| Brand | Brifit |
| Model Number | WA3 |
| Display Type | LCD |
| Shape | Rectangular |
| Power Source | Batteries (Not Included) |
| Item Weight | 136 g |
| Package Dimensions | 12.95 x 7.87 x 2.79 cm |
| UPC | 612289987813, 767421045927 |

Figure 5: Physical dimensions of the Brifit WA3 Digital Hygrometer Thermometer.
Warranty and Support
For warranty information or technical support, please refer to the documentation included with your purchase or contact Brifit customer service directly. Contact details are typically available on the manufacturer's official website or product packaging.