
Introduction
The Acuvar 3-in-1 Battery Charger is designed to efficiently charge AA, AAA, and 9V rechargeable batteries. This charger features dual banks with LED indicators that illuminate during charging and turn off when batteries are fully charged. It is suitable for various electronic devices and includes a European adapter for worldwide use (100-240V).

Image: The Acuvar 3-in-1 Battery Charger, showing its compact design and integrated US plug.
Safety Information
Please read and understand all safety instructions before using this product. Failure to follow these instructions may result in electric shock, fire, or serious injury.
- Do not charge 1.5V alkaline or carbon batteries. This charger is designed for rechargeable batteries only. Charging non-rechargeable batteries may cause leakage or explosion.
- Do not mix batteries of different specifications or capacities within the same charging cycle.
- This product is for indoor use only. Do not expose to rain or moisture.
- Keep out of reach of children.
- Do not disassemble or modify the charger.
- Unplug the charger from the power outlet when not in use or before cleaning.

Image: The back of the Acuvar charger, displaying input/output specifications and critical safety warnings.
Setup
- Unpack the Charger: Remove the charger from its packaging.
- Power Connection: Plug the charger directly into a standard wall outlet (100-240V). If using in Europe, attach the included European adapter before plugging into the wall outlet.
- Prepare Batteries: Ensure the batteries you intend to charge are rechargeable (NiMH or NiCd) and are of the correct size (AA, AAA, or 9V).
Operating Instructions
Follow these steps to charge your batteries:
- Insert Batteries: Carefully insert the rechargeable batteries into the appropriate slots on the charger.
- For AA and AAA batteries, ensure the positive (+) and negative (-) terminals align correctly with the markings on the charger.
- For 9V batteries, align the terminals with the corresponding connectors in the 9V charging slots.
- Charging Indication: Once batteries are correctly inserted and the charger is plugged in, the LED indicator lights for the respective charging banks will illuminate, indicating that charging is in progress.
- Charging Completion: The LED indicator lights will turn off when the batteries are fully charged. This feature helps prevent overcharging.
- Remove Batteries: Once charging is complete and the LED indicators are off, carefully remove the charged batteries from the charger.
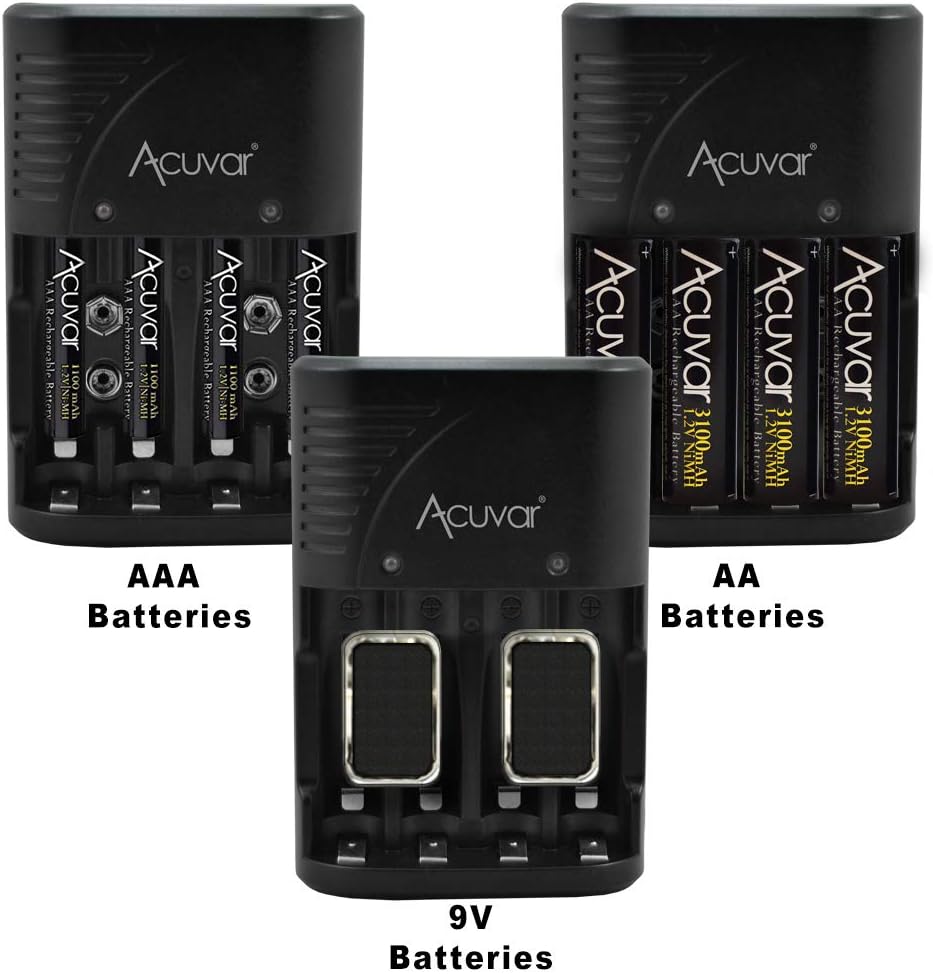
Image: The Acuvar charger illustrating the dedicated slots for AAA, AA, and 9V batteries.
Maintenance
- Cleaning: Disconnect the charger from the power outlet before cleaning. Use a soft, dry cloth to wipe the exterior of the charger. Do not use liquid cleaners or solvents.
- Storage: Store the charger in a cool, dry place away from direct sunlight and extreme temperatures when not in use.
- Inspection: Periodically inspect the charger for any signs of damage, such as frayed wires or cracked casing. If damage is found, discontinue use and contact customer support.
Troubleshooting
| Problem | Possible Cause | Solution |
|---|---|---|
| LED indicator does not light up when batteries are inserted. |
|
|
| LED indicator does not turn off after extended charging time. |
|
|
| Batteries get hot during charging. |
|
|
Specifications
| Feature | Detail |
|---|---|
| Model Number | ECCO-1FW168 |
| Input Voltage | AC 100-240V, 50/60Hz |
| Output Voltage |
|
| Compatible Battery Types | AA, AAA, 9V Rechargeable (NiMH, NiCd) |
| Indicator | LED (illuminates during charge, turns off when full) |
| Item Weight | 3 ounces |
| Color | Black |
| Certifications | CE, RoHS |

Image: Dimensions of the Acuvar 3-in-1 Battery Charger, showing its compact size.
Warranty and Support
For warranty information or technical support, please refer to the retailer's return policy or contact Acuvar customer service through their official channels. Keep your purchase receipt for any warranty claims.
You can often find support information on the Acuvar Brand Store on Amazon.