
1. Introduction
This manual provides essential information for the safe and efficient installation, operation, and maintenance of your Hatco C-9 Compact Booster Heater. Designed for commercial food service applications, this unit ensures a continuous supply of hot water at consistent temperatures. Please read this manual thoroughly before attempting to install or operate the unit.
2. Safety Instructions
Important: Failure to follow these safety instructions may result in property damage, serious injury, or death.
- Always disconnect power before servicing or cleaning the unit.
- This appliance must be installed by a qualified technician in accordance with all local and national electrical and plumbing codes.
- Do not operate the unit if it has a damaged cord or plug, or if it is not working properly.
- Keep hands and clothing away from hot surfaces during operation.
- Ensure proper ventilation around the unit to prevent overheating.
- Do not spray water directly onto the unit.
- This unit is designed for commercial use only.
- Use only genuine Hatco replacement parts.
3. Setup and Installation
3.1 Unpacking
Carefully remove the booster heater from its packaging. Inspect the unit for any shipping damage. Report any damage immediately to the carrier and your dealer. Retain all packaging materials for inspection.
3.2 Placement
The Hatco C-9 is a floor-mount unit. Select a level, stable surface capable of supporting the unit's weight (approximately 118 pounds). Ensure adequate clearance around the unit for ventilation and servicing. Avoid placing the unit near flammable materials or in areas with excessive moisture.
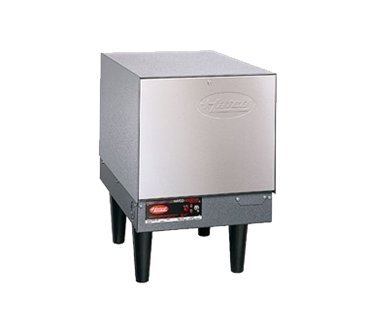
Image 1: Hatco C-9 Compact Booster Heater. This image shows the compact design of the booster heater, suitable for floor mounting in commercial kitchens.
3.3 Electrical Connection
This unit operates on corded electric power. Ensure the electrical supply matches the voltage and amperage requirements specified on the unit's data plate. A dedicated circuit is recommended. All electrical connections must comply with local and national electrical codes and be performed by a licensed electrician.
3.4 Plumbing Connection
Connect the water inlet and outlet lines to the appropriate fittings on the booster heater. Use approved plumbing materials and ensure all connections are watertight. Install a shut-off valve on the inlet line for easy servicing. A pressure relief valve and temperature relief valve may be required by local codes.
4. Operation
4.1 Initial Startup
- Ensure all plumbing connections are secure and the water supply valve is open.
- Allow the unit to fill with water completely before applying power. This prevents damage to the heating elements.
- Plug the unit into a properly grounded electrical outlet.
- Turn the main power switch (if present) to the "ON" position.
- The unit will begin heating water to its set temperature. Allow sufficient time for the water to reach the desired temperature.
4.2 Normal Operation
The Hatco C-9 is designed for automatic operation, maintaining a consistent hot water temperature. The unit features a noiseless operation, ensuring a quiet working environment. Monitor the temperature gauge (if equipped) to confirm proper function. If the unit is not maintaining temperature, refer to the troubleshooting section.
4.3 Shutting Down
To temporarily shut down the unit, turn the main power switch to the "OFF" position. For extended periods of non-use, also close the water supply valve and drain the unit to prevent freezing or stagnant water issues.
5. Maintenance
Regular maintenance ensures optimal performance and extends the lifespan of your booster heater. Always disconnect power and shut off water supply before performing any maintenance.
5.1 Cleaning
- Wipe down the exterior surfaces with a damp cloth and mild detergent. Do not use abrasive cleaners or solvents.
- Ensure ventilation openings are clear of dust and debris.
5.2 Descaling
Mineral deposits (scale) can build up inside the tank and on heating elements, reducing efficiency. The frequency of descaling depends on water hardness. Consult a qualified service technician for periodic descaling procedures. Failure to descale can lead to reduced performance and premature component failure.
5.3 Inspection
Periodically inspect all plumbing connections for leaks and electrical connections for signs of wear or damage. Check the pressure relief valve for proper operation according to manufacturer guidelines.
6. Troubleshooting
Before contacting service, review the following common issues and solutions:
| Problem | Possible Cause | Solution |
|---|---|---|
| No hot water | No power; water supply off; heating element failure; thermostat issue. | Check power supply and circuit breaker. Ensure water valve is open. Contact service for element or thermostat issues. |
| Water not hot enough | Thermostat setting too low; excessive hot water demand; scale buildup. | Adjust thermostat (if accessible). Reduce demand or allow recovery time. Schedule descaling. |
| Water leaking | Loose plumbing connections; faulty pressure relief valve; tank leak. | Tighten connections. Inspect and replace relief valve if necessary. Contact service for tank leaks. |
| Unit not turning on | No power; tripped circuit breaker; faulty power switch. | Verify power supply. Reset circuit breaker. Contact service if switch is faulty. |
For issues not listed or if solutions do not resolve the problem, contact a qualified service technician.
7. Specifications
The following specifications are for the Hatco C-9 Compact Booster Heater:
- Brand: Hatco
- Model: C-9
- Part Number: C-9_407564
- Special Feature: Noiseless operation
- Power Source: Corded Electric
- Heating Method: Convection
- Mounting Type: Floor Mount
- Heating Element: Radiant
- Item Weight: 118 Pounds
- ASIN: B0742DJDJ7
8. Warranty and Support
Hatco products are manufactured to the highest quality standards. For specific warranty information, please refer to the warranty card included with your product or visit the official Hatco website. For technical support, parts, or service inquiries, please contact Hatco customer service or an authorized Hatco service agent. Ensure you have your model number (C-9) and serial number available when contacting support.
Hatco Contact Information: (Refer to official Hatco website or product documentation for current contact details)


