1. Important Safety Information
Please read all instructions carefully before using your VonHaus 600W Corded 2-in-1 Stick Vacuum Cleaner. Retain this manual for future reference.
- Always ensure the appliance is unplugged from the power supply before assembling, disassembling, or cleaning.
- Do not use the appliance on wet surfaces or to pick up liquids.
- Keep hair, loose clothing, fingers, and all parts of the body away from openings and moving parts.
- Do not pick up anything that is burning or smoking, such as cigarettes, matches, or hot ashes.
- Use only as described in this manual. Use only manufacturer’s recommended attachments.
- Do not use without dust cup and/or filters in place.
- If the supply cord is damaged, it must be replaced by the manufacturer, its service agent, or similarly qualified persons in order to avoid a hazard.
2. Package Contents
Verify that all components are present and in good condition:
- Main Vacuum Unit
- Extendable Handle
- Floor Brush Head
- Crevice Tool
- Brush Attachment
- HEPA Filter (pre-installed)
- Sponge Filter (pre-installed)

Figure 2.1: Included accessories for versatile cleaning.
3. Setup and Assembly
Your VonHaus vacuum can be assembled in two configurations: upright stick vacuum or handheld vacuum.
3.1 Upright Stick Vacuum Assembly
- Attach the Handle: Insert the extendable handle into the main vacuum unit until it clicks securely into place.
- Attach the Floor Brush Head: Connect the floor brush head to the main vacuum unit. Ensure it is firmly attached.
- Power Connection: Plug the power cord into a suitable electrical outlet.

Figure 3.1: The VonHaus 2-in-1 Stick Vacuum Cleaner in its two primary configurations.
3.2 Handheld Vacuum Assembly
- Detach Handle and Floor Head: If assembled as an upright vacuum, press the release buttons to detach the extendable handle and the floor brush head from the main unit.
- Attach Accessories: Select the desired accessory (crevice tool or brush attachment) and firmly attach it to the main vacuum unit.
- Power Connection: Plug the power cord into a suitable electrical outlet.
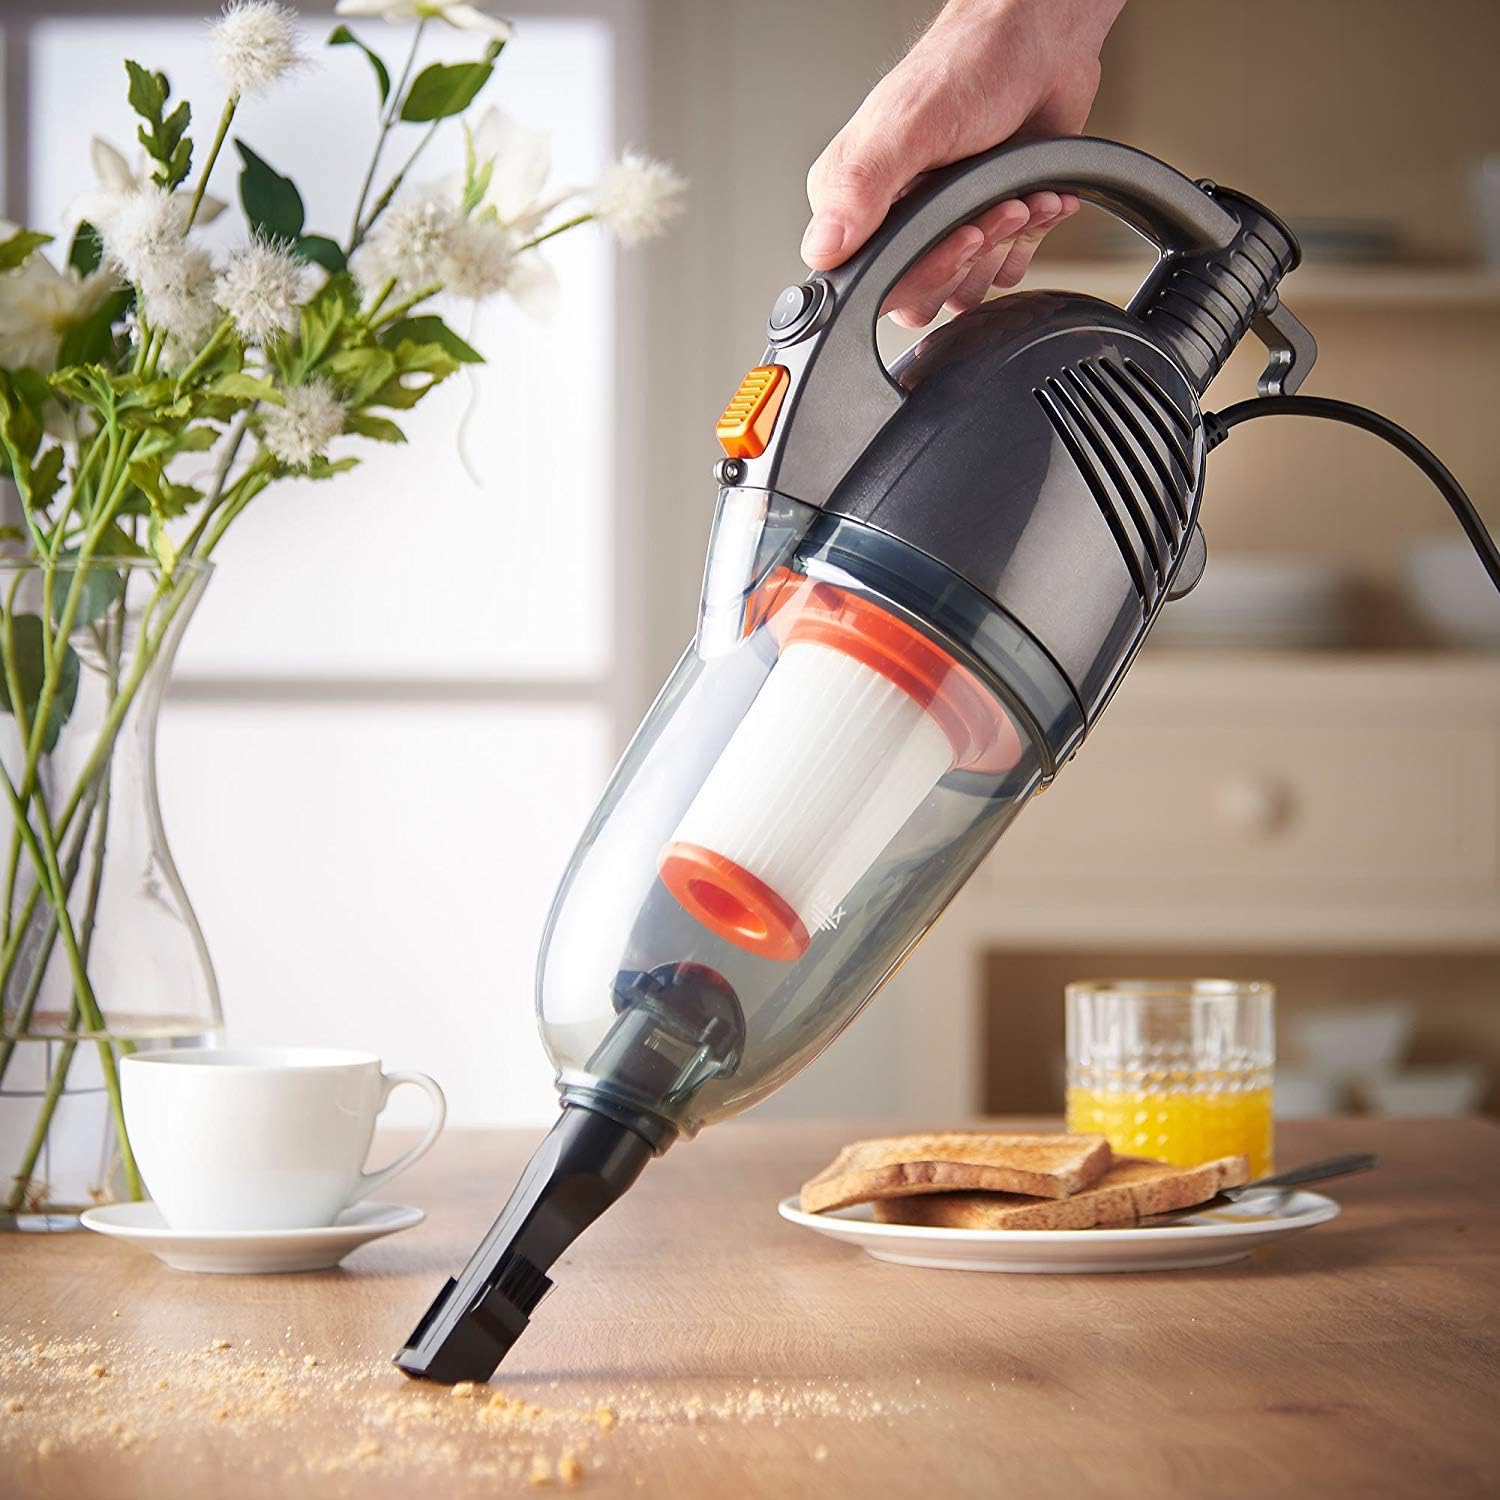
Figure 3.2: Handheld configuration for detailed cleaning tasks.
3.3 Visual Setup Guide
For a visual demonstration of the assembly process, please refer to the video below:
Video 3.1: General guide for assembling and operating a stick vacuum. This video demonstrates attaching the handle, floor brush, and accessories, as well as emptying and cleaning the dust cup and filter.
4. Operating Instructions
Once assembled and plugged in, your vacuum is ready for use.
- Power On/Off: Locate the power switch on the main unit and slide it to the 'On' position to start vacuuming. Slide to 'Off' to stop.
- Upright Mode: Use the extendable handle and floor brush head for cleaning carpets, hard floors, and tiles. The lightweight design (approximately 0.01 ounces) allows for easy maneuverability.
- Handheld Mode: For smaller messes, upholstery, car interiors, or hard-to-reach areas, use the main unit with the appropriate attachment.
- Using Attachments: The crevice tool is ideal for tight spaces and corners. The brush attachment is suitable for delicate surfaces and upholstery.

Figure 4.1: Effective cleaning of hard floors using the upright stick vacuum.
5. Maintenance
Regular maintenance ensures optimal performance and extends the life of your vacuum cleaner.
5.1 Emptying the Dust Cup
Empty the dust cup regularly, ideally after each use, to maintain strong suction power.
- Detach Dust Cup: Hold the main vacuum unit and press the dust cup release button. Gently pull the dust cup away from the main unit.
- Remove Cyclone Separator: Over a waste bin, gently pull out the cyclone separator from the dust cup.
- Empty Contents: Tip the dust cup to empty all collected debris into the waste bin.
- Reassemble: Reinsert the cyclone separator, ensuring it aligns correctly. Reattach the dust cup to the main unit until it clicks securely.

Figure 5.1: The 1.3L dust tank and HEPA sponge filtration system.
5.2 Cleaning the HEPA Filter
The washable HEPA filtration system helps trap small particles. Clean the filter periodically.
- Remove Filter: After detaching the dust cup, carefully remove the HEPA filter.
- Shake Off Debris: Gently shake the filter over a waste bin to remove loose dirt and debris.
- Wash Filter: Rinse the filter under running water until clean. Do not use detergents or hot water.
- Dry Completely: Allow the filter to air dry completely in a well-ventilated area before reinserting it. Ensure it is completely dry to prevent mold or damage.
- Reinsert Filter: Place the dry filter back into the vacuum, ensuring it is securely sealed.
5.3 Visual Maintenance Guide
For a visual demonstration of emptying the dust cup and washing the filter, please refer to the video below:
Video 5.1: General guide for emptying the dust cup and washing the filter of a stick vacuum.
6. Troubleshooting
If you encounter issues with your vacuum, refer to the following common troubleshooting steps:
- No Power:
- Ensure the power cord is securely plugged into a working outlet.
- Check the power switch is in the 'On' position.
- Loss of Suction:
- Empty the dust cup.
- Clean or replace the HEPA and sponge filters.
- Check for blockages in the nozzle, hose, or extension tube.
- Unusual Noise:
- Check for any foreign objects caught in the floor brush head or main unit.
- Ensure all parts are correctly assembled and securely fastened.
If problems persist after attempting these steps, please contact VonHaus customer support.
7. Specifications
| Feature | Specification |
|---|---|
| Brand | VonHaus |
| Model Name | 2 in 1 Stick Vacuum 600W (07/813) |
| Power Source | Corded Electric |
| Wattage | 600 watts |
| Amperage | 5 Amps |
| Capacity | 1.3 Liters |
| Filter Type | HEPA and Sponge Filtration (Washable) |
| Form Factor | Handheld, Stick |
| Recommended Uses | Carpet, Hard Floor, Tile Floor, Hardwood, Upholstery |
| Special Features | Compact, HEPA, Lightweight, Wheels |
| Noise Level | 80 Decibels |
| Item Weight | 0.01 ounces |
| Package Dimensions | 19.33 x 11.93 x 7.44 inches |
8. Warranty and Support
For warranty information, product registration, or technical support, please refer to the documentation included with your purchase or visit the official VonHaus website. Keep your proof of purchase for any warranty claims.
For additional assistance, you may contact VonHaus customer service directly.


