
DiCUNO 5C-5MM 450 L
DiCUNO 5mm LED Diode Kit Instruction Manual
Model: 5C-5MM 450 L
1. Product Overview
The DiCUNO 5mm LED Diode Kit provides 450 pieces of 5mm round-top light-emitting diodes, conveniently sorted into 5 colors (Red, Yellow, White, Blue, Green). This versatile kit is ideal for a wide range of DIY lighting projects, educational experiments, and electronic applications.

Figure 1: DiCUNO 5mm LED Diode Kit packaging, displaying the organized assortment of LEDs.
2. Key Features
- Comprehensive Assortment: Includes 90 pieces each of Red, Yellow, White, Blue, and Green 5mm LEDs, totaling 450 diodes.
- Standard Dimensions: Features a 5mm round head diameter with pin lengths of 18mm (Anode, longer) and 17mm (Cathode, shorter).
- Optimized Electrical Parameters: Designed for a maximum current of 20mA and a 30-degree viewing angle. Forward voltages vary by color: Red/Yellow (2.0-2.2V), Blue/Green/White (3.0-3.2V).
- High Luminous Intensity: Provides impressive brightness across all colors, ranging from 2000-3000mcd for Red to 15000-20000mcd for Green.
- Precise Wavelengths: Specific wavelength ranges for each color ensure accurate lighting effects.
- Durable Storage: Supplied in a handy kit box for easy organization and long-term storage, preventing mixing of colors.

Figure 2: Close-up view of individual 5mm LEDs in various colors.
3. Technical Specifications
| Parameter | Red | Yellow | White | Blue | Green |
|---|---|---|---|---|---|
| Max. Current | 20mA | ||||
| Forward Voltage | 2.0-2.2V | 2.0-2.2V | 3.0-3.2V | 3.0-3.2V | 3.0-3.2V |
| Wavelength Range | 620-625nm | 590-595nm | 8000K | 460-465nm | 520-525nm |
| Luminous Intensity | 2000-3000mcd | 3000-4000mcd | 12000-14000mcd | 3000-4000mcd | 15000-20000mcd |
| Viewing Angle | 30 degrees | ||||
| Head Diameter | 5mm Round | ||||
| Pin Length (Anode/Cathode) | 18mm / 17mm | ||||

Figure 3: Detailed specifications for the 5mm multi-colored LEDs.
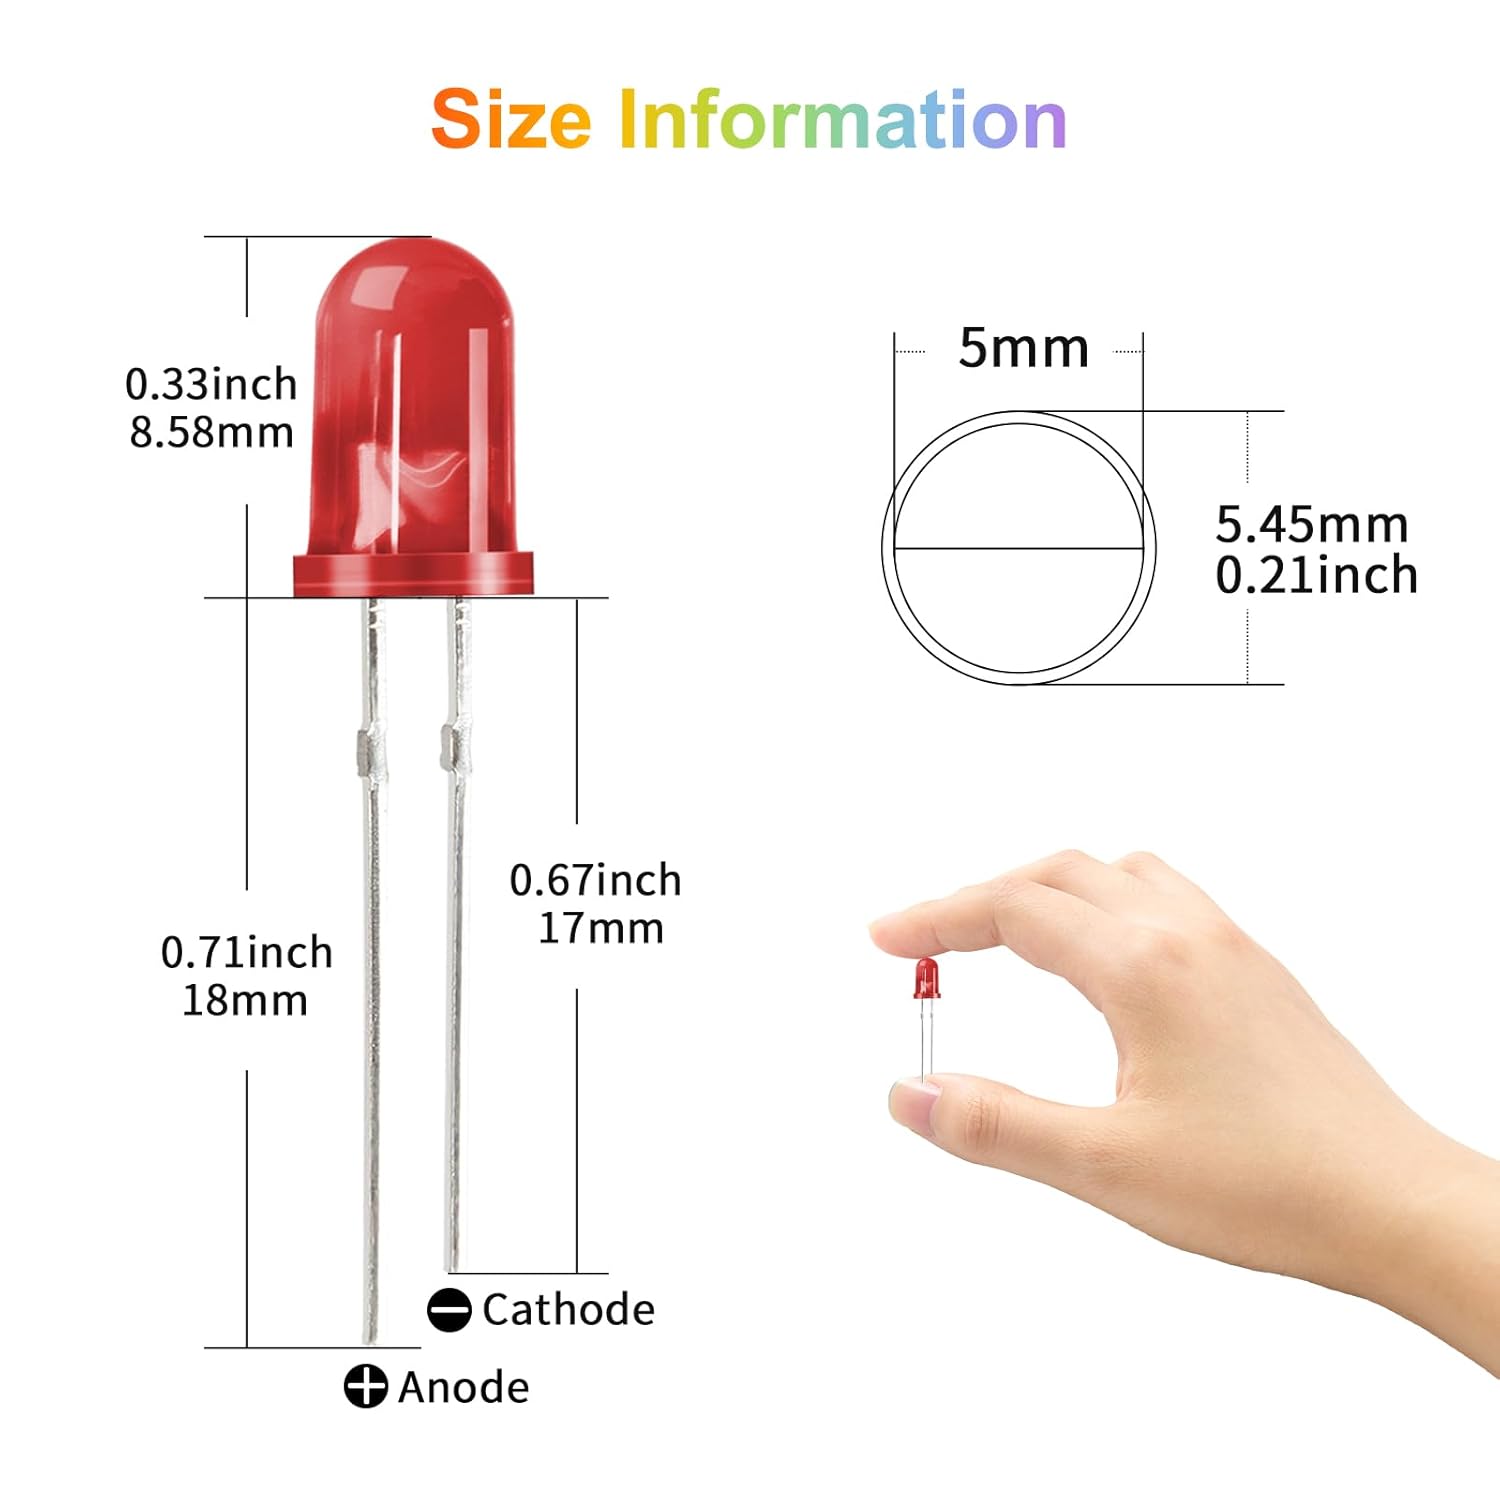
Figure 4: Physical dimensions of the 5mm LED diodes.
4. Setup and Basic Operation
LEDs are polarized components, meaning they must be connected in the correct orientation to function. The longer pin is the Anode (positive +) and the shorter pin is the Cathode (negative -). Always ensure correct polarity when connecting to a power source.
4.1 Testing an LED
To quickly test an LED, you can use a compatible power source (e.g., a coin cell battery or a power supply with appropriate voltage and current limiting resistor). Connect the longer pin (Anode) to the positive terminal and the shorter pin (Cathode) to the negative terminal. If the LED does not light up, reverse the connection. If it still doesn't light up, ensure your power source voltage is within the LED's forward voltage range and that a current-limiting resistor is used to prevent damage.
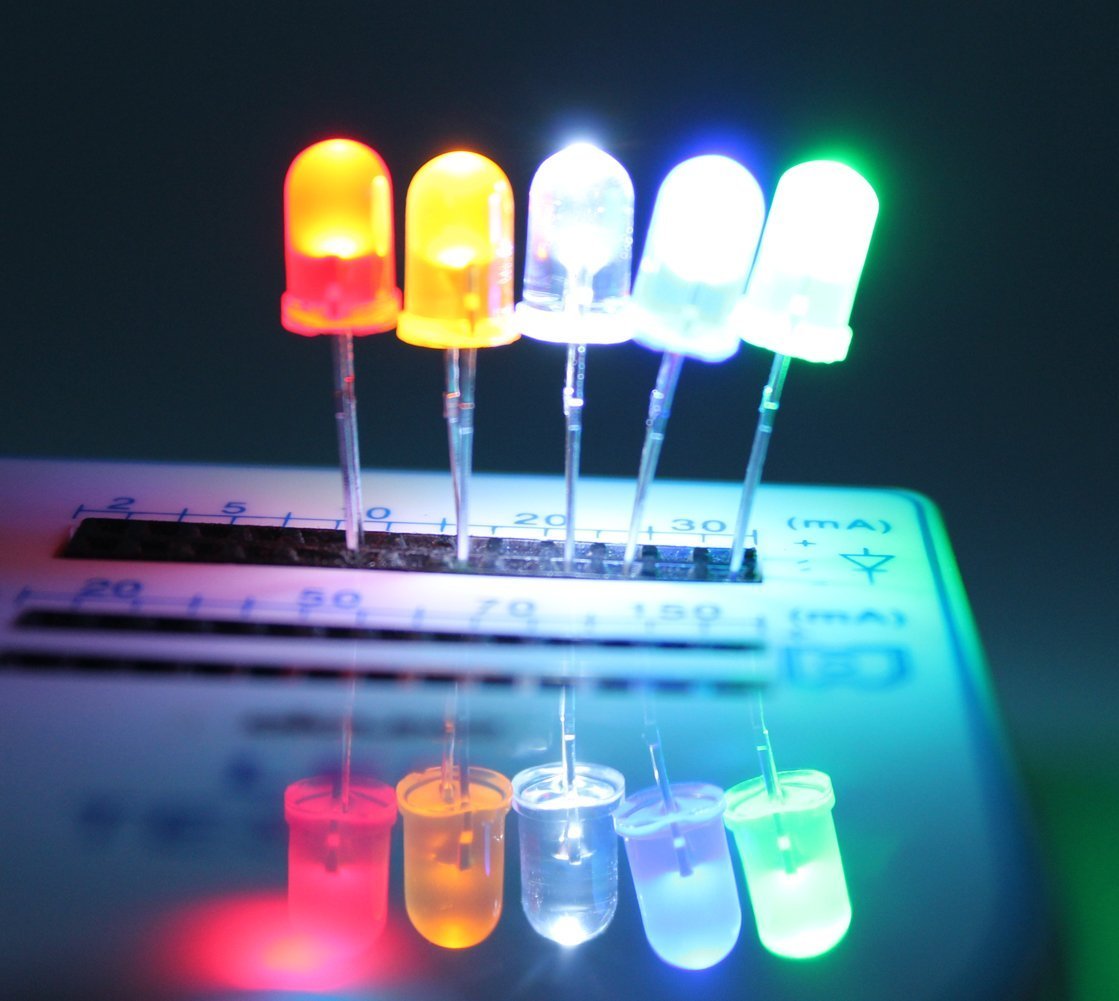
Figure 5: LEDs illuminated during testing on a circuit board.
4.2 Powering LEDs
LEDs require a specific forward voltage and current to operate correctly. It is crucial to use a current-limiting resistor in series with each LED to prevent excessive current flow, which can damage the diode. The resistor value can be calculated using Ohm's Law: R = (Vs - Vf) / I, where R is the resistance, Vs is the supply voltage, Vf is the LED's forward voltage, and I is the desired forward current (typically 20mA for these LEDs).
Video 1: Demonstration of DiCUNO LED Diodes, including how to test them with a coin cell battery.
5. Applications
DiCUNO 5mm LED diodes are highly versatile and can be integrated into numerous projects:
- DIY LED Projects: Create custom lighting setups, decorative displays, or illuminated signs.
- School Science Experiments: Ideal for teaching basic electronics, circuits, and light principles.
- Signal Indicators: Use as status indicators in electronic devices or control panels.
- Car Decorations: Add custom interior or exterior lighting to vehicles.
- Electronic and Electrical Experiments: Perfect for breadboard prototyping and circuit design.

Figure 6: Diverse applications of DiCUNO LEDs in various projects.

Figure 7: LEDs used in DIY model projects, such as illuminating a miniature house.

Figure 8: LEDs as educational tools for school science experiments.

Figure 9: LEDs used for decorative illumination, such as on a Christmas tree.
Video 2: Official product video showcasing various DIY applications of the DiCUNO 5mm LEDs.
6. Safety Guidelines
- Always use appropriate current-limiting resistors to prevent LED damage and overheating.
- Ensure correct polarity (Anode to positive, Cathode to negative) to avoid damaging the LED.
- Do not exceed the maximum forward current (20mA) or reverse voltage ratings.
- Avoid direct eye exposure to bright LEDs, especially high-intensity ones, as prolonged exposure may cause discomfort.
- Keep small components away from young children to prevent choking hazards.
- Handle pins carefully to avoid bending or breaking.
7. Troubleshooting
- LED Not Lighting Up:
- Check polarity: Ensure the longer pin (Anode) is connected to positive and the shorter pin (Cathode) to negative.
- Verify power supply: Confirm the power source is providing the correct voltage for the LED's forward voltage.
- Check resistor: Ensure a current-limiting resistor is used and its value is correctly calculated.
- Inspect connections: Make sure all connections are secure and there are no breaks in the circuit.
- Test LED: Use a known good power source and resistor to test the individual LED.
- LED Too Dim/Too Bright:
- Adjust resistor value: A higher resistance will decrease brightness, a lower resistance will increase it (within safe limits).
- Check power supply voltage: Ensure it matches the intended design.
- LED Flickering:
- Unstable power supply: Use a regulated power supply.
- Loose connections: Secure all wires and components.
8. Warranty and Support
DiCUNO products are manufactured to high quality standards. For any questions, technical assistance, or support regarding your 5mm LED Diode Kit, please contact DiCUNO customer service through the retailer's platform or the official DiCUNO website. Please retain your proof of purchase for warranty claims.
Ask a question about this manual
Ask about setup, troubleshooting, compatibility, parts, safety, or missing instructions. Manuals+ will review the question and use this page’s manual context to help answer it.