
Introduction
This manual provides detailed instructions for the assembly, painting, and care of your TAMIYA 1/35 German Assault Tank IV Brummbar Late Production plastic model kit. This kit allows for the creation of a highly detailed replica of the German Brummbar assault tank, featuring options for different road wheels and side armor configurations. Careful attention to these instructions will ensure a successful and enjoyable modeling experience.

Image: A fully assembled TAMIYA 1/35 German Assault Tank IV Brummbar Late Production model kit, showcasing its detailed camouflage paint scheme and overall structure.
Setup and Assembly
Before beginning assembly, ensure you have a clean, well-lit workspace. Carefully remove all parts from the sprues using appropriate tools. Refer to the included diagram for part identification.
Recommended Tools
The following tools are recommended for optimal assembly:
- Side cutters or hobby knife for removing parts from sprues.
- Tweezers for handling small parts.
- Plastic cement for bonding parts.
- Sandpaper or files for cleaning mold lines.
- Paint brushes and masking tape for painting.

Image: A selection of recommended tools for model kit assembly, including precision tweezers, a hobby knife, side cutters, paint brushes, masking tape, and plastic cements.
Paints Required
Refer to the color guide for specific paint numbers and types. TAMIYA XF (flat acrylic) and X (gloss acrylic) paints are recommended for accurate color representation. TS spray paints are also suitable for larger areas.

Image: A chart detailing the required TAMIYA XF (flat acrylic), X (gloss acrylic), and TS (spray) paints, along with their corresponding color codes, for painting the model kit.
Assembly Steps
- Chassis and Suspension: Assemble the lower hull, road wheels, and drive sprockets. The kit includes parts for both rubber-rimmed and all-steel road wheels, allowing for choice.
- Tracks: Assemble the track links. Ensure proper alignment and tension.
- Upper Hull and Superstructure: Attach the upper hull components. The massive main gun allows for elevation and traverse movement.
- Schurzen Side Armor: The Schurzen side armor is provided in multiple parts. These can be attached to depict various configurations or battle damage.
- Figures: The kit includes one torso figure and one full-body figure. Assemble and paint these according to the instructions.
- Detailing and Decals: Apply small detail parts and decals as indicated in the instruction booklet. Two marking options for 219th Assault Tank Battalion vehicles are provided.

Image: A detailed view of the Brummbar's main gun and the front section of its superstructure, highlighting the textured surface and camouflage.

Image: A side view of the Brummbar model kit, showing the track and road wheel assembly, with individual Schurzen side armor plates displayed separately in the foreground.
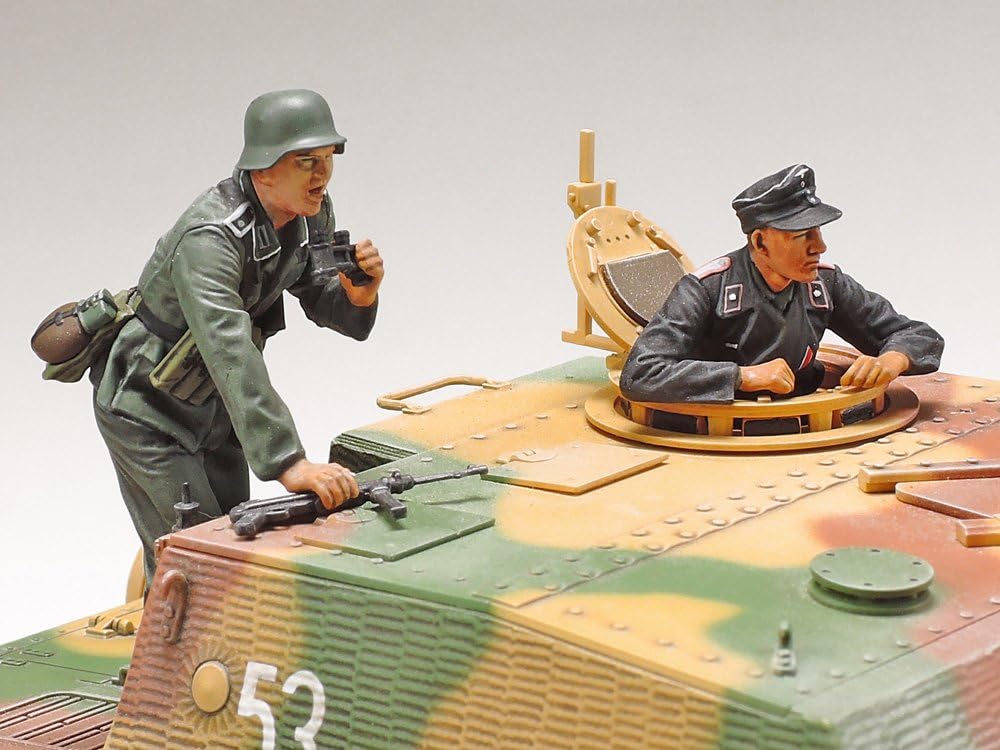
Image: Two detailed figures, a standing soldier with binoculars and a tank commander in the hatch, positioned on the Brummbar model kit, adding a sense of scale and realism.
Display and Handling
This is a static display model. Once assembled and painted, handle the model with care to prevent damage to delicate parts. Avoid exposing the model to direct sunlight, extreme temperatures, or high humidity, which can cause paint fading or material warping. Display on a stable, flat surface.
Maintenance
To maintain the appearance of your model:
- Cleaning: Dust the model regularly with a soft, dry brush or a can of compressed air. Avoid using wet cloths or harsh cleaning agents, as these can damage the paint or plastic.
- Storage: If storing the model, place it in a sealed container to protect it from dust and environmental factors. Ensure it is not subjected to pressure that could deform parts.
Troubleshooting Common Issues
- Parts not fitting: Ensure all mold lines are removed and parts are oriented correctly. A small amount of sanding may be required.
- Poor glue bond: Ensure surfaces are clean and free of paint or grease. Apply plastic cement sparingly to one surface and hold parts firmly together until set.
- Paint issues (e.g., uneven coat, brush marks): Ensure paint is properly thinned. Apply multiple thin coats rather than one thick coat. Allow adequate drying time between coats.
- Decal silvering: Apply decals to a gloss surface. Use decal setting solutions to help decals conform to surface details and eliminate air bubbles.
Specifications
| Product Dimensions | 7.87 x 13.78 x 2.56 inches |
| Item Weight | 6.1 ounces |
| ASIN | B073MYNY4L |
| Item Model Number | 300035353 |
| Manufacturer Recommended Age | 14 months and up |
| Manufacturer | Tamiya |
Warranty Information
TAMIYA products are manufactured to high-quality standards. For specific warranty details regarding manufacturing defects or missing parts, please refer to the documentation included with your kit or contact TAMIYA customer support directly. Keep your proof of purchase for any warranty claims.
Customer Support
For further assistance, technical questions, or inquiries about replacement parts, please visit the official TAMIYA website or contact their customer service department. Contact information can typically be found on the product packaging or the manufacturer's official website.
Official TAMIYA Website: www.tamiya.com


