1. Introduction
Thank you for purchasing the LEXIBOOK Paw Patrol Projector Alarm Clock. This device combines a digital alarm clock with a time projector, night light, and sound effects, designed for children. Please read this manual carefully before use to ensure proper operation and to maximize your enjoyment of the product.
2. Safety Information
- Keep this manual for future reference.
- Do not expose the unit to direct sunlight, heat sources, or excessive moisture.
- Use only the specified battery type (4 x LR6/AA batteries).
- Do not mix old and new batteries, or different types of batteries.
- Remove batteries if the unit will not be used for an extended period.
- This product is not a toy. Adult supervision is recommended for young children.
3. Package Contents
- 1 x LEXIBOOK Paw Patrol Projector Alarm Clock (Model RP500AC)
- 1 x User Manual
4. Product Overview
Familiarize yourself with the various parts and controls of your alarm clock.
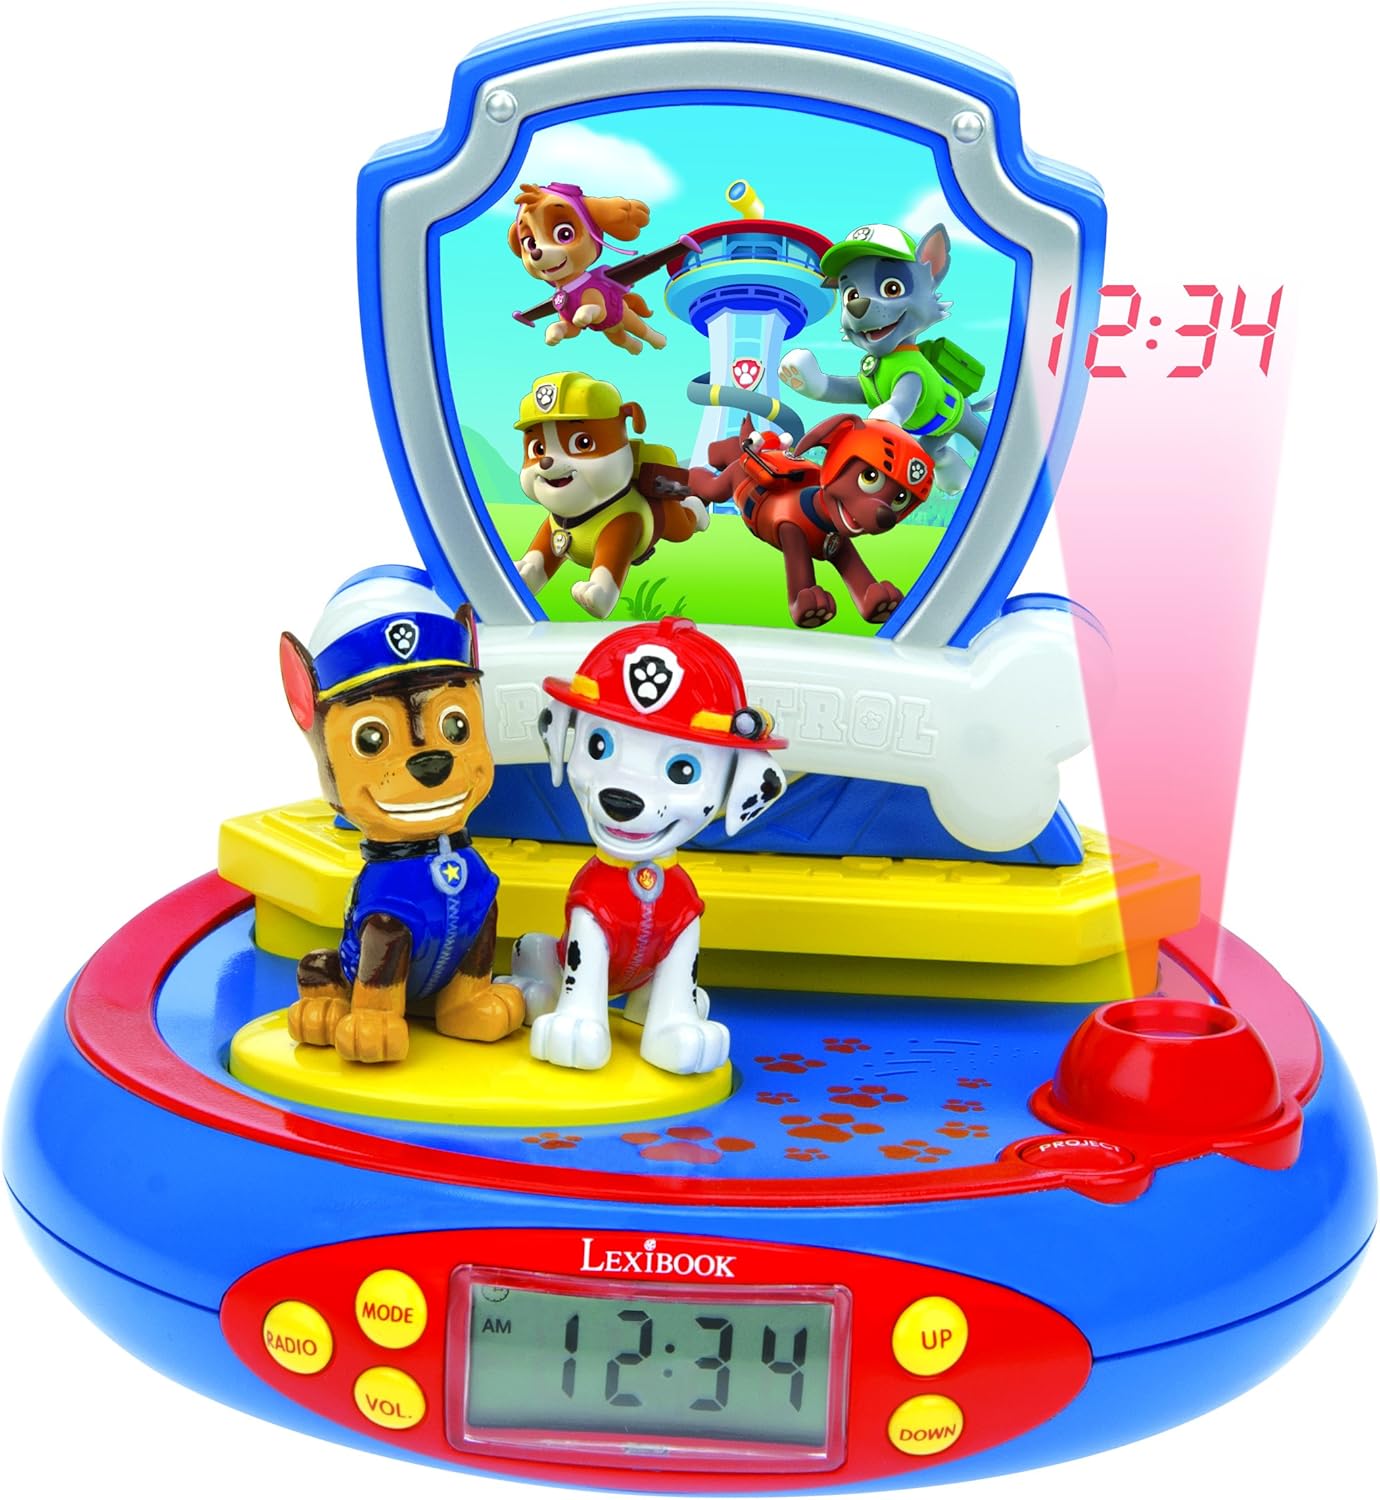
Figure 1: Front view of the Paw Patrol Projector Alarm Clock, highlighting the digital display, character figures (Chase and Marshall), and control buttons.
- Digital LCD Screen: Displays the current time.
- PROJECT Button: Activates the time projection feature.
- MODE Button: Used to switch between time setting, alarm setting, and other functions.
- UP/DOWN Buttons: Adjust time, alarm, and other settings.
- RADIO/VOL Button: (Note: This model does not include a radio function despite some previous descriptions. This button may control volume for sound effects or have no function.)
- Chase and Marshall Figures: Pressing these figures activates sound effects.
- Base: Pressing the base activates the night light function.
5. Setup
5.1 Battery Installation
The alarm clock requires 4 x LR6/AA batteries (not included).
- Locate the battery compartment on the underside of the unit.
- Using a small screwdriver, open the battery compartment cover.
- Insert 4 new LR6/AA batteries, ensuring correct polarity (+/-).
- Replace the battery compartment cover and secure it with the screw.

Figure 2: Rear view of the alarm clock, indicating the battery compartment location.
6. Operating Instructions
6.1 Setting the Time
- Press the MODE button repeatedly until the time display flashes.
- Use the UP and DOWN buttons to adjust the hours.
- Press MODE again to set the minutes, then use UP and DOWN to adjust.
- Press MODE once more to confirm and exit time setting mode.
6.2 Setting the Alarm
- Press the MODE button until the alarm icon (bell symbol) appears and the alarm time flashes.
- Use the UP and DOWN buttons to set the desired alarm hour.
- Press MODE again to set the alarm minutes, then use UP and DOWN to adjust.
- Press MODE to confirm. The alarm is now set.
- To activate/deactivate the alarm, press the MODE button until the alarm time is displayed, then press UP or DOWN to toggle the alarm ON/OFF.
6.3 Snooze Function
When the alarm sounds, press any button (except the alarm off button, if applicable) to activate the snooze function. The alarm will temporarily stop and sound again after a few minutes.
6.4 Time Projection
Press the PROJECT button to project the current time onto the ceiling or a wall. The projection will typically last for a few seconds before automatically turning off. You can press it again to reactivate.
6.5 Sound Effects
Press the Chase or Marshall figures on the alarm clock to activate 4 different Paw Patrol sound effects.
6.6 Night Light Function
Press the base of the alarm clock to switch on a cozy night light. This night light will automatically turn off after approximately 15 minutes.

Figure 3: The alarm clock functioning as a night light in a child's room.
6.7 Product Demonstration Video
Video 1: A demonstration of the LEXIBOOK Paw Patrol Projector Alarm Clock, showcasing its features and operation.
7. Maintenance
7.1 Cleaning
To clean the alarm clock, wipe it with a soft, dry cloth. Do not use abrasive cleaners or immerse the unit in water.
7.2 Battery Replacement
When the display dims or functions become erratic, it is time to replace the batteries. Follow the battery installation steps in Section 5.1.
8. Troubleshooting
- No display or unit not turning on:
- Check if batteries are inserted correctly with proper polarity.
- Replace with fresh batteries.
- Projection is dim or unclear:
- Ensure the room is sufficiently dark.
- Check battery level and replace if low.
- Sound effects not working:
- Ensure batteries are not depleted.
- Check if the figures are pressed firmly.
- Alarm not sounding:
- Verify that the alarm is set and activated (alarm icon visible).
- Check battery level.
9. Specifications
| Brand | LEXiBOOK |
| Model Number | RP500AC (also referred to as RP500PA in some documentation) |
| Display Type | Digital LCD |
| Power Source | 4 x LR6/AA Batteries (not included) |
| Special Features | Alarm, Time Projection, Night Light, Sound Effects, Snooze Function |
| Product Dimensions | 7.09"W x 6.69"H (approx.) |
| Item Weight | 0.4 Kilograms / 14.2 ounces |
10. Warranty & Support
This product comes with a 2-year warranty. For warranty claims or technical support, please refer to the contact information provided with your purchase or visit the official LEXiBOOK website.


