
1. Introduction
This manual provides essential information for the safe and efficient operation, maintenance, and troubleshooting of your BACOENG 3.5CFM Single Stage Rotary Vane HVAC Vacuum Pump, Model P0652. Please read these instructions thoroughly before use and retain for future reference.
Safety Precautions
- Always wear appropriate personal protective equipment, including safety glasses and gloves, when operating the vacuum pump.
- Ensure the pump is placed on a stable, level surface to prevent tipping.
- Operate the pump in a well-ventilated area.
- Do not operate the pump without sufficient vacuum pump oil. Check oil levels before each use.
- Never restart the vacuum pump if it is connected to a system already under full vacuum, unless the pump is specifically designed for such operation.
- Disconnect power before performing any maintenance or repairs.
- Keep children and unauthorized personnel away from the operating area.
2. Product Overview
The BACOENG 3.5CFM Vacuum Pump is a single-stage rotary vane pump designed for various applications, including HVAC/AC refrigeration maintenance, epoxy resin degassing, thermoforming, and vacuum packaging. It features a robust alloy aluminum casing and an oil anti-flow-back design.

Figure 2.1: Key components of the BACOENG 3.5CFM Vacuum Pump. Visible parts include the 1/4" Intake Port, Handle, Oil Filling Cap/Filter, Sight Glass, Oil Drain, Aluminum Oil Tank, Non-Slip Base, Motor, and Fan Cover.
Key Features:
- Oil Anti Flow-Back Design: The gas inlet is engineered to prevent oil from flowing back into the system, protecting connected equipment and hoses from contamination.
- Durable Construction: Features an alloy aluminum casing for enhanced durability and extended service life.
- Efficient Cooling: Equipped with a high-volume cooling fan to maintain optimal operating temperature and ensure efficient, long-term performance.
- Clear Oil Level Indication: A large sight glass with minimum and maximum scales allows for easy monitoring of the oil level, improving operational efficiency and preventing issues.
- Versatile Applications: Suitable for a wide range of tasks including A/C refrigeration maintenance, printing machinery, epoxy resin degassing, thermoforming, and vacuum packaging.

Figure 2.2: Detailed view of the oil sight glass for level monitoring, the built-in fan for heat dissipation, and the reinforced power cord.
3. Setup
Follow these steps to prepare your vacuum pump for first use:
- Unpacking and Inspection: Carefully remove the pump from its packaging. Inspect for any visible damage. Ensure all components, including the vacuum pump oil, are present.
- Add Vacuum Pump Oil: The pump is shipped without oil in the reservoir. Locate the oil filling cap (refer to Figure 2.1). Unscrew the cap and slowly pour the provided vacuum pump oil into the reservoir until the level is between the 'MIN' and 'MAX' marks on the sight glass. Do not overfill. Securely replace the oil filling cap.
- Check for Obstructions: Before initial operation, visually inspect the fan cover area for any foreign objects or plastic debris that may have accumulated during manufacturing or shipping. Remove any obstructions to prevent damage during operation.
- Placement: Position the vacuum pump on a firm, level, and stable surface in a well-ventilated area. Ensure adequate space around the pump for air circulation.
- Electrical Connection: Ensure the ON/OFF switch is in the 'OFF' position. Connect the power cord to a grounded 110V, 60Hz electrical outlet.

Figure 3.1: The pump features an anti-slip bottom for stability, a portable handle for easy transport, and a clearly marked ON/OFF button for power control.
4. Operating Instructions
Once the pump is set up and oil is added, follow these steps for operation:
- Connect to System: Connect the vacuum hose from your application (e.g., HVAC system, vacuum chamber) to the 1/4" SAE inlet port on the vacuum pump. Ensure all connections are tight to prevent leaks.
- Start the Pump: Flip the ON/OFF switch to the 'ON' position. The pump will begin to operate.
- Monitor Operation: Observe the vacuum gauge on your system (if applicable) to monitor the vacuum level. The pump will draw down the system to the desired vacuum.
- Oil Level Check: Periodically check the oil level through the sight glass during operation. If the oil level drops below the 'MIN' mark, turn off the pump, disconnect power, and add more vacuum pump oil.
- Shut Down: Once the desired vacuum is achieved, or when operation is complete, first close the valve to isolate the vacuum pump from the system. Then, turn the ON/OFF switch to the 'OFF' position. Disconnect the power cord.
- Release Vacuum: Slowly release the vacuum in your system as required by your application.
Applications:
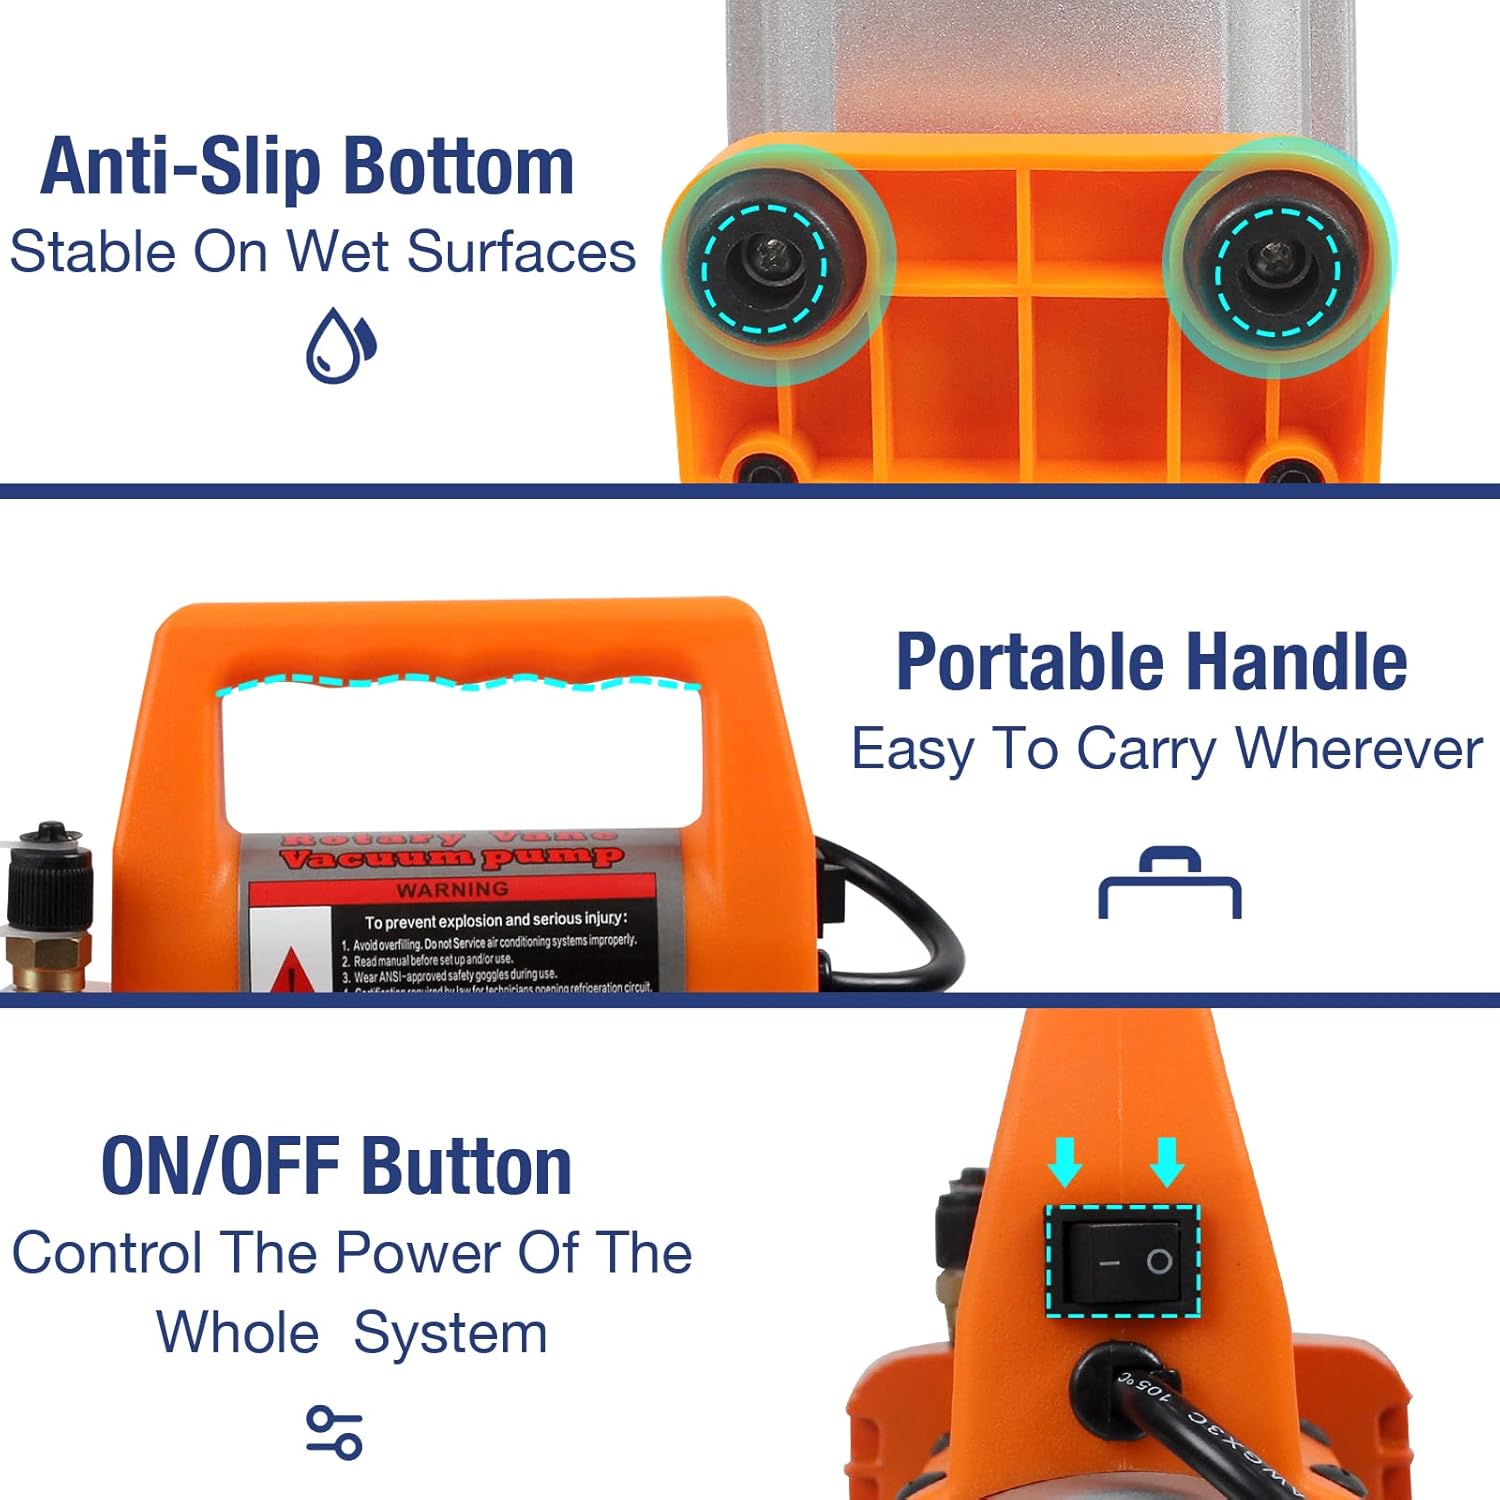
Figure 4.1: The BACOENG vacuum pump is suitable for a wide range of professional and DIY applications.
- HVAC/AC Refrigeration: Essential for evacuating air and moisture from AC systems (R12, R22, R134a, R410a) before recharging with refrigerant.
- Resin Degassing: Used with a vacuum chamber to remove air bubbles from epoxy resins, silicones, and other casting materials, ensuring bubble-free finished products.
- Vacuum Packaging: Can be integrated into vacuum packaging systems for food preservation or other items requiring airtight sealing.
5. Maintenance
Regular maintenance ensures the longevity and optimal performance of your vacuum pump.
- Oil Level Check: Check the oil level before each use. The oil should be clear and between the 'MIN' and 'MAX' marks on the sight glass.
- Oil Change: Vacuum pump oil degrades over time and with use. Change the oil regularly, especially if it appears cloudy, discolored, or contaminated. To change oil, ensure the pump is off and cool. Place a suitable container under the oil drain plug (refer to Figure 2.1). Remove the drain plug and allow all old oil to empty. Replace the drain plug and refill with new vacuum pump oil as described in the Setup section.
- Cleaning: Keep the exterior of the pump clean and free of dust and debris. Ensure the cooling fan and motor vents are unobstructed to prevent overheating.
- Storage: When not in use for extended periods, drain the oil and store the pump in a dry, clean environment.
6. Troubleshooting
Refer to the following table for common issues and their solutions:
| Problem | Possible Cause | Solution |
|---|---|---|
| Pump does not start | No power, faulty switch, motor issue | Check power connection and outlet. Ensure switch is ON. If problem persists, contact support. |
| Pump runs but does not pull vacuum | Low oil level, system leak, clogged intake, internal pump issue | Check oil level and add if necessary. Inspect all hose connections for leaks. Check intake port for obstructions. |
| Smoke or unusual odor during operation | Overheating, contaminated oil, internal component failure | Immediately turn off pump and disconnect power. Allow to cool. Check oil for contamination and change if needed. Ensure ventilation is adequate. If smoke persists, discontinue use and contact support. |
| Grinding noise | Foreign object in fan/motor, worn bearings | Turn off pump and disconnect power. Inspect fan and motor area for debris. If noise continues, contact support. |
| Oil leaks | Loose oil cap, damaged seals, overfilling | Ensure oil filling cap and drain plug are tight. Check oil level to avoid overfilling. Inspect seals for damage. |
7. Specifications
| Specification | Value |
|---|---|
| Model Number | P0652 |
| Voltage | 110V |
| Frequency | 60Hz |
| Power | 1/4 HP (0.25 hp) |
| Pumping Speed (Flow Rate) | 3.5 CFM |
| Ultimate Vacuum | 5 Pa |
| Inlet Port | 1/4 SAE |
| Oil Capacity | 250 ml |
| Motor Speed | 1720 r/min |
| Product Dimensions (L x W x H) | 9.06" x 4.76" x 9.8" |
| Item Weight | 11.9 pounds |
| Material | Aluminum, Glass |

Figure 7.1: The BACOENG 3.5CFM Vacuum Pump with its primary specifications highlighted.
8. Warranty and Support
For warranty information, please refer to the documentation included with your purchase or contact BACOENG customer support directly. If you encounter any issues not covered in this manual or require further assistance, please reach out to the manufacturer's support team.
Manufacturer: Baco Engineering
Brand: BACOENG
