
1. Introduction and Overview
Thank you for choosing the KLH Bassbite-II Powered Subwoofer. This unit is designed to enhance the low-frequency response of your existing audio system, providing deep, rich bass for an immersive listening experience. This manual provides essential information for the safe and effective operation of your subwoofer.
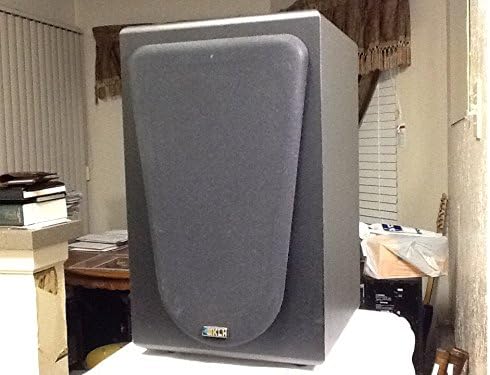
Figure 1.1: Front view of the KLH Bassbite-II Powered Subwoofer with grille.
This image shows the front of the KLH Bassbite-II subwoofer, featuring its dark gray cabinet and a removable front grille that covers the speaker driver. The KLH logo is visible at the bottom of the grille.
2. Important Safety Instructions
Please read and follow all safety instructions before operating the subwoofer to prevent electric shock, fire, or injury.
- Read Instructions: Read all safety and operating instructions before operating the appliance.
- Retain Instructions: Keep the safety and operating instructions for future reference.
- Heed Warnings: Adhere to all warnings on the appliance and in the operating instructions.
- Follow Instructions: Follow all operating and use instructions.
- Water and Moisture: Do not use this apparatus near water.
- Cleaning: Clean only with a dry cloth.
- Ventilation: Do not block any ventilation openings. Install in accordance with the manufacturer's instructions.
- Heat: Do not install near any heat sources such as radiators, heat registers, stoves, or other apparatus (including amplifiers) that produce heat.
- Power Cord Protection: Protect the power cord from being walked on or pinched, particularly at plugs, convenience receptacles, and the point where they exit from the apparatus.
- Lightning: Unplug this apparatus during lightning storms or when unused for long periods of time.
- Servicing: Refer all servicing to qualified service personnel. Servicing is required when the apparatus has been damaged in any way, such as power-supply cord or plug is damaged, liquid has been spilled or objects have fallen into the apparatus, the apparatus has been exposed to rain or moisture, does not operate normally, or has been dropped.
3. Package Contents
Please check the package for the following items:
- KLH Bassbite-II Powered Subwoofer
- Power Cable (attached)
If any items are missing or damaged, please contact your retailer.
4. Setup
4.1. Placement
The placement of your subwoofer can significantly affect its sound performance. Experiment with different locations to find the best bass response for your room.
- Corner Placement: Placing the subwoofer in a corner of the room can often maximize its output and provide the most impactful bass.
- Near Front Speakers: Placing the subwoofer near your main front speakers can help create a more seamless soundstage.
- Avoid Obstructions: Ensure the subwoofer is not placed in an enclosed cabinet or directly against a wall that might block its port (if applicable) or restrict airflow.
4.2. Connections
The KLH Bassbite-II subwoofer offers multiple connection options to integrate with your audio system. Ensure all components are turned off before making any connections.

Figure 4.1: Rear panel of the KLH Bassbite-II Subwoofer.
This image displays the rear panel of the subwoofer, featuring the speaker level inputs/outputs ("FROM AMPLIFIER", "TO SPEAKERS"), RCA low-level inputs, a power switch, and a volume control knob. The attached power cord is also visible.

Figure 4.2: Close-up of the connection panel.
A detailed view of the connection panel, highlighting the speaker wire terminals (red and black clips) for "FROM AMPLIFIER" and "TO SPEAKERS", and the RCA jacks for "LOW LEVEL" input. The "POWER" switch and "VOLUME" knob are also clearly visible.
Option 1: Low-Level (RCA) Connection (Recommended for Receivers with Subwoofer Output)
- Connect an RCA cable from the "SUBWOOFER OUT" or "LFE OUT" jack on your receiver/amplifier to the "LOW LEVEL" (L or R) input on the Bassbite-II subwoofer. If your receiver has a single LFE output, connect it to either the L or R input on the subwoofer.
- Ensure the subwoofer's power switch is in the OFF position.
- Plug the subwoofer's power cord into a standard 120 VAC, 60 Hz electrical outlet.
Option 2: Speaker Level Connection (For Amplifiers without Subwoofer Output)
- Connect speaker wires from the "SPEAKER OUT" terminals of your amplifier/receiver to the "FROM AMPLIFIER" speaker level inputs on the Bassbite-II subwoofer. Ensure correct polarity (+ to + and - to -).
- Connect speaker wires from the "TO SPEAKERS" outputs on the Bassbite-II subwoofer to your main left and right speakers. Again, ensure correct polarity.
- Ensure the subwoofer's power switch is in the OFF position.
- Plug the subwoofer's power cord into a standard 120 VAC, 60 Hz electrical outlet.
5. Operating Instructions
5.1. Powering On/Off
- To turn on the subwoofer, flip the "POWER" switch located on the rear panel to the ON position.
- To turn off the subwoofer, flip the "POWER" switch to the OFF position.
5.2. Adjusting Volume
The "VOLUME" knob on the rear panel controls the output level of the subwoofer.
- Rotate the knob clockwise to increase the volume.
- Rotate the knob counter-clockwise to decrease the volume.
- Start with the volume at a low setting and gradually increase it until the bass blends seamlessly with your main speakers without overpowering them.
6. Maintenance
Proper care will ensure the longevity and performance of your KLH Bassbite-II Subwoofer.
- Cleaning: Use a soft, dry cloth to clean the cabinet. Do not use abrasive cleaners, waxes, or solvents, as they may damage the finish.
- Dust: Regularly dust the subwoofer to prevent accumulation, especially around the rear panel connections and ventilation areas.
- Environment: Avoid exposing the subwoofer to extreme temperatures, humidity, or direct sunlight.

Figure 6.1: Subwoofer with grille removed.
This image shows the KLH Bassbite-II subwoofer with its front grille detached, revealing the bass reflex port located at the bottom of the front baffle. This port helps enhance the low-frequency output.
7. Troubleshooting
If you experience issues with your subwoofer, refer to the following common problems and solutions:
| Problem | Possible Cause | Solution |
|---|---|---|
| No Power | Power cord not connected; Power switch off; Outlet not working. | Ensure power cord is securely plugged into the subwoofer and a working electrical outlet. Flip the power switch to ON. Test the outlet with another device. |
| No Sound | Incorrect connections; Volume too low; Source device not sending signal. | Check all audio connections (RCA or speaker wires) for proper seating and polarity. Increase the subwoofer's volume knob. Ensure your receiver/amplifier is powered on and sending an audio signal. |
| Distorted or Boomy Sound | Volume too high; Improper placement; Source signal distortion. | Decrease the subwoofer's volume. Experiment with different placement locations (refer to Section 4.1). Check if the audio source itself is distorted. |
| Humming Noise | Ground loop; Nearby electrical interference. | Try plugging the subwoofer into a different electrical outlet (preferably on a different circuit). Ensure all audio cables are high quality and properly shielded. Avoid running audio cables parallel to power cables. |
8. Specifications
| Model Name | Bassbite-II |
| Model Number | E206825 (KLH Bassbite-II) |
| Brand | KLH |
| Speaker Type | Powered Subwoofer |
| Maximum Speaker Output Power | 40 Watts |
| Power Source | Corded Electric (120 VAC, 60 Hz) |
| Dimensions (H x W x D) | 38.1 cm x 22.9 cm x 26.7 cm (15 inches x 9 inches x 10.5 inches) |
| Weight | 6.35 kg (14 lbs) |
| Compatible Devices | Video Game Consoles, Home Theater Systems, Televisions |
9. Warranty and Support
For specific warranty information, please refer to the documentation provided by your retailer at the time of purchase. Manufacturer warranty details are typically included with new products.
If you require technical support or have questions regarding your KLH Bassbite-II Subwoofer, please contact your original retailer or visit the official KLH Audio Systems website for support resources.
Note: The product description mentions a "Two weeks Return/Refund Guarantee" which refers to a seller's return policy and not a manufacturer's warranty.