1. Product Overview
The EPEVER 30A MPPT Solar Charge Controller (Model Tracer3210AN) is an advanced Maximum Power Point Tracking (MPPT) charge controller for off-grid photovoltaic systems. It maximizes the energy from solar panels to efficiently charge your battery system. Key features include:
- High Efficiency: Features advanced MPPT technology with up to 99.5% tracking efficiency and a peak conversion efficiency of 98%.
- Multi-Battery Support: Compatible with various Deep Cycle battery options including Sealed, Gel, Flooded, and Lithium batteries.
- Reliable Protection: Built-in protections against reverse polarity, overcharging, over-discharging, overload, short-circuiting, and reverse current.
- Smart Control: Supports PC software, mobile application (APP), and MT-50 remote meter for monitoring and settings adjustment.
- User-Friendly: Equipped with a backlight LCD screen for displaying system information and working conditions, and offers multiple load control methods.

Figure 1.1: EPEVER 30A MPPT Solar Charge Controller (Tracer3210AN) and included accessories.
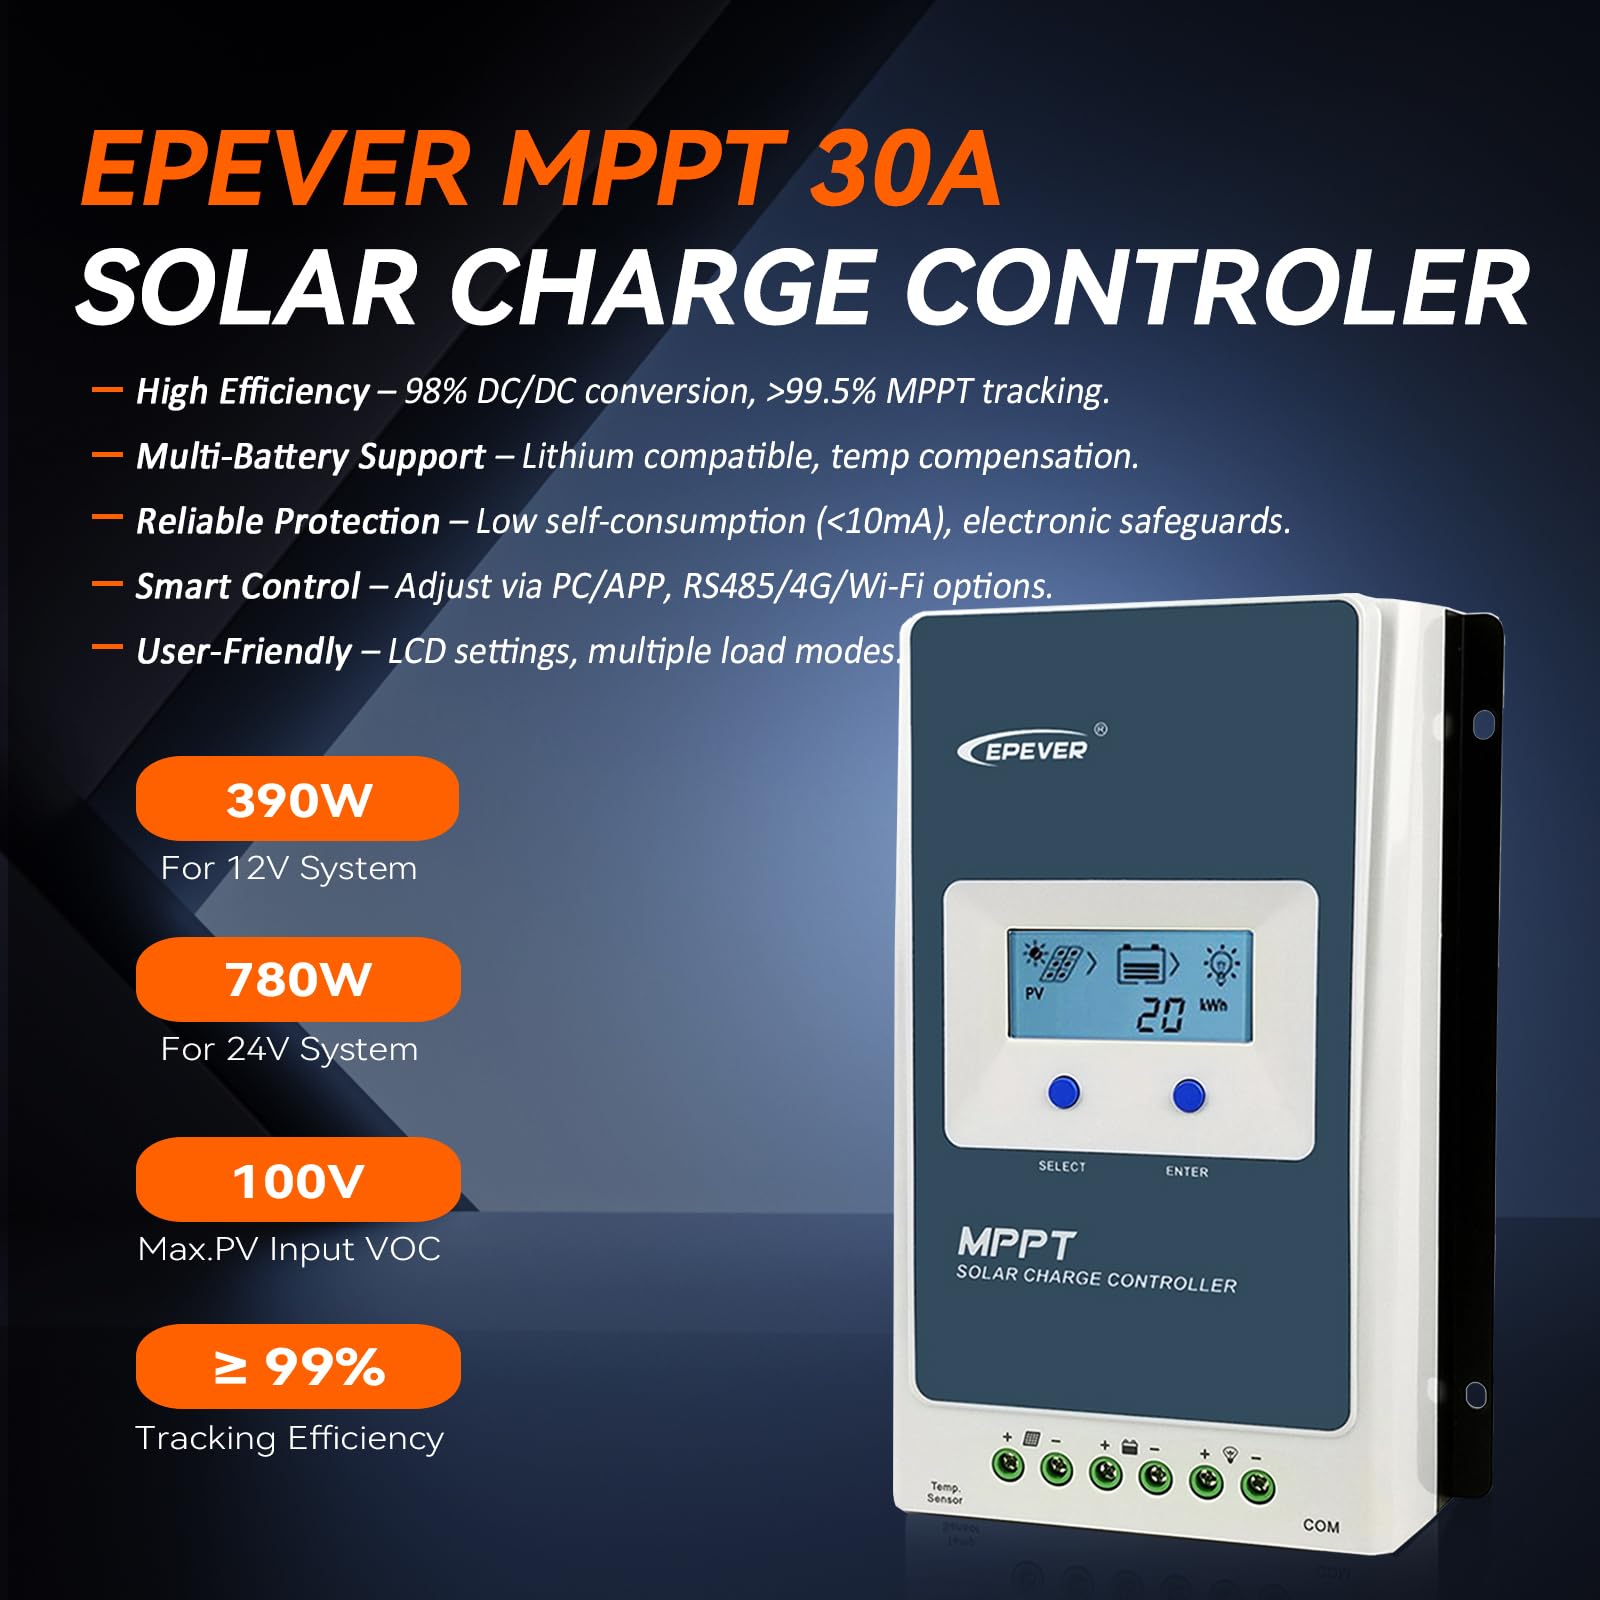
Figure 1.2: Overview of the EPEVER MPPT 30A Solar Charge Controller's main features.
2. Installation and Setup
Proper installation is crucial for the safe and efficient operation of your solar charge controller. Please follow these guidelines carefully:
- Mounting: Mount the controller vertically on a flat, non-flammable surface in a well-ventilated area, away from direct sunlight, high temperatures, and water. Ensure sufficient clearance around the controller for heat dissipation.
- Wiring Sequence: Connect the system in the following order to prevent damage:
- Connect the battery first.
- Connect the load (if applicable).
- Connect the PV array (solar panels).
Important: Disconnect the system in the reverse order (PV array, then load, then battery) when performing maintenance or removal.
- Wire Sizing: Use appropriate wire gauges for your system voltage and current to minimize voltage drop and ensure safety. Refer to the specifications section for recommended wire sizes.
- Grounding: This is a negative grounded solar regulator. Ensure proper grounding according to local electrical codes.
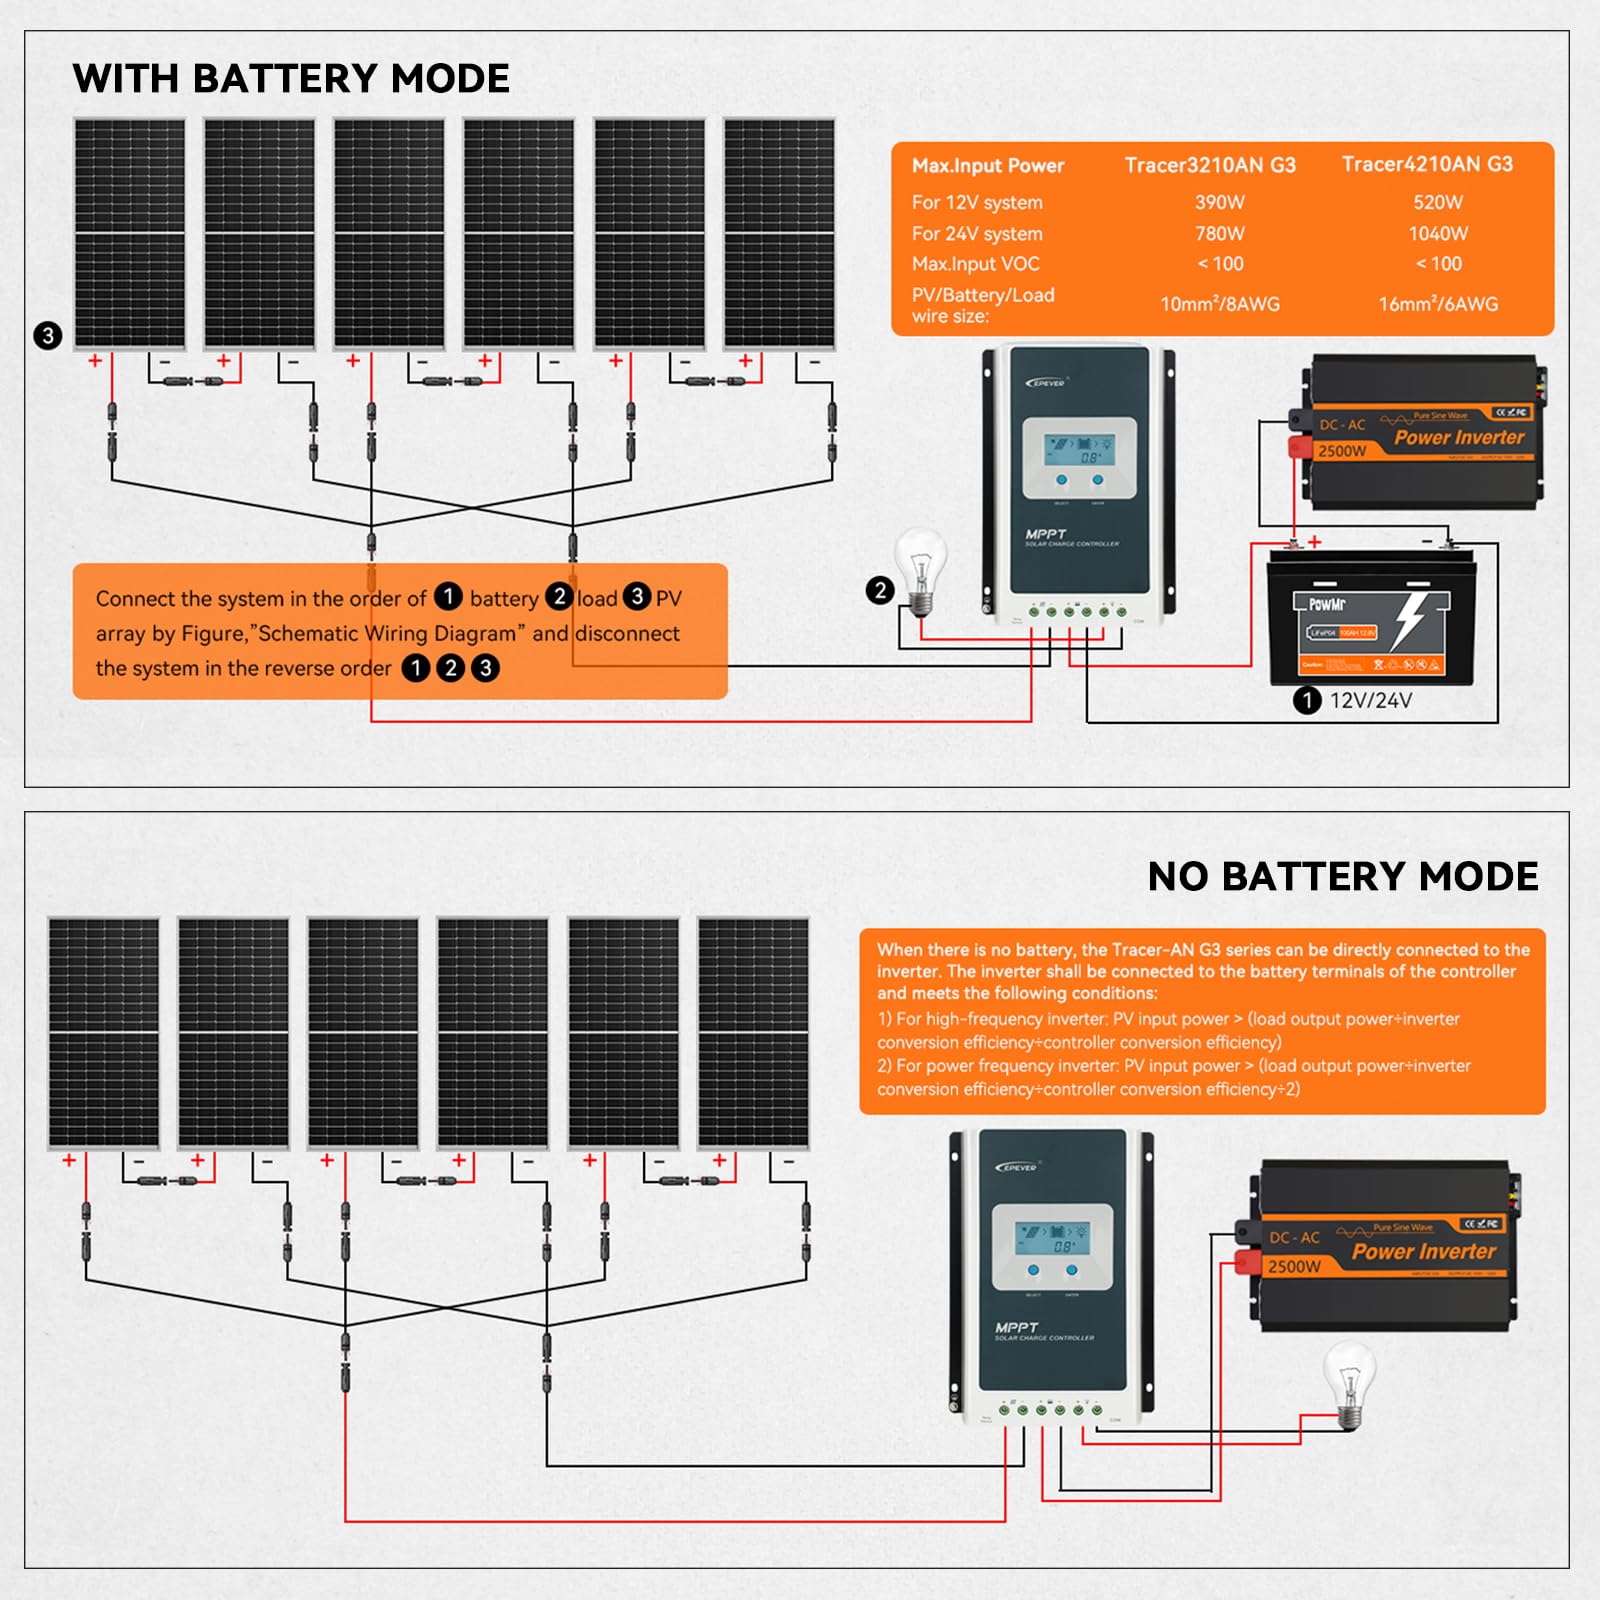
Figure 2.1: Schematic Wiring Diagram for systems with a battery.

Figure 2.2: Schematic Wiring Diagram for systems operating without a battery (direct to inverter).
3. Operating Instructions
The Tracer3210AN controller features an intuitive LCD display and can be configured via the device itself or through external software/apps.
3.1 LCD Display and Buttons
The integrated LCD screen provides real-time data on system status, battery voltage, charging current, and more. Use the "SELECT" and "ENTER" buttons to navigate menus and adjust settings directly on the controller.
3.2 Battery Settings
The controller supports various battery types. It is crucial to select the correct battery type for optimal charging and battery longevity. The charging process includes 4 stages: Bulk, Boost, Float, and Equalization.
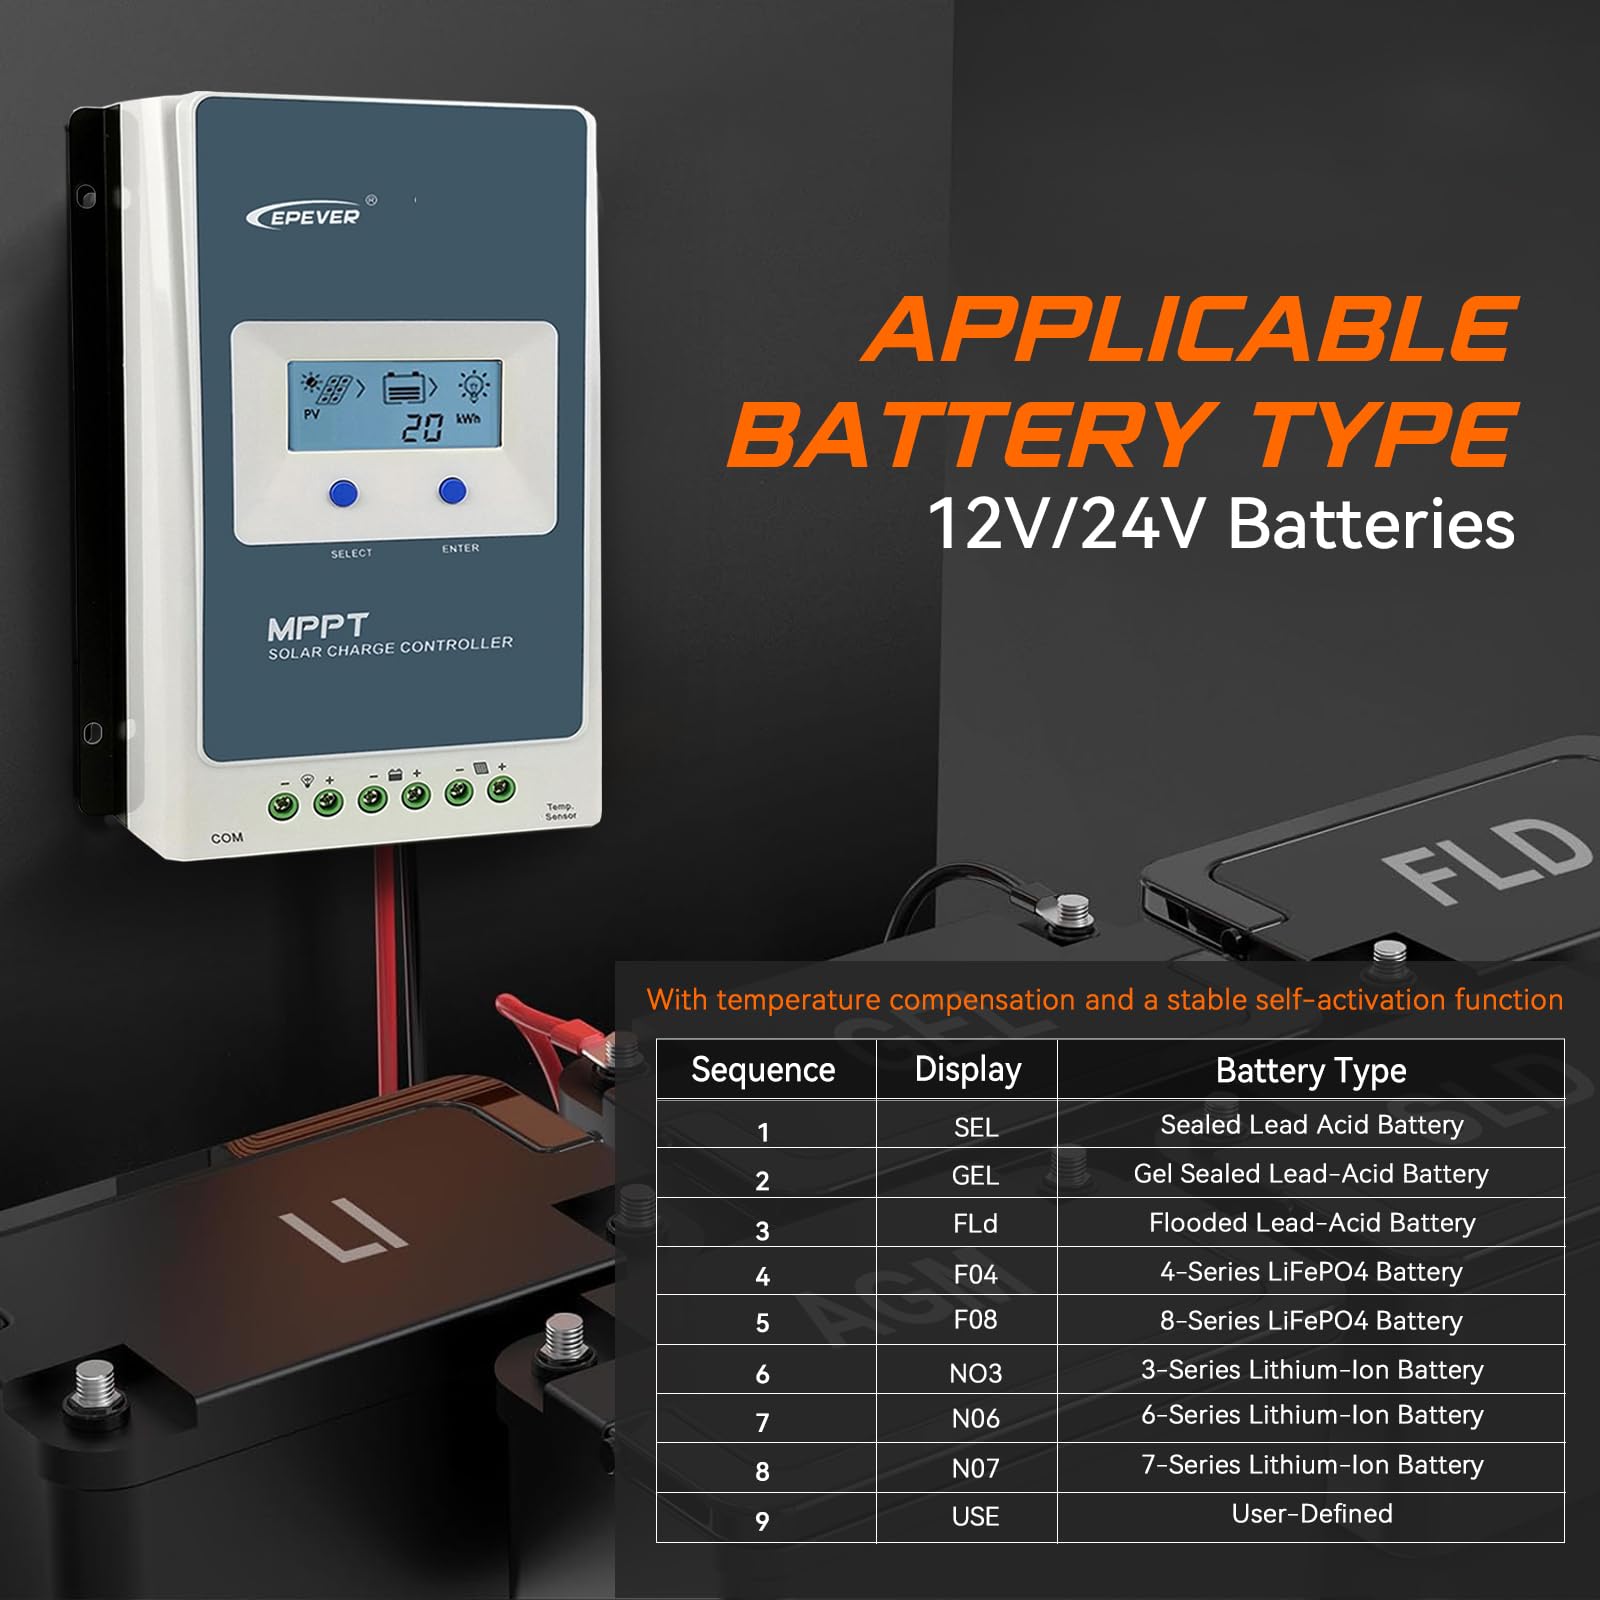
Figure 3.1: Applicable Battery Types and their corresponding display codes.
For Lithium batteries, you can select predefined types (e.g., 4-Series LiFePO4) or use the "User-Defined" option for custom voltage parameters. This can often be done via the mobile app or PC software for more precise control.
3.3 Load Control Modes
The controller offers multiple load work modes to manage power output to your connected devices:
- Manual Mode: Load is turned on/off manually.
- Timer Mode (1-14 Hrs): Load operates for a set duration after sunset.
- Always-On Mode: Load is continuously powered.
- Auto-On/Off Mode (Dawn-to-Dusk Mode): Load automatically turns on at dusk and off at dawn.
- Test Mode: For testing load functionality.
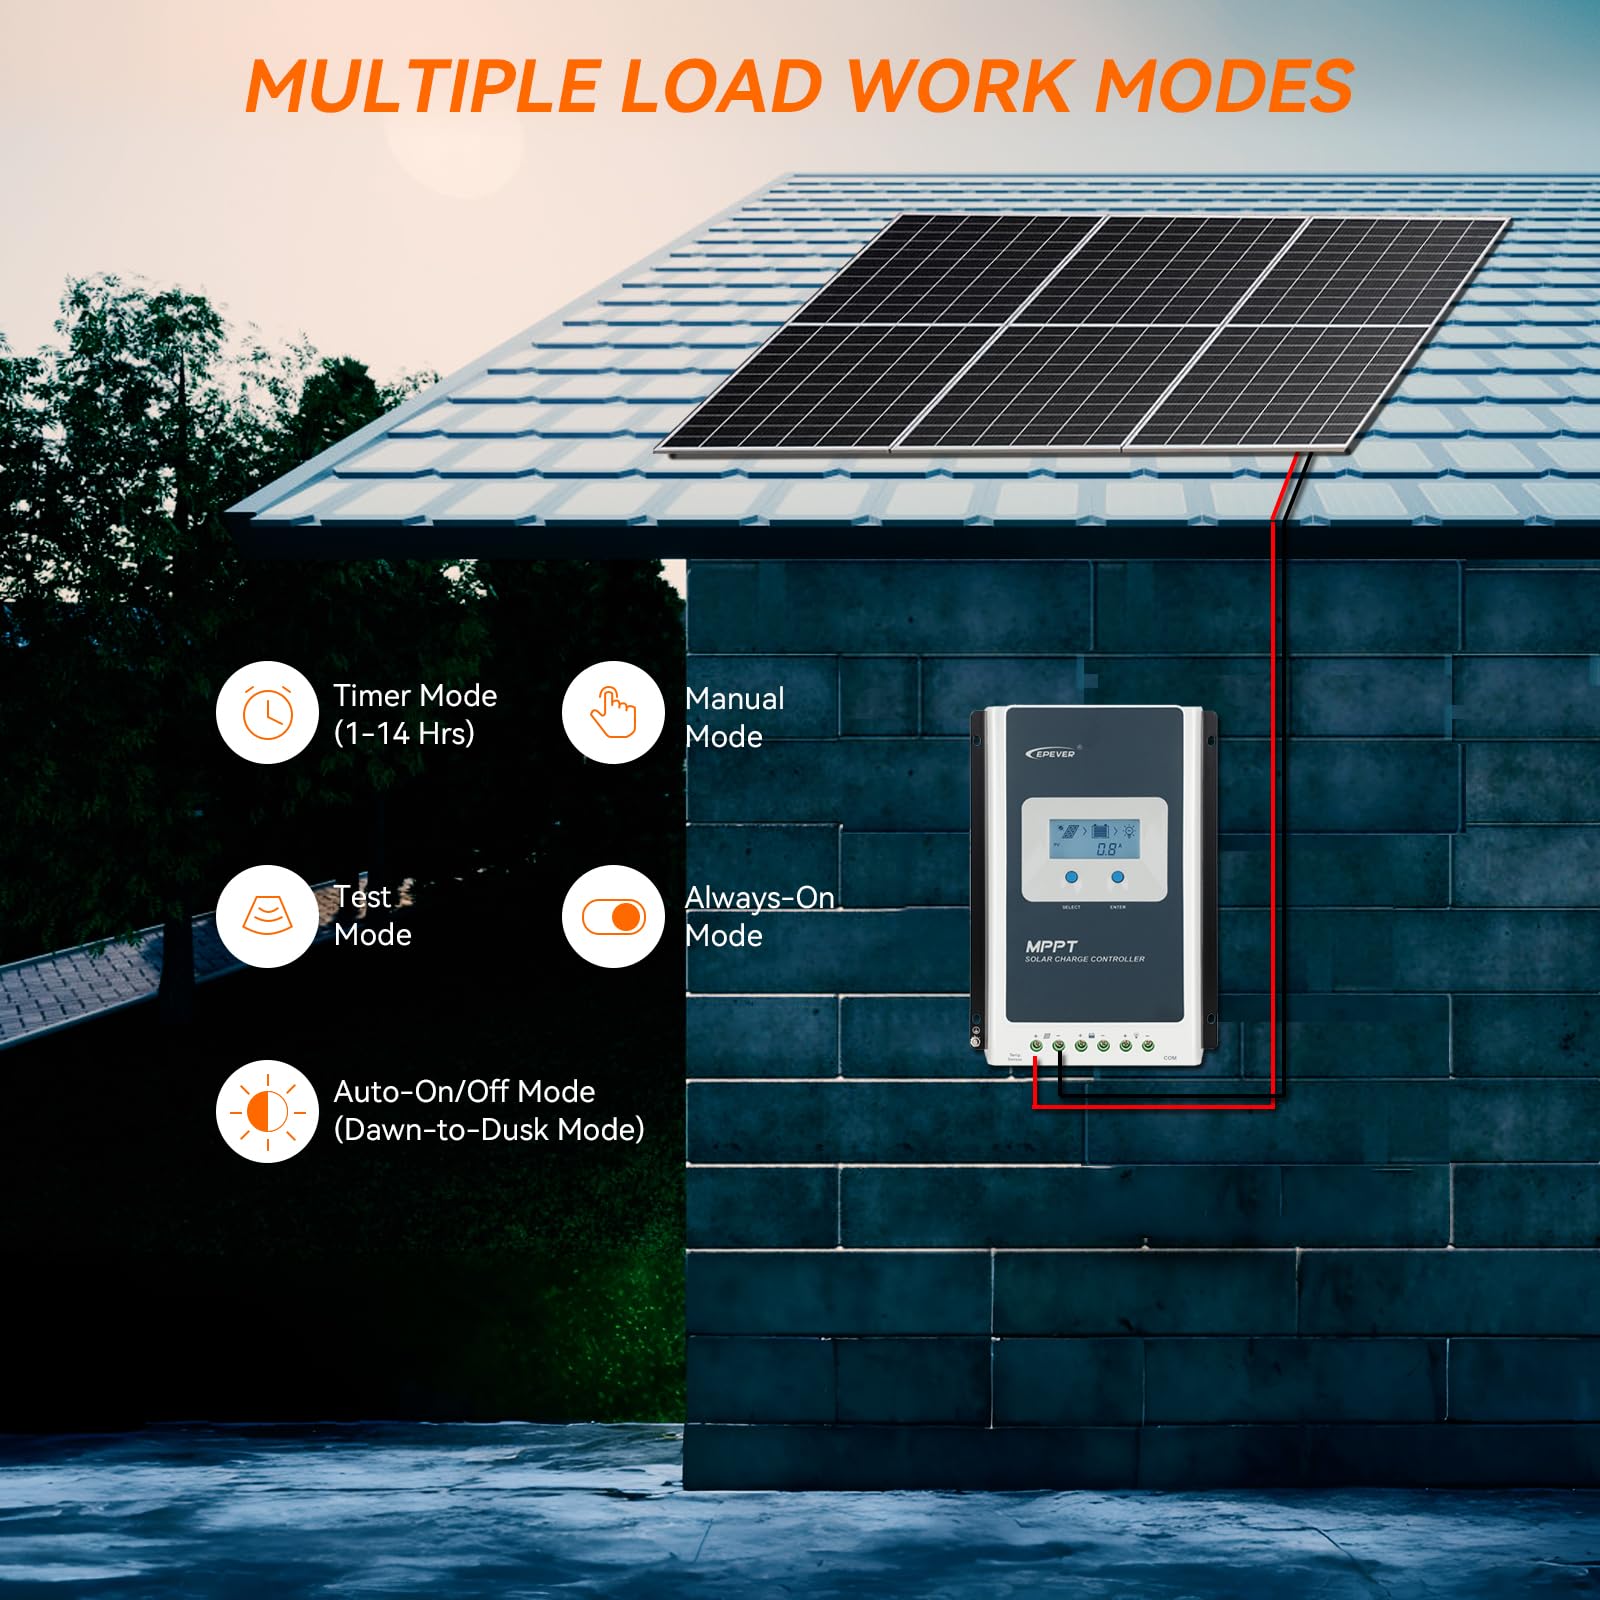
Figure 3.2: Overview of available load work modes.
3.4 Remote Monitoring and Control
The EPEVER Tracer3210AN supports wireless monitoring and control via Bluetooth or WiFi using compatible accessories (sold separately), allowing you to manage your solar system from your smartphone or PC.

Figure 3.3: Wireless monitoring and control setup.
4. Maintenance
Regular maintenance ensures the longevity and optimal performance of your EPEVER solar charge controller. Perform the following checks periodically:
- Cleanliness: Keep the controller clean and free from dust and debris. Ensure ventilation openings are not blocked.
- Connections: Periodically check all wiring connections for tightness and corrosion. Loose connections can cause overheating and damage.
- Battery Health: Monitor battery voltage and health regularly. Ensure battery terminals are clean and secure.
- Environmental Conditions: Ensure the controller is operating within its specified temperature range and is protected from moisture.
5. Troubleshooting
If you encounter issues with your EPEVER solar charge controller, refer to the following general troubleshooting tips. For more detailed guidance, consult the official Troubleshooting Guide PDF available from the manufacturer.
- No Display/Power: Check battery connections and voltage. Ensure the battery is adequately charged.
- No Charging: Verify PV array connections and ensure solar panels are receiving sufficient sunlight. Check for any shading or damage to the panels. Confirm correct battery type settings.
- Load Not Working: Check load connections and ensure the load is not exceeding the controller's rated current. Verify the selected load control mode.
- Error Codes: Consult the user manual or troubleshooting guide for specific error codes displayed on the LCD or app.
For advanced troubleshooting or issues not resolved by these steps, please contact EPEVER customer support.
6. Specifications
| Attribute | Value |
|---|---|
| Model Number | Tracer 3210AN |
| Item Weight | 4.62 pounds (2.1 Kilograms) |
| Product Dimensions | 6.46 x 2.17 x 8.99 inches |
| Display Type | LCD |
| Voltage | 12V/24V Auto Work |
| Material | Aluminum |
| Max. PV Input VOC | 100V |
| Rated Charge Current | 30A |
| Battery Types Supported | Sealed, Gel, Flooded, LiFePO4, Li-NiCoMn (User-defined available) |
7. Warranty and Support
The EPEVER 30A MPPT Solar Charge Controller (Tracer3210AN) comes with a Manufacturer warranty for 2 years from the date of purchase.
For technical support, warranty claims, or further assistance, please contact EPEVER customer service through their official channels. You may also refer to the User Manual (PDF) or Troubleshooting Guide (PDF) for comprehensive information.


