
1. Product Overview
The QIBOX Tempered Glass Screen Protector is designed to safeguard your compatible Sony Alpha camera's LCD screen from scratches, impacts, and daily wear. Made from high-quality tempered glass, it offers superior protection while maintaining optical clarity and touch sensitivity.

Image: Three QIBOX tempered glass screen protectors packaged together, indicating a multi-pack.
2. Package Contents
Each QIBOX screen protector package includes the following items:
- 3 x Tempered Glass Screen Protectors
- 3 x Wet Cleaning Wipes (labeled '1')
- 3 x Dry Cleaning Wipes (labeled '2')
- 1 x Installation Instructions (printed on packaging)
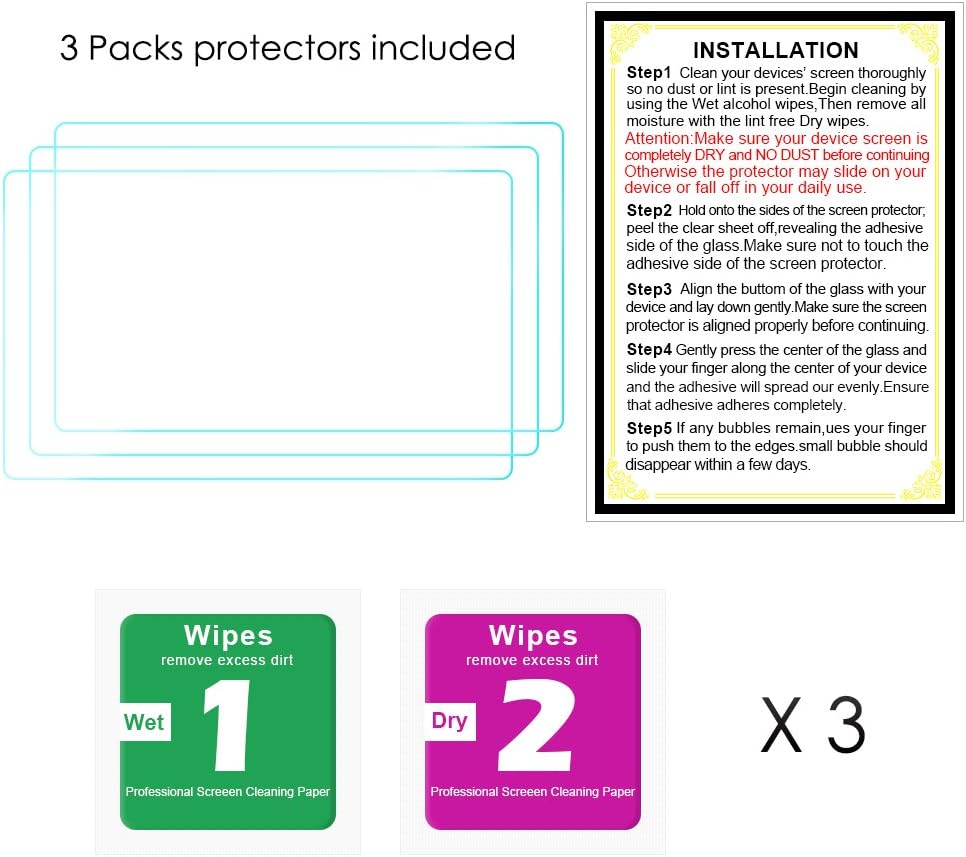
Image: A visual representation of the package contents, showing three screen protectors, three sets of wet and dry wipes, and a small card with installation instructions.
3. Compatibility
This screen protector is compatible with the following Sony Alpha camera models:
- Sony Alpha A6600
- Sony Alpha A6100
- Sony Alpha A6400
- Sony Alpha A6300
- Sony Alpha A6000
- Sony Alpha A5000
- Sony NEX-7
- Sony NEX-6
- Sony NEX-6L
- Sony NEX-5
- Sony NEX-3N
NOTE: This screen protector is NOT compatible with Sony Alpha A6500 or A5100 models.
4. Features
- 9H Hardness & Shatter-Proof: Constructed from premium tempered glass, this protector offers 9H hardness, providing robust protection against high impact drops, scratches, scrapes, and bumps. It is designed to absorb impact, protecting your camera's original screen.
- High Transparency & HD Clarity: With over 99% light transmittance, the protector ensures high-definition clear viewing, preserving the original display quality of your camera screen.
- Hydrophobic Oleophobic Coating: The surface features a hydrophobic and oleophobic coating that repels sweat and oil residue from fingerprints, making the screen easy to clean and maintaining high-sensitivity touch response.
- Touch Friendly: Designed to maintain the original touch sensitivity of your camera's screen, ensuring smooth and responsive interaction.
- Bubble-Free Adhesive: The advanced adhesive technology ensures a bubble-free installation when applied correctly.
- 2.5D Rounded Edges: Features smoothly finished 2.5D rounded edges for a comfortable feel and seamless integration with your camera's screen.
- Waterproof: Provides a layer of protection against water splashes and moisture.

Image: A graphic illustrating the shatter-proof and 9H hardness feature, showing a hammer impacting the screen protector, which cracks but keeps the underlying camera screen intact.

Image: A camera screen displaying a vibrant image of a skier, highlighting the 99.99% HD clarity provided by the screen protector.

Image: Water droplets beading on the screen protector, illustrating its oleophobic and anti-fingerprint properties.

Image: A finger interacting with the camera screen, demonstrating the touch-friendly nature of the protector.

Image: A close-up of the screen protector with water droplets, emphasizing its waterproof characteristic.
5. Setup and Installation
Follow these steps carefully for a successful, bubble-free installation:
- Prepare Your Workspace: Choose a clean, dust-free environment. Good lighting is recommended to spot any dust particles.
- Clean the Camera Screen: Use the provided wet cleaning wipe (labeled '1') to thoroughly clean your camera's LCD screen. Ensure all grime, oils, and smudges are removed.
- Dry the Screen: Immediately use the dry cleaning wipe (labeled '2') to dry the screen completely. Ensure no moisture or lint remains. For best results, use a bright light to check for any remaining dust.
- Remove Original Protective Layer (if applicable): If your camera has a thin, original protective film, peel it off carefully before proceeding.
- Dust Removal: Use a dust-absorber sticker (if included) to pick up any remaining dust particles from the screen surface. Gently dab the sticker across the screen.
- Align the Protector: Carefully peel off the protective film from the adhesive side of the tempered glass screen protector. Hold the protector by its edges to avoid touching the adhesive. Align the protector precisely with your camera's screen, paying close attention to the bottom and right edges for optimal fit.
- Apply the Protector: Once aligned, gently lay the screen protector down onto the camera screen. The adhesive will automatically begin to spread.
- Remove Bubbles: If any small bubbles appear, gently press them towards the edges of the screen with a clean, soft cloth or your finger. Most small bubbles will disappear within a few days.

Image: A camera screen with blue guidelines, illustrating the importance of centering the screen protector correctly to cover the entire screen area.

Image: A four-step diagram illustrating the installation process: A) Clean the camera screen, B) Use dust-absorber, C) Tear the protective layer, D) Automatic adsorption and gentle press.
6. Operating (Usage)
Once installed, the QIBOX Tempered Glass Screen Protector operates seamlessly with your camera. It maintains the original clarity and touch responsiveness of your LCD screen, allowing for normal camera operation, menu navigation, and image review without interference.
7. Maintenance
To ensure the longevity and clarity of your screen protector:
- Wipe the screen protector regularly with a clean, soft microfiber cloth to remove fingerprints and smudges.
- For stubborn marks, lightly dampen a microfiber cloth with water or a screen-safe cleaning solution.
- Avoid using harsh chemicals or abrasive materials, as these can damage the oleophobic coating.
- While the protector is waterproof, avoid prolonged exposure to water or submerging your camera.
8. Troubleshooting
- Bubbles After Installation: Small bubbles are common immediately after installation. Most will dissipate naturally within 24-48 hours. For larger bubbles, gently lift the nearest edge of the protector slightly and re-apply, pushing the bubble out with a soft cloth. Ensure no dust is trapped underneath.
- Dust Under the Protector: If dust particles are trapped, carefully lift the protector from the nearest corner using a piece of tape. Use another piece of tape to gently dab and remove the dust from both the screen and the adhesive side of the protector. Re-apply slowly.
- Protector Not Sticking Properly: Ensure the screen was thoroughly cleaned and dried before application. If the edges are not adhering, gently press them down. If the issue persists, the protector may have been damaged during a previous attempt to remove or reposition it. Use one of the spare protectors provided.
- Reduced Touch Sensitivity: Verify that the screen protector is correctly installed and there are no air gaps. If the issue persists, ensure your camera's touch settings are configured correctly.
9. Specifications
| Brand | QIBOX |
| Model Number | QBX-C1 |
| Material | Tempered Glass |
| Item Hardness | 9H |
| Clarity | 99.99% |
| Special Features | Scratch Resistant, Waterproof |
| Screen Surface Description | Glossy |
| Unit Count | 3.0 Count |
| Product Dimensions | 1"L x 1"W (Note: This dimension may refer to packaging or a generic measurement, actual screen fit is precise for listed models) |
10. Warranty and Customer Support
QIBOX provides a 2-year warranty for this product, covering manufacturing defects. For any inquiries, concerns, or issues regarding your QIBOX glass screen protector, please contact our responsive customer service team. We aim to address your concerns and provide a solution within 24 hours.
Please refer to your purchase documentation or the QIBOX official website for contact details.