
1. Introduction
This manual provides instructions for the installation, operation, and maintenance of the XENOCAM 16 Channel 12V DC 10 Amp Distributed Power Supply Box. This unit is designed to provide stable 12V DC power to multiple security cameras, DVRs, and other compatible low-voltage devices, ensuring reliable performance for your surveillance system.
2. Safety Information
- Indoor Use Only: This power supply box is designed for indoor use in dry environments. Do not expose it to rain, moisture, or extreme temperatures.
- Electrical Safety: Ensure the power supply is disconnected from the AC mains before performing any installation, wiring, or maintenance. Only qualified personnel should perform electrical connections.
- Ventilation: Do not block the ventilation openings on the unit. Adequate airflow is necessary to prevent overheating.
- Overload Protection: Do not exceed the total output current of 10 Amps. Overloading can damage the unit and connected devices.
- Fuse Replacement: Use only fuses of the specified type and rating (1.5A glass tube resettable fuses) for replacement.
- Secure Mounting: Mount the unit securely to a stable surface to prevent accidental falls or damage.
3. Package Contents
Verify that all items are present in the package:
- XENOCAM 16 Channel 12V DC 10 Amp Distributed Power Supply Box
- AC Power Cord
- Keys for the lockable enclosure
- Spare Glass Tube Fuses (1.5A)
- Mounting Screws and Wall Anchors

Figure 3.1: Power Supply Box and Accessories
4. Product Overview
The XENOCAM 16 Channel Power Supply Box provides a centralized power solution for various 12V DC devices. It features individual LED power indications for each channel and resettable glass tube fuses for protection.

Figure 4.1: Front View of the Power Supply Box

Figure 4.2: Internal Components Layout

Figure 4.3: Product Dimensions
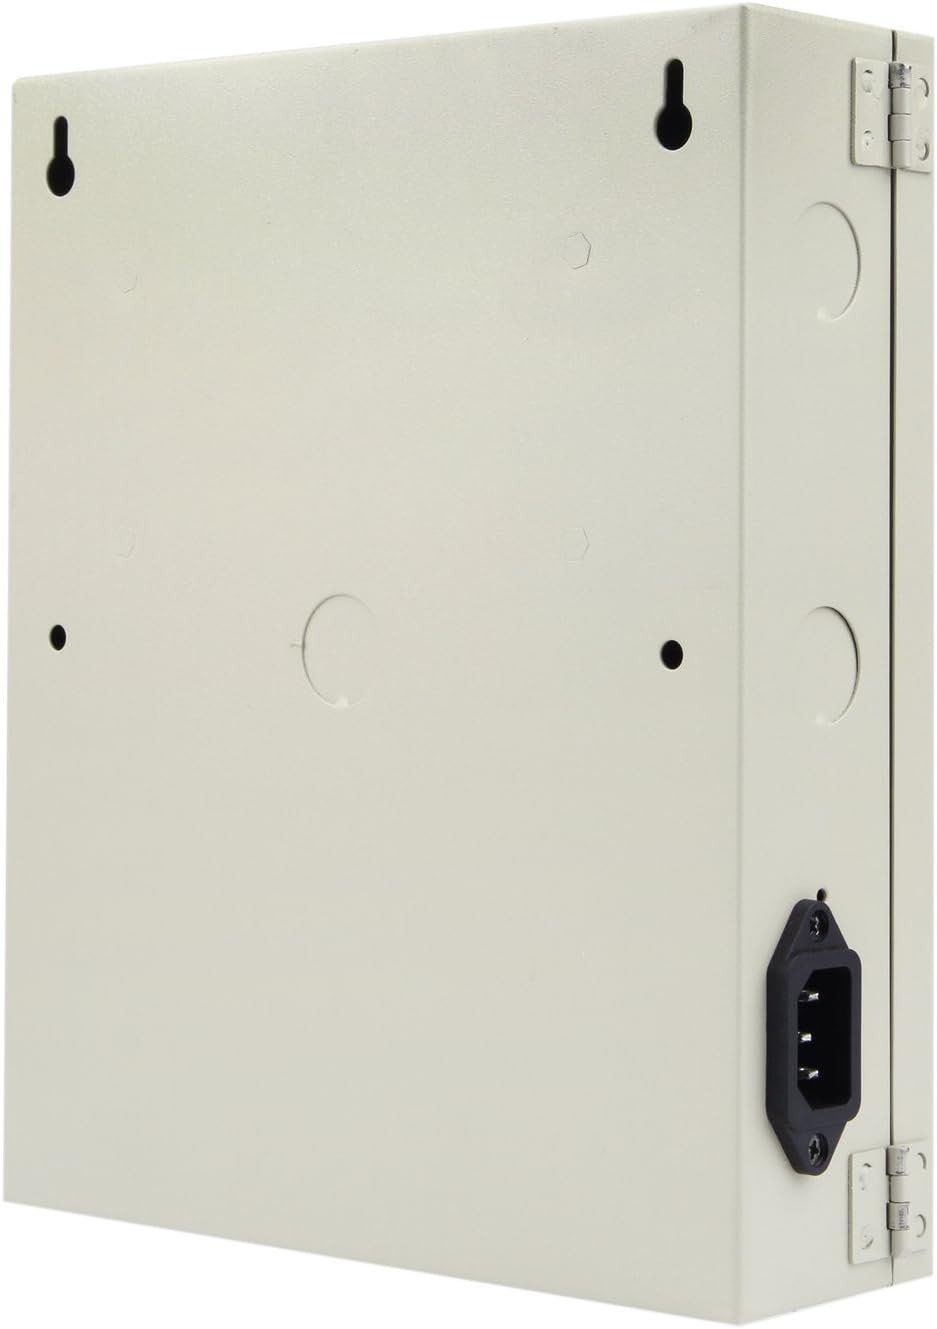
Figure 4.4: Rear Panel with AC Input
5. Setup
Follow these steps to set up your power supply box:
- Mounting: Choose a suitable indoor location for mounting the power supply box. Use the provided screws and wall anchors to securely fasten the unit to a wall or other stable surface. Ensure there is adequate space around the unit for ventilation and cable management.
- AC Power Connection: Connect the supplied AC power cord to the AC input port on the rear of the power supply box (refer to Figure 4.4). Plug the other end into a standard AC 100-240V, 50/60Hz electrical outlet. Do not apply power yet.
- DC Device Connection: Open the front cover of the power supply box using the provided keys. Locate the 16 individual DC output terminal blocks. Connect the positive (+) and negative (-) wires from each 12V DC device (e.g., CCTV camera, DVR) to the corresponding terminals on the power supply box. Ensure correct polarity to prevent damage to your devices.
- Fuse Installation (if necessary): Each output channel is protected by a 1.5A glass tube fuse. Ensure all fuses are properly seated in their holders. Spare fuses are provided for replacement.
- Secure Enclosure: Once all connections are made, close the front cover and lock it using the provided keys to prevent unauthorized access and protect internal components.
- Power On: Plug the AC power cord into the wall outlet. The power indicator LEDs on the front panel and for each active channel should illuminate, indicating proper operation.
6. Operating Instructions
The XENOCAM power supply box operates automatically once connected to AC power and DC devices.
- Power Indication: The main power LED on the front panel indicates that the unit is receiving AC power and providing DC output. Each individual channel also has an LED indicator that illuminates when power is supplied to that specific channel.
- Overload Protection: If a channel experiences an overload or short circuit, its corresponding fuse will blow, and the LED for that channel will turn off. This protects both the power supply and the connected device.
- Key Lock: The front cover can be locked to secure the internal wiring and prevent tampering.
7. Maintenance
- Cleaning: Periodically clean the exterior of the unit with a soft, dry cloth. Do not use liquid cleaners or solvents. Ensure ventilation openings are free from dust and debris.
- Fuse Replacement: If a channel's LED is off and the connected device is not receiving power, the fuse for that channel may have blown. Disconnect the power supply from the AC mains. Open the enclosure, carefully remove the blown fuse, and replace it with a new 1.5A glass tube resettable fuse. Close and lock the enclosure before restoring AC power.
- Cable Inspection: Regularly inspect all power and device cables for any signs of wear, damage, or loose connections.
8. Troubleshooting
| Problem | Possible Cause | Solution |
|---|---|---|
| No power to any device, main LED off. | No AC power input. | Check AC power cord connection and wall outlet. Ensure the outlet is live. |
| One device not receiving power, its channel LED off. | Blown fuse for that channel; device fault. | Disconnect power, check and replace the fuse for the affected channel. Inspect the connected device for short circuits or damage. |
| All devices intermittently lose power. | Total current draw exceeds 10A; overheating. | Reduce the number of connected devices or replace high-current devices with lower-power alternatives. Ensure adequate ventilation around the unit. |
| Enclosure cannot be opened. | Keys misplaced or lock jammed. | Ensure correct key is used. If jammed, contact support. |
9. Specifications
| Feature | Specification |
|---|---|
| Input Voltage | AC 100-240V, 50/60 Hz |
| Output Voltage | DC 12V (Adjustable 11.8V-14V) |
| Total Output Current | 10 Amps |
| Number of Channels | 16 Channels |
| Fuse Type | Glass Tube Resettable |
| Fuse Rating (per channel) | 1.5 Amps |
| Output Wattage | 120 Watts |
| Cooling Method | Air |
| Operating Temperature | -20°C to 60°C |
| Storage Temperature | -40°C to 85°C |
| Item Dimensions (L x W x H) | 7.87" x 9.37" x 2.36" (20 cm x 23.8 cm x 6 cm) |
| Item Weight | 3.87 pounds (1.76 kg) |
| Compatible Devices | CCTV Camera, PTZ, IR Illuminators, Video Process, Access Control |
10. Warranty Information
For specific warranty details regarding your XENOCAM 16 Channel 12V DC 10 Amp Distributed Power Supply Box, please refer to the warranty card included with your purchase or contact the manufacturer directly. Warranty terms typically cover defects in materials and workmanship under normal use.
11. Support
If you require technical assistance or have questions not covered in this manual, please contact XENOCAM customer support through their official website or the retailer from whom you purchased the product. Please have your product model number (HT1216-10A) and purchase information ready when contacting support.