1. Introduction
The Oreck Commercial XL Pro 5 Super Compact Canister Vacuum is engineered for powerful and versatile cleaning in various environments. Its lightweight and portable design, combined with extended reach capabilities and a comprehensive accessory pack, makes it ideal for both commercial and home use. This manual provides essential information for the safe and effective operation, maintenance, and troubleshooting of your vacuum cleaner.
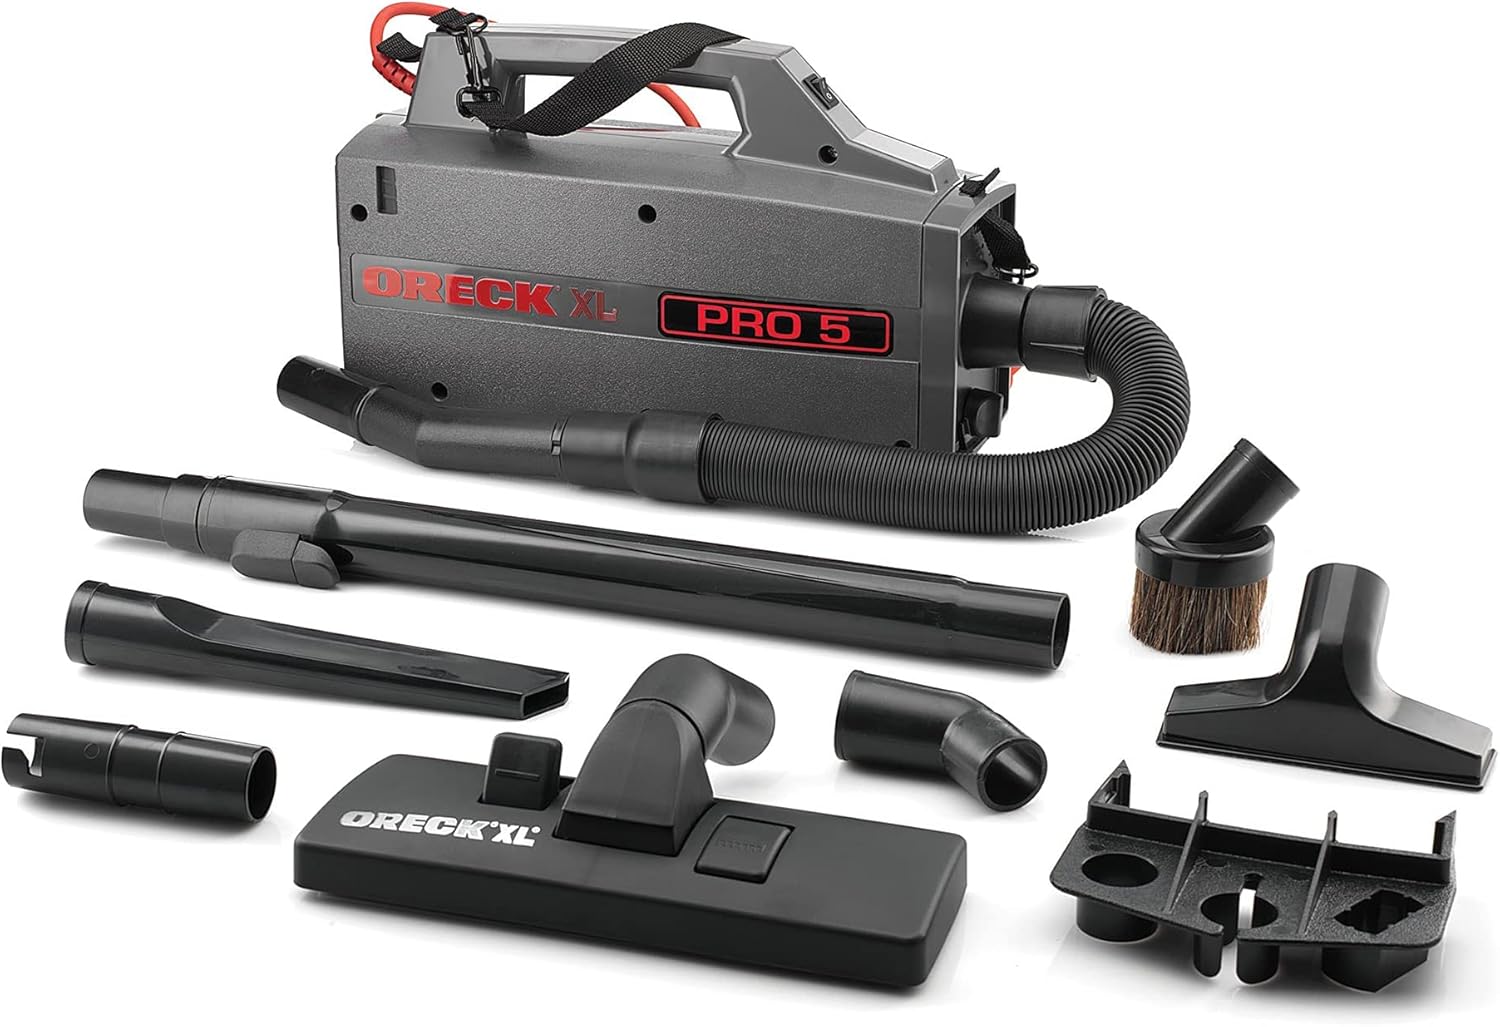
Figure 1: Oreck Commercial XL Pro 5 Super Compact Canister Vacuum Cleaner with all included attachments.
2. What's Included
Your Oreck Commercial XL Pro 5 Super Compact Canister Vacuum package should contain the following components:
- Oreck Commercial XL Pro 5 Canister Vacuum Unit
- Flexible Hose
- Telescopic Wand
- Upholstery Tool
- Dusting Brush
- Floor Cleaning Nozzle (with hard floor and carpet settings)
- Crevice Tool
- Universal Adapter
- Detachable Accessory Caddy
- Carrying Strap
- Filter Bag (pre-installed or included separately)

Figure 2: The Oreck XL Pro 5 features a long, durable power cord for extended reach.
3. Setup
Before using your Oreck Commercial XL Pro 5, ensure all components are present and properly assembled.
- Unpacking: Carefully remove all contents from the packaging. Retain packaging for future storage or transport.
- Filter Bag Installation: Open the filter bag compartment (typically located at the hose connection point). Insert a new filter bag, ensuring it is securely seated. Close the compartment.
- Hose Attachment: Connect the flexible hose to the vacuum unit's intake port. Ensure it clicks securely into place.
- Wand and Accessory Attachment: Select the desired cleaning attachment (e.g., floor cleaning nozzle, crevice tool, dusting brush) and firmly attach it to the end of the telescopic wand.
- Carrying Strap (Optional): If desired, attach the carrying strap to the designated loops on the vacuum unit for shoulder-mounted operation.

Figure 3: The compact design allows for easy attachment of the hose and accessories.
4. Operating Instructions
4.1 Powering On/Off
Plug the power cord into a suitable electrical outlet. Locate the power switch on the top of the vacuum unit. Flip the switch to the "ON" position to start the vacuum. Flip it to the "OFF" position to turn it off.
4.2 Using the Floor Cleaning Nozzle
The floor cleaning nozzle is designed for both hard floors and carpets. It features a lever or button to retract or extend bristles.
- For Hard Floors: Ensure the bristles are retracted (flush with the nozzle) to prevent scratching and optimize suction on hard surfaces.
- For Carpets: Extend the bristles by pressing the lever/button. This helps agitate carpet fibers for deeper cleaning.
4.3 Using Specialized Attachments
The Oreck XL Pro 5 comes with various attachments for specific cleaning tasks:
- Upholstery Tool: Ideal for cleaning furniture, curtains, and car interiors.
- Dusting Brush: Use for delicate surfaces, blinds, lampshades, and vents.
- Crevice Tool: Perfect for reaching tight spaces, corners, and along edges.
- Universal Adapter: Allows for compatibility with various other cleaning tools.
To use an attachment, simply remove the current attachment from the telescopic wand (or directly from the hose if preferred) and firmly attach the desired tool.
4.4 Portability and Reach
The lightweight design and long 30-ft. power cord provide excellent maneuverability. Utilize the carrying strap for hands-free portability, allowing you to clean stairs, high-up areas, or vehicle interiors with ease. The stretch hose further extends your reach for detailed cleaning in difficult-to-access spots.
5. Maintenance
Regular maintenance ensures optimal performance and extends the life of your Oreck Commercial XL Pro 5.
5.1 Replacing the Filter Bag
The filter bag should be replaced when it is full or when suction power noticeably decreases. Refer to the indicator on your vacuum, if present, or visually inspect the bag.
- Disconnect Power: Always unplug the vacuum from the electrical outlet before performing any maintenance.
- Open Compartment: Locate and open the filter bag compartment.
- Remove Old Bag: Carefully remove the full filter bag. Dispose of it according to local regulations.
- Install New Bag: Insert a new Oreck-compatible filter bag, ensuring it fits snugly and seals properly.
- Close Compartment: Securely close the filter bag compartment.
5.2 Cleaning Attachments and Hose
Periodically check the hose and attachments for blockages. Clear any debris to maintain strong suction. Wipe down attachments with a damp cloth as needed.
5.3 Exterior Cleaning
Wipe the exterior of the vacuum unit with a soft, damp cloth. Do not use harsh chemicals or abrasive cleaners.
6. Troubleshooting
| Problem | Possible Cause | Solution |
|---|---|---|
| Vacuum does not turn on. | Not plugged in; power switch off; circuit breaker tripped. | Ensure cord is securely plugged in; turn power switch on; check household circuit breaker. |
| Loss of suction. | Full filter bag; clogged hose/attachment; motor filter dirty. | Replace filter bag; clear any blockages; clean/replace motor filter (if applicable). |
| Unusual noise. | Blockage in hose/nozzle; foreign object in fan chamber. | Inspect and clear blockages; contact customer support if noise persists. |
7. Specifications
- Brand: Oreck
- Model Name: XL Pro 5 Canister Vacuum
- Model Number: BB900-DGR
- Product Dimensions: 13.5"L x 5.25"W x 8"H
- Item Weight: 5 pounds
- Capacity: 1.25 Quarts
- Wattage: 480 watts
- Amperage: 4 Amps
- Hose Length: 5 Feet
- Noise Level: 80 dB
- Filter Type: Cloth
- Power Source: Corded Electric
- Color: Black
- Indoor/Outdoor Usage: Indoor
8. Warranty and Support
Warranty Description: This product comes with a 1-year commercial warranty.
For detailed warranty information, service, or to purchase replacement parts and accessories, please refer to the official Oreck website or contact Oreck customer support.
You can also download the official User Manual (PDF) for more in-depth information: Download User Manual


