Introduction
This manual provides essential information for the safe and efficient operation, installation, and maintenance of your Maxima 600L Commercial Freezer. Please read these instructions thoroughly before using the appliance and retain them for future reference. Proper use and maintenance will ensure optimal performance and longevity of your freezer.

Image: Front view of the Maxima 600L Commercial Freezer with its door closed, showcasing its stainless steel exterior and compact design on casters.
Safety Instructions
- Ensure the appliance is connected to a properly grounded electrical outlet with the correct voltage (230 Volts).
- Do not operate the freezer with a damaged power cord or plug. Contact qualified service personnel for repairs.
- Keep ventilation openings clear of obstructions. Adequate airflow is crucial for efficient operation and to prevent overheating.
- Do not store explosive substances or flammable propellants in this appliance.
- This appliance is intended for commercial use only.
- Always unplug the freezer before cleaning or performing any maintenance.
- Do not touch cold surfaces with wet or damp hands, as skin may stick to extremely cold surfaces.
- Ensure the freezer is placed on a stable, level surface to prevent tipping.
Setup
1. Unpacking
Carefully remove all packaging materials. Inspect the freezer for any shipping damage. Report any damage to your supplier immediately.
2. Placement
- Place the freezer on a firm, level surface capable of supporting its weight (125 kg) when fully loaded.
- Ensure there is adequate space (at least 10 cm) around the back and sides of the unit for proper ventilation. Avoid placing the freezer near heat sources or in direct sunlight.
- The freezer is equipped with casters for easy movement. Ensure the casters are locked once the unit is in its final position to prevent accidental movement.
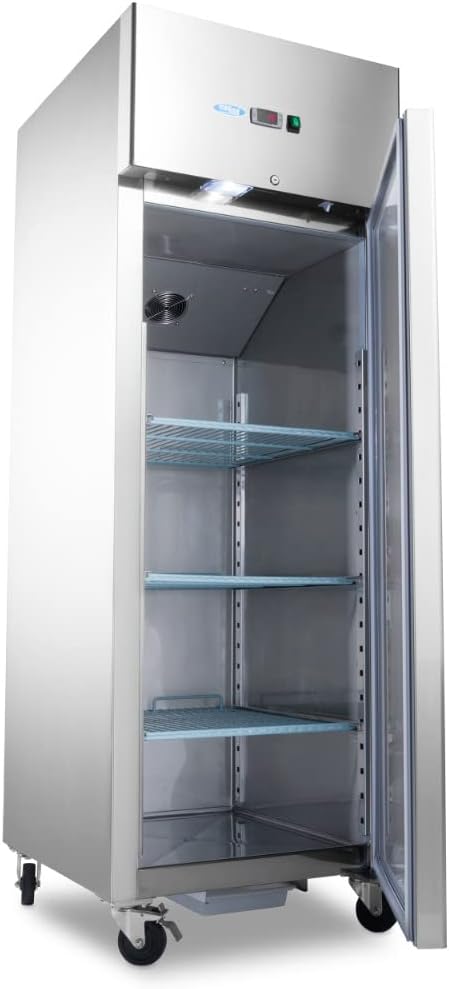
Image: The Maxima 600L Commercial Freezer with its door open, revealing the spacious interior and three adjustable wire shelves.
3. Initial Cleaning
Before first use, clean the interior and exterior of the freezer with a mild detergent and warm water. Rinse thoroughly and dry completely.
4. Shelf Installation
The freezer comes with three adjustable shelves (2/1 GN compatible). Install the shelves at desired heights by placing them on the support rails inside the cabinet. Ensure shelves are securely seated before loading products.
5. Power Connection
After placement and cleaning, plug the freezer into a dedicated 230 Volt, grounded electrical outlet. Allow the unit to stand for at least 2 hours before powering on to allow refrigerants to settle.
Operating Instructions
1. Powering On/Off
Locate the power switch, typically near the digital control panel. Press the switch to turn the unit on. The digital display will illuminate, indicating the current internal temperature.

Image: A close-up view of the freezer's control panel, featuring a digital temperature display (Dixell controller) and a green illuminated power switch.
2. Temperature Control
The freezer is equipped with a digital temperature controller (e.g., Dixell). To adjust the temperature:
- Press the "SET" button. The current set point temperature will flash.
- Use the up (▲) and down (▼) arrow buttons to adjust the desired temperature.
- Press "SET" again to confirm the new temperature setting.
Allow several hours for the freezer to reach the set temperature before loading products.
3. Loading the Freezer
Distribute products evenly on the shelves. Do not overload shelves or block the internal air circulation fan. Ensure there is space for air to circulate around items for efficient freezing.
4. Door Operation and Lock
The freezer door is designed for a tight seal. Ensure the door closes completely after each use. The unit is equipped with a lock for security. Use the provided keys to lock or unlock the door as needed.

Image: A detailed view of the freezer's integrated door lock, with keys inserted, providing security for stored contents.
Maintenance
1. Regular Cleaning
- Interior: Clean the interior regularly with a mild, non-abrasive cleaner and warm water. Rinse and dry thoroughly to prevent odors and maintain hygiene.
- Exterior: Wipe down the stainless steel exterior with a soft cloth and a suitable stainless steel cleaner.
- Door Seals: Inspect and clean door gaskets frequently. Ensure they are free of food debris and remain pliable for an effective seal. A damaged seal can lead to inefficient operation.

Image: A close-up shot highlighting the robust and clean door seal of the Maxima freezer, essential for maintaining internal temperature.
2. Condenser Coil Cleaning
The condenser coils, located at the back or bottom of the unit, should be cleaned every 3-6 months. Dust and debris on the coils reduce efficiency and can lead to compressor failure. Use a brush or vacuum cleaner to gently remove accumulated dirt. Always unplug the unit before cleaning the condenser coils.
3. Defrosting
This commercial freezer typically features an automatic defrost system. However, if excessive ice build-up occurs, a manual defrost may be necessary. To manually defrost:
- Unplug the unit.
- Remove all contents and store them in another freezer.
- Leave the door open to allow ice to melt naturally. Do not use sharp objects or heating devices to speed up defrosting, as this can damage the unit.
- Once defrosted, clean and dry the interior thoroughly before restarting.
Troubleshooting
Before contacting service, review the following common issues and solutions:
| Problem | Possible Cause | Solution |
|---|---|---|
| Freezer not cooling |
|
|
| Excessive noise |
|
|
| Door not sealing properly |
|
|
If the problem persists after attempting these solutions, contact qualified service personnel.
Specifications
- Brand: Maxima
- Model: MK-09400005
- Capacity: 600 Liters
- Dimensions (L x W x H): 68 x 56.4 x 139 cm
- Weight: 125 kg
- Voltage: 230 Volts
- Power: 600 Watts
- Shelves: 3 adjustable (2/1 GN compatible)
- Features: Digital temperature control, internal lighting, door lock, casters.
Warranty and Support
For warranty information or technical support, please refer to the documentation provided at the time of purchase or contact your Maxima product supplier. Ensure you have your model number (MK-09400005) and purchase date available when seeking support.


