Introduction
Thank you for purchasing the Trevi RR 501 BT Portable Bluetooth, USB, SD, MP3 Stereo Boombox. This manual provides essential information for the safe and efficient use of your new device. Please read these instructions carefully before operating the unit and retain them for future reference.
Safety Information
- Do not expose this appliance to rain or moisture.
- Do not block any ventilation openings.
- Ensure the power cord is not pinched or walked on.
- Only use attachments/accessories specified by the manufacturer.
- Unplug the appliance during lightning storms or when unused for long periods.
- Refer all servicing to qualified service personnel.
- Do not open the unit casing; there are no user-serviceable parts inside.
Package Contents
Please check that the following items are included in your package:
- Trevi RR 501 BT Boombox Unit
- AC Power Cable
- User Manual (this document)
Product Overview
Familiarize yourself with the main components of your Trevi RR 501 BT Boombox.
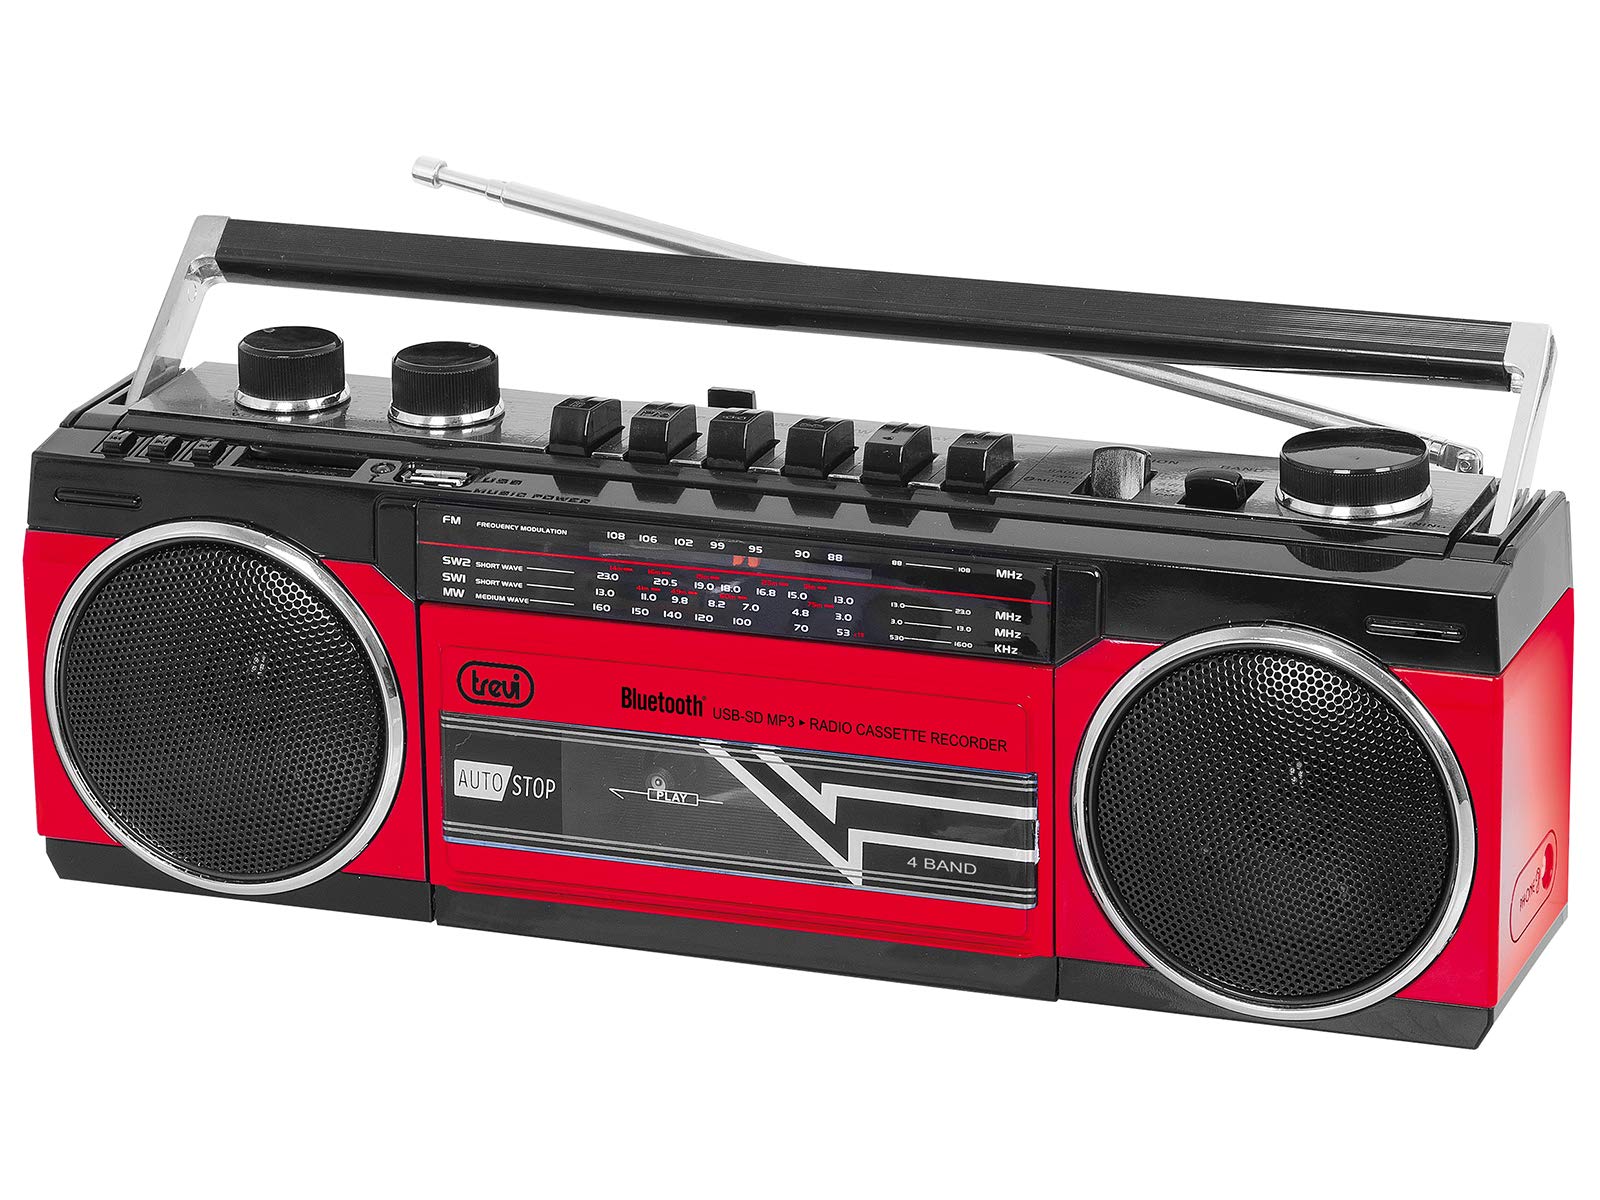
Figure 1: Front view of the Trevi RR 501 BT Boombox, showing the dual speakers, control panel, and cassette deck.

Figure 2: Angled view of the Trevi RR 501 BT Boombox, highlighting the side profile and handle.
Key Components:
- Speakers: Two integrated stereo speakers.
- Control Panel: Buttons for playback, mode selection, and tuning.
- Volume Knob: Adjusts audio output level.
- Tuning Knob: For radio frequency selection.
- Mode Selector: Switches between Radio, Bluetooth, USB, SD, and Cassette modes.
- Cassette Deck: For playing and recording audio cassettes.
- USB Port: For USB flash drive playback.
- SD Card Slot: For SD card playback.
- Antenna: Telescopic antenna for FM radio reception.
- Power Input: For connecting the AC power cable.
- Battery Compartment: (Located on the bottom/rear) For optional battery operation.
Setup
Power Connection:
- AC Power: Insert the AC power cable into the AC input jack on the back of the unit, then plug the other end into a standard wall outlet.
- Battery Power (Optional): Open the battery compartment cover (usually on the bottom or rear). Insert the required number of D-size batteries (not included), ensuring correct polarity (+/-). Close the compartment cover securely.
Note: When using AC power, batteries are automatically disconnected. Remove batteries if the unit will not be used for an extended period.
Operating Instructions
Powering On/Off:
To turn the unit on, rotate the Volume Knob clockwise until you hear a click. To turn off, rotate the Volume Knob counter-clockwise until it clicks off.
Radio Operation (FM):
- Turn on the unit.
- Set the Mode Selector to "RADIO".
- Extend the telescopic antenna for optimal reception.
- Rotate the Tuning Knob to select your desired FM station.
- Adjust the Volume Knob to your preferred listening level.
Bluetooth Connection:
- Turn on the unit.
- Set the Mode Selector to "BT" (Bluetooth). The unit will enter pairing mode, indicated by a flashing LED.
- On your Bluetooth-enabled device (e.g., smartphone, tablet), enable Bluetooth and search for available devices.
- Select "Trevi RR 501 BT" from the list of devices.
- Once paired, the LED indicator will stop flashing and remain solid. You can now play audio from your device through the boombox.
USB/SD Playback:
- Turn on the unit.
- Insert a USB flash drive into the USB Port or an SD card into the SD Card Slot. Ensure the media contains MP3 audio files.
- Set the Mode Selector to "USB/SD". The unit will automatically begin playing the first compatible audio file.
- Use the playback control buttons (e.g., Play/Pause, Next, Previous) on the unit to manage your audio.
Cassette Playback:
- Turn on the unit.
- Press the STOP/EJECT button on the cassette deck to open the cassette compartment.
- Insert an audio cassette with the open edge facing upwards and the tape side facing you. Close the compartment door.
- Set the Mode Selector to "TAPE".
- Press the PLAY button to start playback.
- Use the REWIND and FAST FORWARD buttons to navigate the tape.
- Press STOP/EJECT to stop playback and open the compartment.
Cassette Recording:
- Insert a blank cassette into the cassette deck.
- Select the desired audio source (Radio, Bluetooth, USB, SD) using the Mode Selector.
- Start playback of the source audio.
- Press the RECORD button (usually red) on the cassette deck. The PLAY button will also engage. Recording will begin.
- To stop recording, press the STOP/EJECT button.
Maintenance
- Cleaning: Use a soft, dry cloth to clean the exterior of the unit. Do not use abrasive cleaners or solvents.
- Cassette Deck Care: Periodically clean the tape heads and pinch rollers with a cotton swab lightly dampened with isopropyl alcohol.
- Storage: When not in use for extended periods, store the unit in a cool, dry place, away from direct sunlight and extreme temperatures. Remove batteries if applicable.
Troubleshooting
| Problem | Possible Cause | Solution |
|---|---|---|
| No power | Power cable not connected; Batteries depleted or incorrectly inserted. | Check AC power connection; Replace batteries or ensure correct polarity. |
| Poor radio reception | Antenna not extended; Weak signal. | Fully extend the telescopic antenna; Reposition the unit for better signal. |
| Bluetooth not pairing | Unit not in BT mode; Device too far; Already paired with another device. | Ensure mode is set to BT; Move device closer; Disconnect from other devices. |
| USB/SD not playing | Incorrect mode; Incompatible file format; Corrupted media. | Set mode to USB/SD; Ensure files are MP3; Try different USB/SD media. |
| Cassette playback issues | Cassette inserted incorrectly; Tape heads dirty. | Re-insert cassette correctly; Clean tape heads and pinch rollers. |
Specifications
| Brand | Trevi |
| Model Number | 0RR50102 |
| Connectivity Technology | Bluetooth, USB |
| Speaker Type | Stereo |
| Dimensions (L x W x H) | 50 x 50 x 28 centimeters |
| Power Source | AC |
| Item Weight | 1.25 Kilograms |
| Output Power | 6 Watts |
| Color | Red |
| Style | Retro |
Warranty and Support
For warranty information and technical support, please refer to the warranty card included with your product or visit the official Trevi website. Information regarding spare parts availability and software updates is not provided in the product specifications.
Please retain your proof of purchase for any warranty claims.


