
Molex KSJ-00062-04
Instruction Manual
Molex PowerCat Category 6A Shielded Jack
Model: KSJ-00062-04
Introduction
This manual provides comprehensive instructions for the installation, operation, and maintenance of the Molex KSJ-00062-04 PowerCat Category 6A Shielded Jack. This high-performance RJ45 jack is designed for reliable data transfer in demanding networking environments, supporting Category 6A specifications for enhanced bandwidth and reduced crosstalk.
Please read this manual thoroughly before beginning installation to ensure proper setup and optimal performance.
Safety Information
- Always disconnect power to networking equipment before installing or servicing the jack.
- Handle components with care to avoid damage.
- Ensure proper grounding for shielded installations to maintain performance and safety.
- Do not expose the product to excessive moisture or extreme temperatures.
- If you are unsure about any installation step, consult a qualified professional.
Package Contents
Verify that all components are present before proceeding with installation:
- 1 x Molex KSJ-00062-04 PowerCat Category 6A Shielded Jack
- 1 x Wire Cap/Strain Relief (if applicable)
- Installation Guide (this manual)
Setup and Installation
Follow these steps to properly install the Category 6A shielded jack:
Prepare the Cable
Carefully strip approximately 1.5 to 2 inches of the outer jacket from your Category 6A shielded cable. Be careful not to nick the inner conductors or the foil shield.
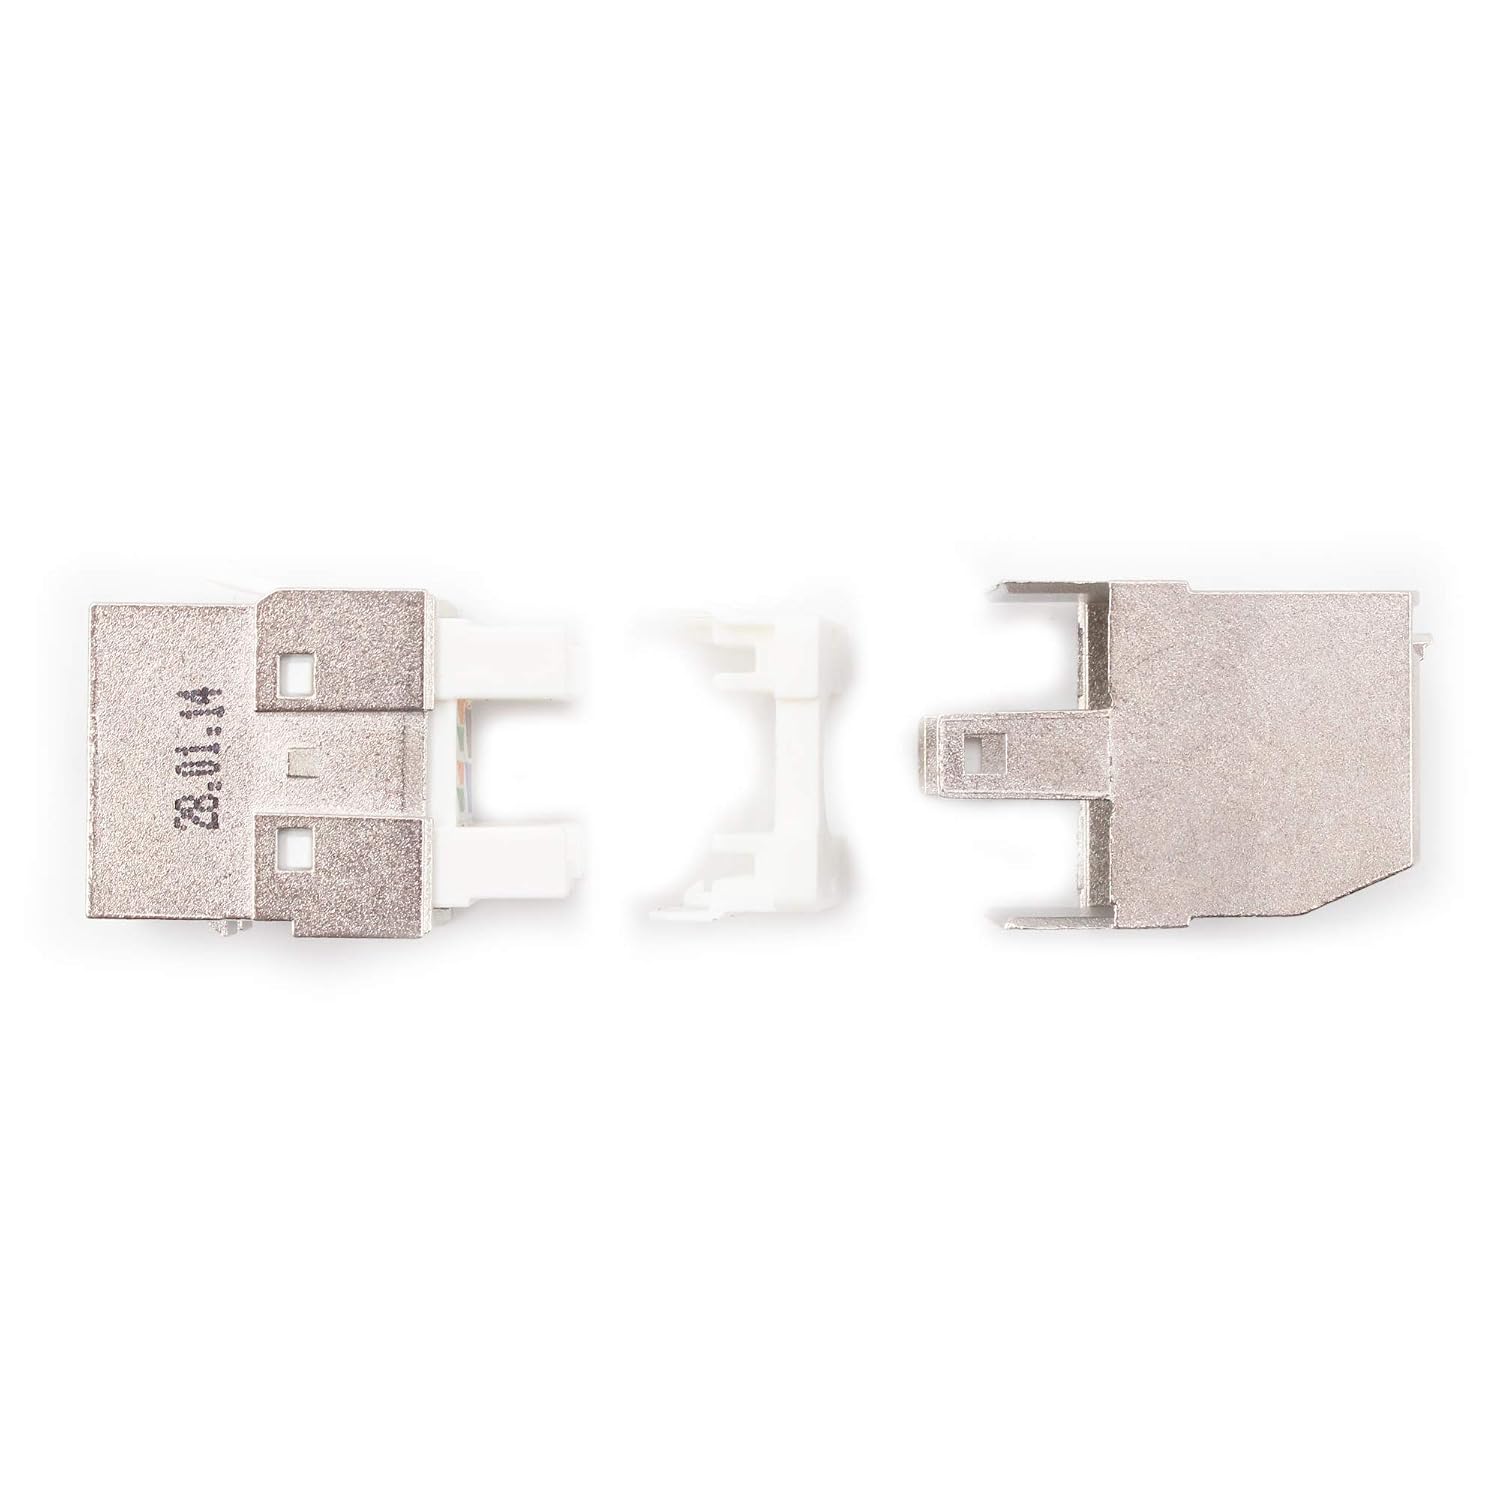
Figure 1: Disassembled components of the Molex KSJ-00062-04 jack. This image shows the metal housing, the internal jack module, and a white plastic wire cap, illustrating the separate parts before assembly.
Expose and Untwist Pairs
Remove any drain wire or excess foil/braid shield, leaving enough to ensure proper grounding. Untwist the individual wire pairs just enough to align them with the color-coded termination points on the jack module.

Figure 2: Internal module of the Molex KSJ-00062-04 jack with T568A and T568B color coding. This image highlights the clear color-coded labels on the termination block, guiding the installer for correct wire placement according to either T568A or T568B wiring standards.
Terminate Wires
Following either the T568A or T568B wiring standard (ensure consistency across your network), carefully insert each untwisted wire into its corresponding slot on the jack module. Use a standard 110-style punch-down tool to seat the wires firmly and trim any excess. Ensure good contact and no exposed copper beyond the termination points.
Secure the Wire Cap (if applicable)
If your jack includes a wire cap or strain relief, place it over the terminated wires and snap it into place. This provides additional strain relief and protects the terminations.

Figure 3: Molex KSJ-00062-04 jack with wire cap and internal module separated. This view demonstrates how the jack module fits into the metal housing and how the white plastic wire cap secures the terminated wires, ready for final assembly.
Assemble the Jack
Carefully insert the terminated jack module into the metal shielded housing. Ensure it clicks securely into place. The metal housing provides the necessary shielding for Category 6A performance.

Figure 4: Assembled Molex KSJ-00062-04 PowerCat Category 6A Shielded Jack. This image displays the completed jack, ready for insertion into a patch panel or wall plate, showcasing its robust shielded design.
Install into Faceplate/Patch Panel
Once assembled, the jack can be snapped into any standard keystone faceplate or patch panel opening.
Operating Considerations
The Molex Category 6A shielded jack is a passive component designed for high-speed data transmission. Once properly installed, its operation is seamless within your network infrastructure.
- Ensure all connected devices (computers, routers, switches, servers) are compatible with Category 6A standards for optimal performance.
- Use high-quality Category 6A patch cables for connections to and from the jack.
- Verify proper grounding of the shielded system to prevent electromagnetic interference (EMI).
Maintenance
The Molex Category 6A shielded jack requires minimal maintenance once installed correctly.
- Cleaning: If necessary, gently wipe the exterior of the jack with a dry, lint-free cloth. Do not use liquid cleaners or solvents.
- Inspection: Periodically inspect the jack and connected cables for any signs of physical damage or loose connections.
- Environmental Conditions: Ensure the installation environment remains within recommended temperature and humidity ranges to prevent degradation of performance.
Troubleshooting
If you experience issues with your network connection, consider the following troubleshooting steps:
| Problem | Possible Cause | Solution |
|---|---|---|
| No network connectivity | Improper wire termination; faulty cable; incorrect wiring standard (T568A/B mismatch); loose connection. | Re-check wire terminations for proper seating and correct color coding. Test the cable with a network cable tester. Ensure consistent wiring standard throughout the network. Securely connect patch cables. |
| Slow network speed or intermittent connection | Poor termination; EMI/RFI interference (for shielded systems); cable length exceeding limits; faulty network device. | Verify all wire pairs are properly terminated and seated. Ensure proper grounding of the shielded jack and cable. Check cable length against Category 6A specifications. Test with different network devices. |
| Physical damage to jack | Impact or improper handling. | Replace the damaged jack. |
Specifications
| Feature | Detail |
|---|---|
| Product Dimensions | 0.5 x 0.1 x 0.1 inches; 3.2 ounces |
| Item Model Number | KSJ-00062-04 |
| Date First Available | January 1, 2014 |
| Manufacturer | Molex |
| ASIN | B06Y3RTR6B |
| Brand | Molex |
| Connector Type | RJ45 |
| Cable Type | Ethernet |
| Compatible Devices | Computer, Router, Switch, Server |
| Recommended Uses For Product | Networking, Data Transfer |
Warranty and Support
For warranty information and technical support, please refer to the official Molex website or contact their customer service directly. Keep your purchase receipt as proof of purchase.
Online Resources: www.molex.com
Ask a question about this manual
Ask about setup, troubleshooting, compatibility, parts, safety, or missing instructions. Manuals+ will review the question and use this page’s manual context to help answer it.