1. Introduction and Product Overview
This manual provides essential instructions for the safe and effective use of your VULCAN Car Tie Down System with Flat Hooks. This professional-grade system is designed for securing vehicles during transport, ensuring stability and safety. The kit includes four lasso-style tie-downs, each featuring a 2-inch by 96-inch Classic Yellow polyester webbing, a plated O-ring, a Cordura wear pad, and a ratchet buckle with a flat hook.
The VULCAN Car Tie Down System is engineered for durability and reliability, with a Safe Working Load (SWL) of 3,300 pounds per strap. It is suitable for a wide range of vehicles, including passenger cars, trucks, SUVs, and sports cars.

Image 1.1: VULCAN Car Tie Down System components.
2. Safety Information
WARNING: Failure to follow these safety guidelines can result in serious injury, property damage, or death.
- Load Limits: Always comply with the stated Safe Working Load (SWL) of 3,300 lbs per strap. Never exceed the combined SWL of the tie-downs used.
- Inspection: Before each use, thoroughly inspect all tie-down components (webbing, O-rings, wear pads, ratchets, hooks) for any signs of wear, cuts, fraying, corrosion, deformation, or other damage. Do not use damaged tie-downs; replace them immediately.
- Proper Attachment: Ensure all hooks are securely seated in appropriate anchor points (side rails, stake pockets). The lasso strap must be correctly positioned around the tire.
- Tensioning: Apply tension gradually and evenly. Over-tensioning can damage the strap or the vehicle. Under-tensioning can lead to load shifting.
- Vehicle Suspension: These tie-downs allow the vehicle to ride on its own suspension. Ensure the vehicle's parking brake is engaged and the transmission is in 'Park' (or appropriate gear for manual transmissions) before and during securing.
- Roadside Checks: Periodically check the tension of the straps and the security of the load during transit, especially after the first few miles and after encountering rough terrain.
- Compliance: All VULCAN vehicle transport products meet CVSA and DOT specifications and comply with NACM recommendations. Adherence to these standards is crucial for safe operation.

Image 2.1: Safe Working Load indication.
3. Package Contents
Your VULCAN Car Tie Down System package includes the following items:
- 4 x VULCAN 2" x 96" Lasso Style Tie Downs with Flat Hooks

Image 3.1: Contents of the VULCAN Car Tie Down Kit.
4. Setup and Installation
Follow these steps to properly set up and install your VULCAN Car Tie Down System:
- Prepare the Vehicle and Trailer: Ensure the vehicle to be transported is positioned correctly on the trailer. Engage the vehicle's parking brake and place the transmission in 'Park' (or appropriate gear).
- Position the Lasso Strap: Take one lasso-style tie-down. The strap features a plated O-ring and a Cordura wear pad. Loop the strap around the tire, ensuring the Cordura wear pad is positioned to protect the tire and rim from abrasion. The O-ring should be on the outside of the tire.
- Attach the Flat Hook: Connect the flat hook of the ratchet buckle to a secure anchor point on your trailer, such as a side rail or stake pocket. Ensure the hook is fully seated and cannot dislodge.
- Connect the Strap to the Ratchet: Feed the free end of the webbing through the slot in the ratchet spindle. Pull the webbing through until most of the slack is removed.
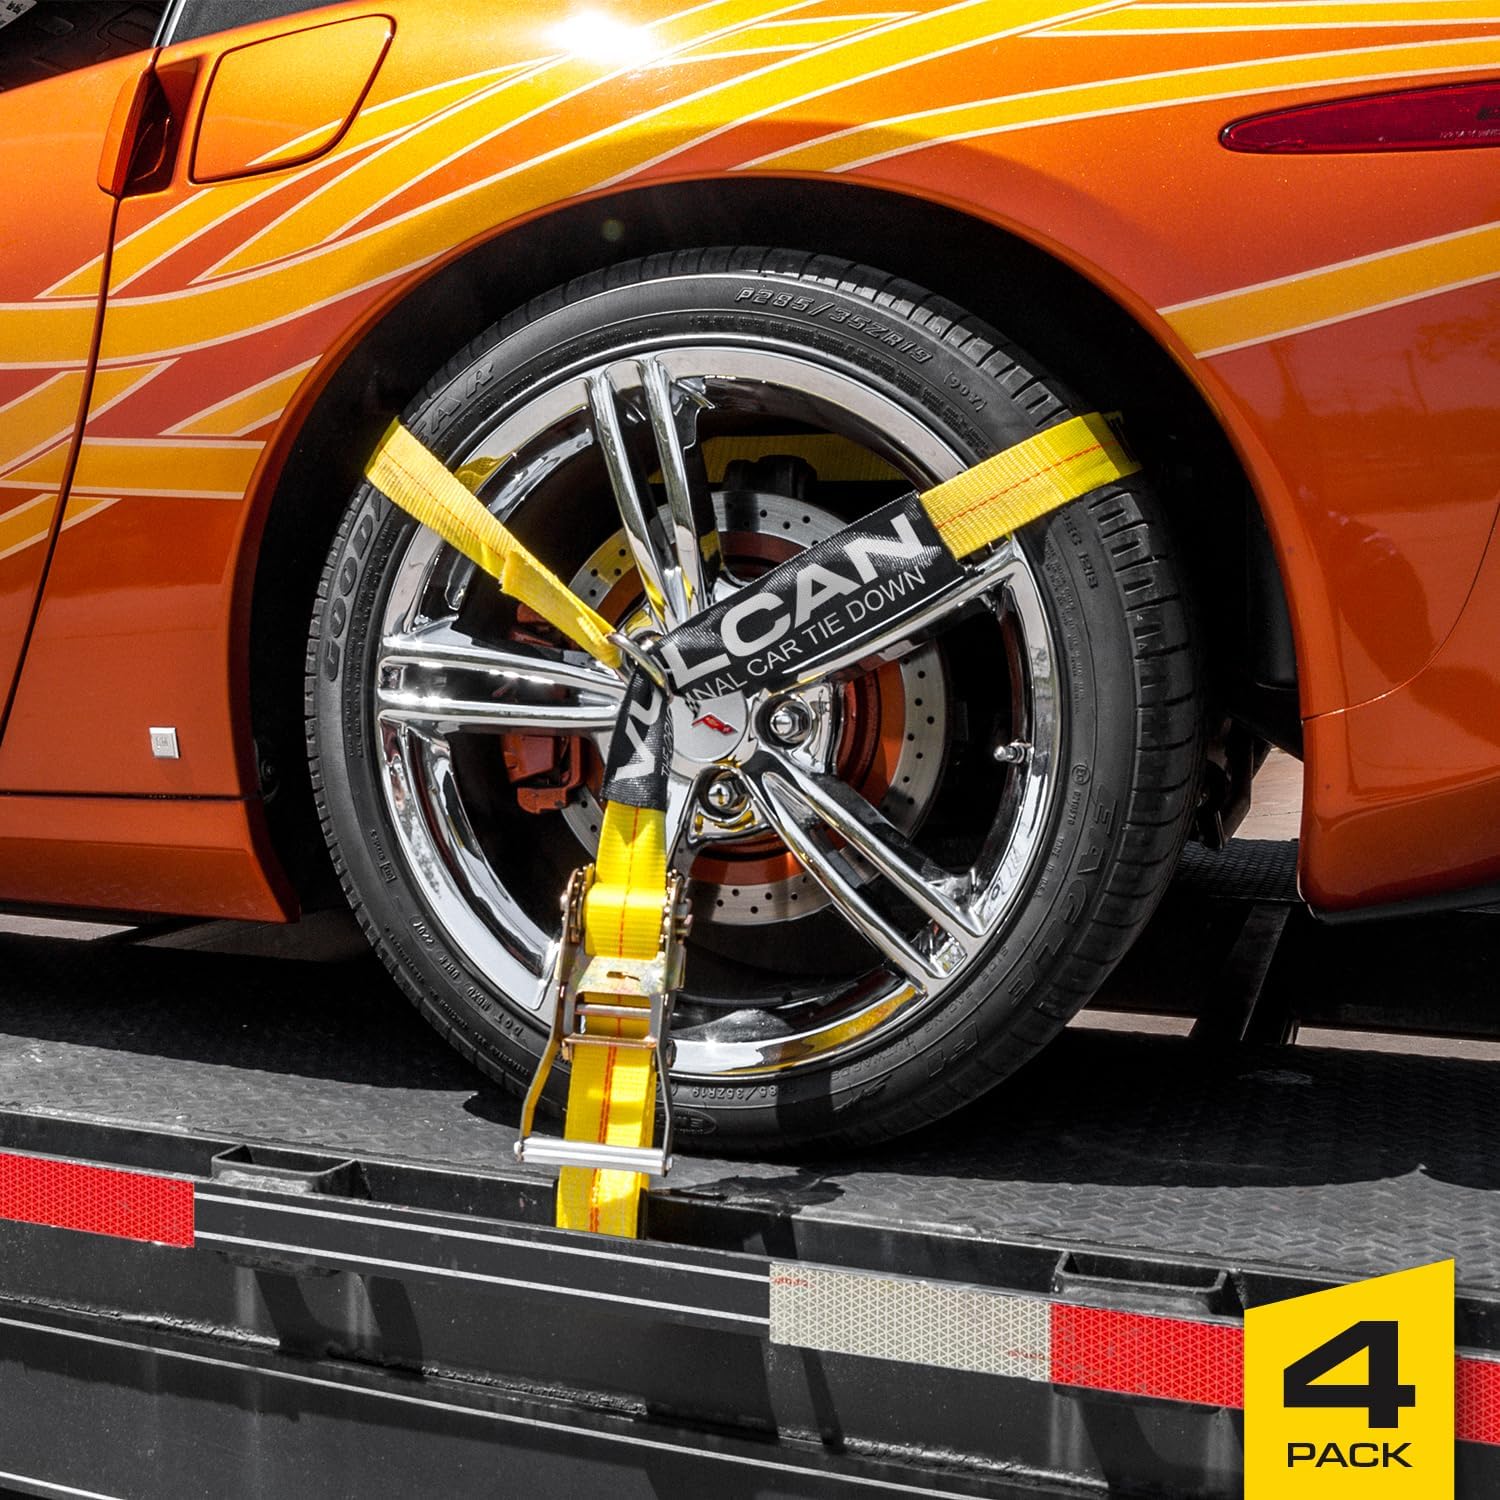
Image 4.1: Lasso strap correctly installed around a vehicle tire.

Image 4.2: Universal single strap design for various tire sizes.
5. Operating Instructions
Once the tie-downs are positioned, follow these steps to secure your vehicle:
- Tension the Strap: Operate the ratchet handle by moving it back and forth. This will wind the webbing onto the spindle, increasing tension. The molded handles provide a superior grip, and the wide handle design allows for easy use, even when wearing gloves.
- Achieve Proper Tension: Continue ratcheting until the strap is taut and the vehicle is securely held in place. Avoid over-tensioning, which can damage the strap or the vehicle's suspension. The goal is to eliminate slack and prevent movement, not to compress the vehicle's suspension excessively.
- Lock the Ratchet: Once the desired tension is achieved, push the ratchet handle fully closed to lock it in place. Ensure the handle is securely latched to prevent accidental release.
- Repeat for All Straps: Apply the same procedure for all four tie-downs, ensuring even tension across all points to distribute the load effectively.
- Release Mechanism: To release the tension, pull the release lever on the ratchet handle and open the handle fully (180 degrees). This will disengage the ratchet mechanism, allowing the webbing to be pulled free from the spindle.

Image 5.1: Ratchet buckle with flat hook for secure connection.
6. Maintenance
Proper maintenance extends the life of your VULCAN Car Tie Down System and ensures continued safe operation:
- Regular Cleaning: Clean straps with mild soap and water. Rinse thoroughly and allow to air dry completely before storage. Avoid harsh chemicals that can degrade the webbing material.
- Storage: Store tie-downs in a clean, dry place, away from direct sunlight, extreme temperatures, and corrosive substances. Roll or coil straps neatly to prevent tangling and damage.
- Webbing Durability: The Classic Yellow polyester webbing is designed to be cut-resistant and UV-resistant, but continuous exposure to sharp edges or prolonged sunlight can still cause damage.
- Hardware Care: Keep ratchet mechanisms clean and lubricated with a light oil to ensure smooth operation. Inspect hooks for bending or deformation.

Image 6.1: Heavy-duty Classic Yellow webbing features.
7. Troubleshooting
If you encounter issues with your VULCAN Car Tie Down System, consider the following:
- Straps Loosening During Transit: This can occur due to vehicle suspension settling or minor tire deflation. Re-tension straps after the first few miles of travel and periodically thereafter. Ensure the ratchet is fully locked.
- Difficulty Tensioning: Check that the webbing is correctly threaded through the ratchet spindle and that there are no twists or obstructions. Ensure the ratchet mechanism is clean and free of debris.
- Damaged Components: Any component showing signs of significant wear, cuts, fraying, bending, or corrosion must be replaced immediately. Do not attempt to repair damaged tie-downs.
- Rim Damage: Ensure the Cordura wear pad is properly positioned between the strap and the tire/rim to prevent abrasion.
8. Specifications
| Feature | Detail |
|---|---|
| Model Number | TH011-K4-F |
| Strap Dimensions | 2 inches (width) x 96 inches (length) |
| Safe Working Load (SWL) | 3,300 lbs per strap |
| Webbing Material | Polyester |
| Webbing Color | Classic Yellow |
| Fastener Material | Carbon Steel |
| Fastener Type | Flat Hook |
| Number of Pieces | 4 (tie-downs) |
| Features | Lasso Style, Plated O-ring, Cordura Wear Pad, UV-resistant, Cut-resistant webbing |
9. Warranty and Support
VULCAN is a USA-based, family-owned company committed to producing high-quality vehicle transport accessories. While specific warranty details are not provided in this manual, VULCAN stands by the quality and operation of its products.
For product support, warranty inquiries, or to report any issues, please contact VULCAN directly through their official channels. Refer to the product packaging or the VULCAN website for the most current contact information.
VULCAN has been developing high-quality vehicle transport accessories for over 60 years, with a focus on expertly designed load management equipment.


