
1. Introduction
This manual provides detailed instructions for the proper installation, operation, and maintenance of your CURT 11465 Class 1 Trailer Hitch. This hitch is designed for select Subaru Impreza models, offering a 1-1/4-inch receiver for various towing applications. Please read this manual thoroughly before installation and use to ensure safe and effective operation.

Image: The CURT 11465 Class 1 Trailer Hitch, highlighting its key features such as vehicle-specific design, industry-leading dual-coat finish, standard hitch receiver, and fully tested design.
2. Safety Information
Always prioritize safety during installation and operation. Failure to follow these guidelines may result in property damage, serious injury, or death.
- Read All Instructions: Ensure you understand all steps before beginning installation.
- Wear Protective Gear: Always wear safety glasses, gloves, and other appropriate personal protective equipment.
- Vehicle Support: Never work under a vehicle supported only by a jack. Use jack stands or a vehicle lift.
- Weight Limits: Do not exceed the lowest-rated towing component's weight capacity, including the hitch, vehicle, and trailer.
- Proper Connections: Always ensure all connections, including safety chains, are properly secured before towing.
- Regular Inspection: Periodically inspect the hitch for any signs of wear, damage, or corrosion.

Image: A CURT hitch being tested to SAE J684 specifications, demonstrating the rigorous safety testing process.
3. Parts List
Verify that all components are present before beginning installation. If any parts are missing or damaged, contact CURT customer service.
- CURT 11465 Class 1 Trailer Hitch
- Mounting Hardware (bolts, washers, nuts, spacers - specific quantities will vary by vehicle fitment)
- Installation Instructions (this document)
4. Installation Instructions
This Class 1 hitch is designed for a factory fit on select Subaru Impreza models. Installation typically requires basic hand tools and may be easier with two people.
- Prepare Vehicle: Park the vehicle on a level surface and engage the parking brake. If necessary, raise the vehicle using a lift or jack stands for better access to the undercarriage.
- Locate Mounting Points: Identify the frame mounting points on your Subaru Impreza. These are typically pre-drilled holes in the vehicle's frame.
- Muffler Considerations: For some Subaru Impreza models, dropping the muffler may provide easier access to the mounting bolts and allow for proper torqueing. While some installations may be possible without dropping the muffler, it is generally recommended for optimal access and secure fastening.
- Position Hitch: Carefully lift the hitch into position, aligning the mounting holes on the hitch with the frame mounting points. This step is often easier with a second person.
- Install Hardware: Insert the provided bolts, washers, and nuts through the aligned holes. For the forward-most mounting bolts, spacers may be required. Ensure all hardware is correctly oriented.
- Tighten Hardware: Hand-tighten all hardware first. Then, using a torque wrench, tighten all bolts to the specifications provided in your vehicle's service manual or the specific CURT installation sheet included with your hitch.
- Final Check: Double-check all connections to ensure they are secure and that the hitch is properly aligned and stable.

Image: Precision fitting and measurement during the design and installation process.

Image: Rear view of a vehicle with the CURT hitch properly installed.
5. Operating Instructions
The CURT 11465 Class 1 Trailer Hitch provides a standard 1-1/4-inch receiver for attaching various towing accessories.
- Receiver Size: This hitch features a 1-1/4-inch receiver opening. Ensure all accessories (ball mounts, bike racks, cargo carriers) are compatible with this size.
- Weight Capacity: This hitch is rated for 2,000 lbs. Gross Trailer Weight (GTW) and 200 lbs. Tongue Weight (TW). Always adhere to these limits and the lowest rating of any towing component.
- Safety Chains: Always attach safety chains from the trailer to the designated chain loops on the hitch. Cross the chains under the trailer tongue to prevent the tongue from dropping to the ground if the hitch connection fails.
- Bike Rack Compatibility: This hitch is not compatible with vertical hanging bike racks that require bikes to be hung or mounted vertically. It is suitable for standard and tray-style bike racks.
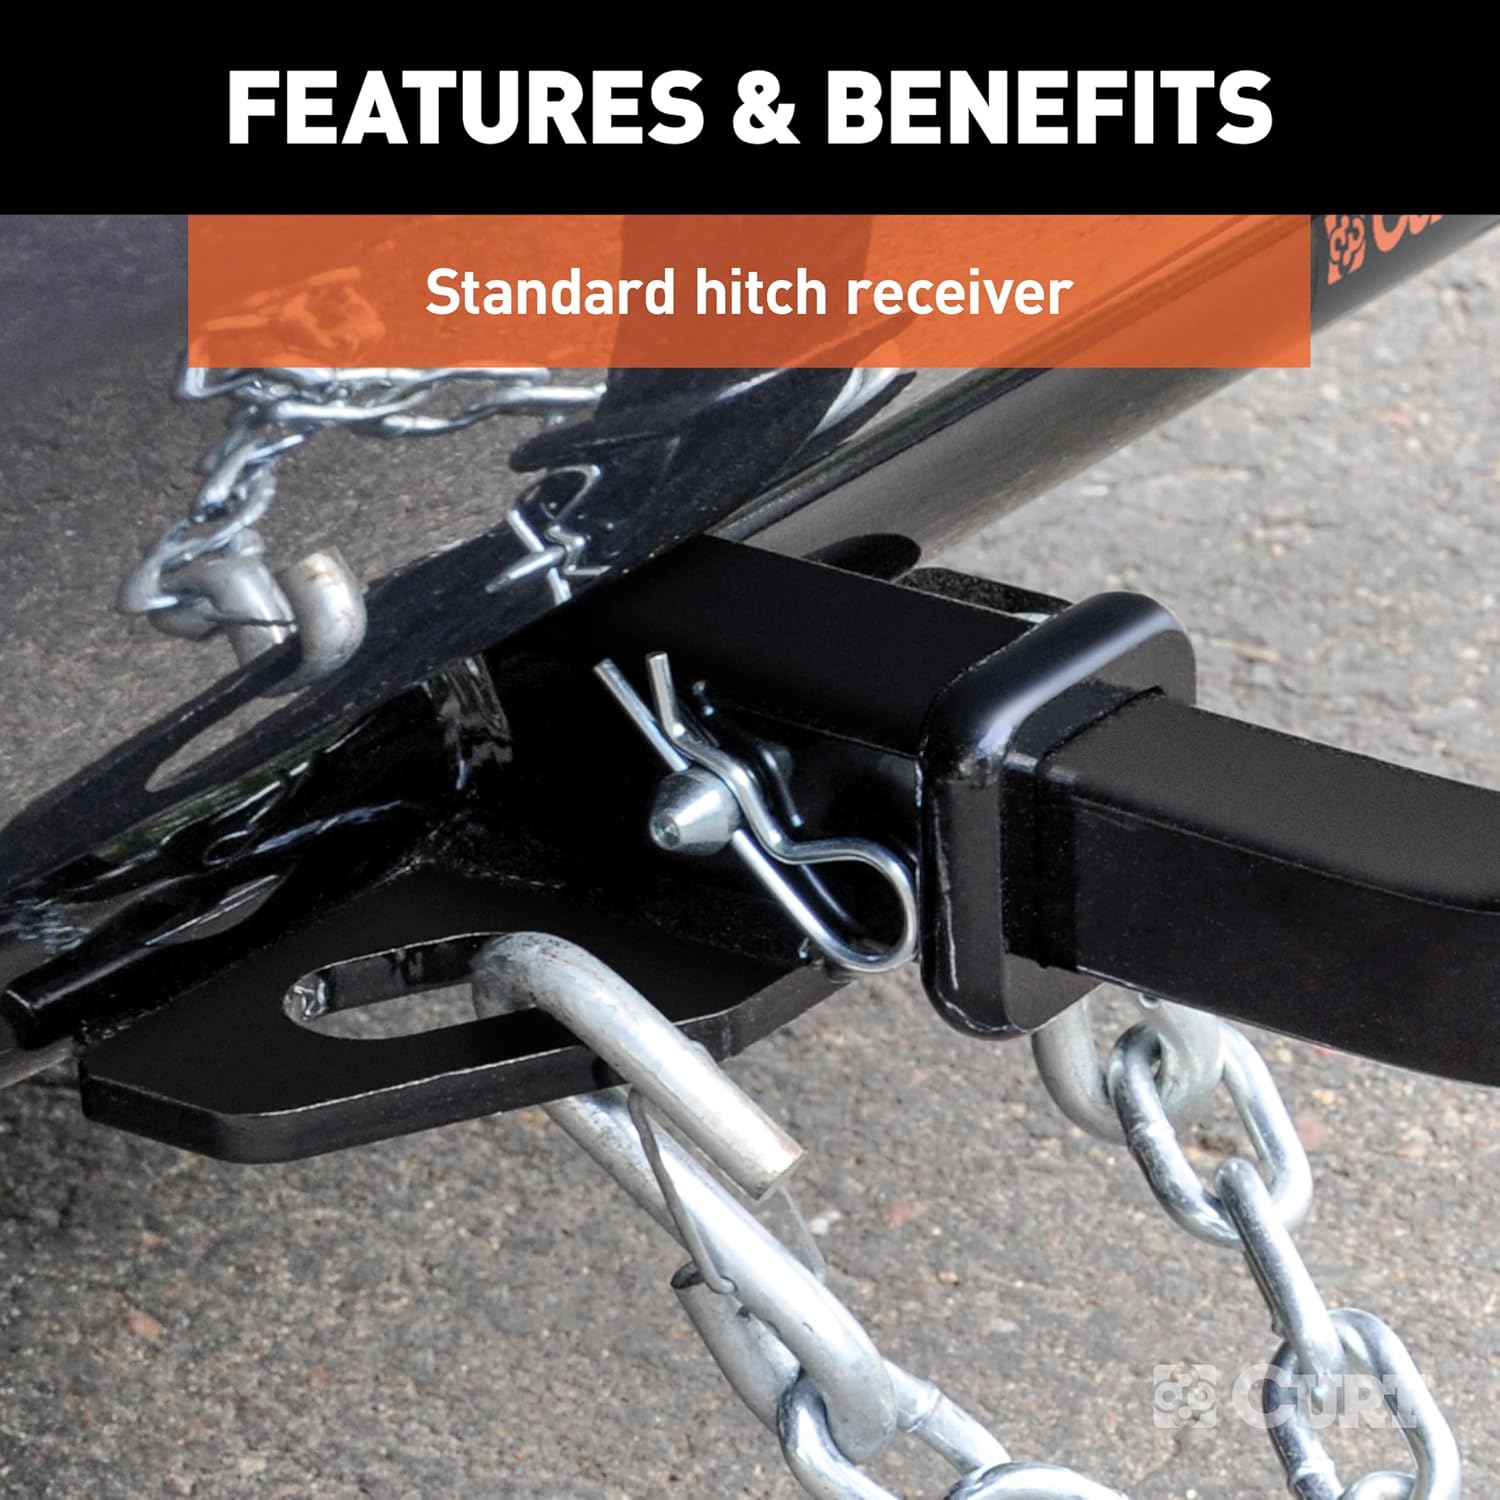
Image: A close-up of the standard hitch receiver with a ball mount and safety chains properly connected.

Image: Compatibility note illustrating that the hitch supports standard and tray-style bike racks, but not vertical hanging bike racks.
Video: An official CURT video demonstrating various towing applications and the importance of secure connections. This video highlights the versatility and reliability of CURT towing products.
6. Maintenance
Proper maintenance will extend the life of your CURT trailer hitch.
- Regular Cleaning: Clean the hitch periodically to remove dirt, salt, and road grime.
- Inspect Finish: The hitch features a dual-coat finish for rust and chip resistance. Inspect for any deep scratches or chips that could expose bare metal and lead to corrosion. Touch up as needed with appropriate paint.
- Check Fasteners: Periodically check all mounting bolts and nuts for tightness. Re-torque to specifications if necessary.
- Receiver Tube: Keep the inside of the receiver tube clean and free of debris. Apply a light coat of grease to the inside surface to prevent rust and ease accessory insertion.

Image: The dual-coat finishing process, where hitch components are submerged in a liquid A-coat for enhanced rust and chip resistance.
7. Troubleshooting
This section addresses common issues you might encounter.
- Difficulty Inserting Accessories: Ensure the receiver tube is clean and free of rust or debris. A light lubricant can help. Check that the accessory is indeed 1-1/4 inches.
- Retaining Pin Stuck: If a retaining pin on an accessory becomes difficult to remove due to alignment with an internal hole in the hitch, ensure the accessory is fully seated and try gently wiggling it while attempting to remove the pin. Avoid excessive force.
- Excessive Play/Rattling: Check that all mounting bolts are torqued to specification. Ensure the hitch pin and clip for your accessory are properly installed and snug. Anti-rattle devices can be used with some accessories.
- Corrosion: If corrosion appears despite the dual-coat finish, clean the area thoroughly, remove any loose rust, and apply a rust-inhibiting primer followed by a durable topcoat.
8. Specifications
| Feature | Detail |
|---|---|
| Model Number | 11465 |
| Receiver Size | 1-1/4 inch |
| Gross Trailer Weight (GTW) | 2,000 lbs. |
| Tongue Weight (TW) | 200 lbs. |
| Material | Carbon Steel |
| Finish Type | Powder Coated (Dual-Coat) |
| Vehicle Service Type | Car, Sport-Utility-Vehicles, Trailer |
| Automotive Fit Type | Vehicle Specific Fit (Select Subaru Impreza) |
| Item Weight | Approximately 0.01 ounces (product listing weight, actual shipping weight will be higher) |
| Product Dimensions | 44 x 15 x 8 inches |

Image: Visual representation of the 1-1/4 inch receiver tube size.
9. Warranty & Support
CURT products are backed by a limited lifetime warranty. For specific warranty details, claims, or technical support, please refer to the official CURT website or contact their customer service department directly. Always provide your product model number (11465) when seeking support.
Contact Information:
- Website: www.curtmfg.com
- Customer Service: Refer to the website for current contact methods (phone, email, chat).

Image: CURT Genuine Parts logo, assuring product authenticity and quality.


