Introduction
This user manual provides essential information for the safe and efficient operation of your Bosch SMS25AI05E Series 2 Freestanding Dishwasher. Please read these instructions carefully before installation and first use. Keep this manual for future reference.

Image: Front view of the Bosch SMS25AI05E Series 2 Freestanding Dishwasher in stainless steel.
Safety Information
Always observe the following safety instructions to prevent accidents and damage.
- This appliance is intended for domestic use only.
- Do not allow children to play with the appliance.
- Ensure the appliance is properly earthed.
- Do not operate the dishwasher if the power cord is damaged.
- Only use detergents and rinse aids specifically designed for dishwashers.
- The AquaStop system provides protection against water damage. Do not immerse the AquaStop device in water.
Setup and Installation
Unpacking
Carefully remove all packaging materials. Dispose of packaging responsibly.
Placement
Position the dishwasher on a stable, level surface. Ensure there is adequate space for door opening and connections. The appliance dimensions are 60 cm (width) x 60 cm (depth) x 84.5 cm (height).
Water Connection
Connect the water inlet hose to a cold water tap with a 3/4-inch thread. Ensure the connection is secure to prevent leaks. The dishwasher features an AquaStop system for enhanced water protection.
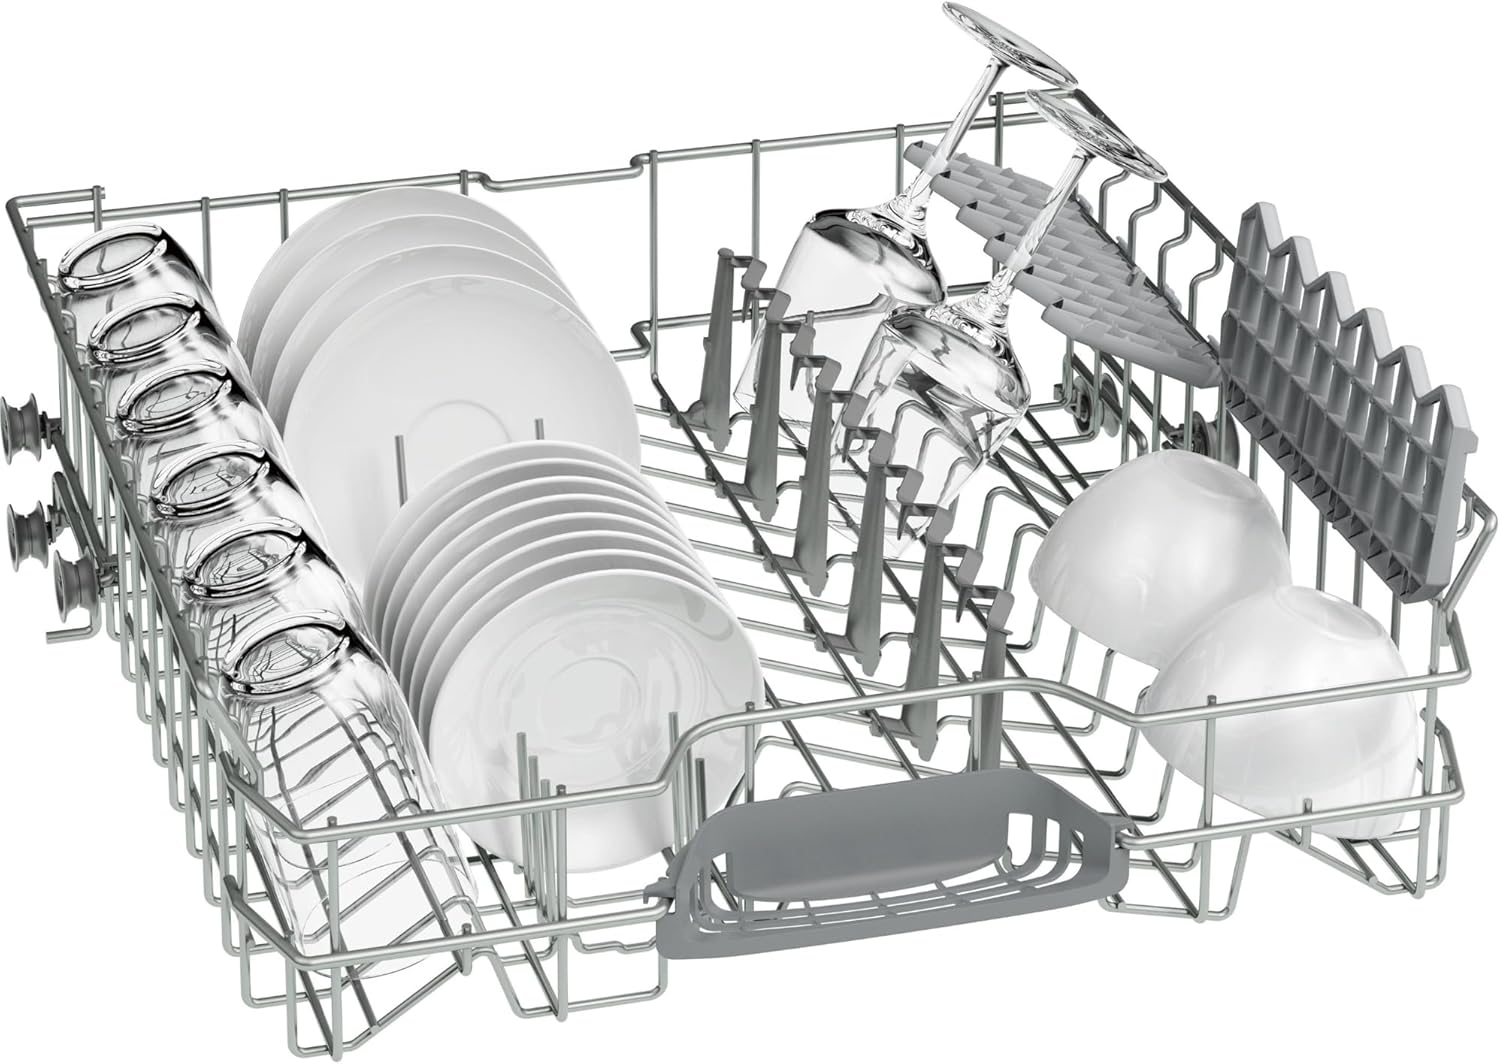
Image: Close-up of the AquaStop water protection system, designed to prevent leaks.
Drain Connection
Connect the drain hose to a suitable drain pipe or sink trap. Ensure the hose is not kinked and is properly secured to prevent backflow.
Electrical Connection
Connect the dishwasher to a properly installed and earthed power socket. The appliance operates on 230 Volts and has a power rating of 2400 watts.
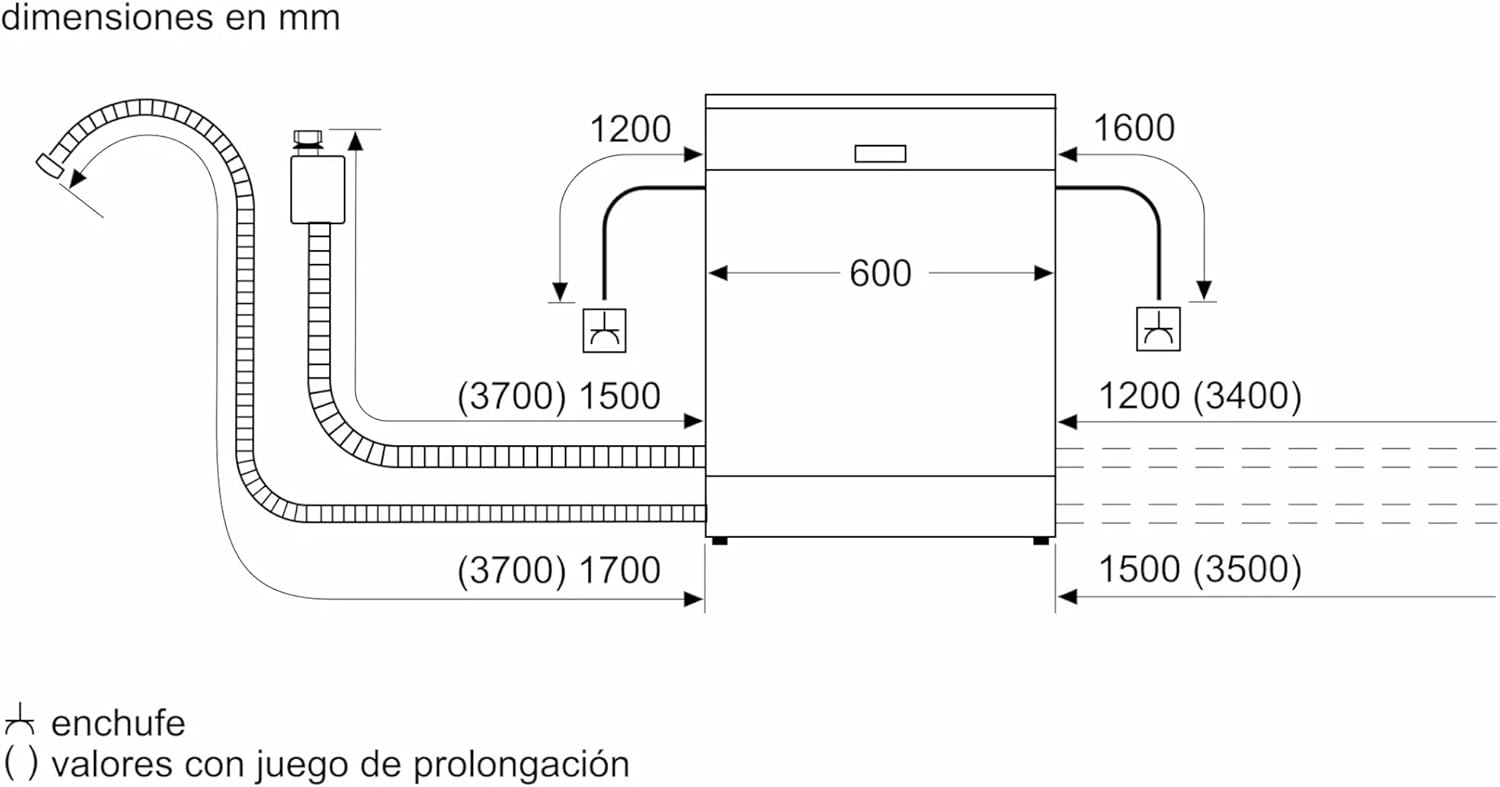
Image: Technical diagram showing dishwasher dimensions and connection points for water inlet, drain, and electrical plug.
Operating Instructions
Control Panel Overview
The control panel provides access to all dishwasher functions.

Image: Detailed view of the control panel, showing program selection buttons, digital display for remaining time, and indicators for salt and rinse aid.
Loading the Dishwasher
Load dishes carefully to ensure optimal cleaning and drying results.
Upper Basket
The upper basket is suitable for glasses, cups, small plates, and bowls.
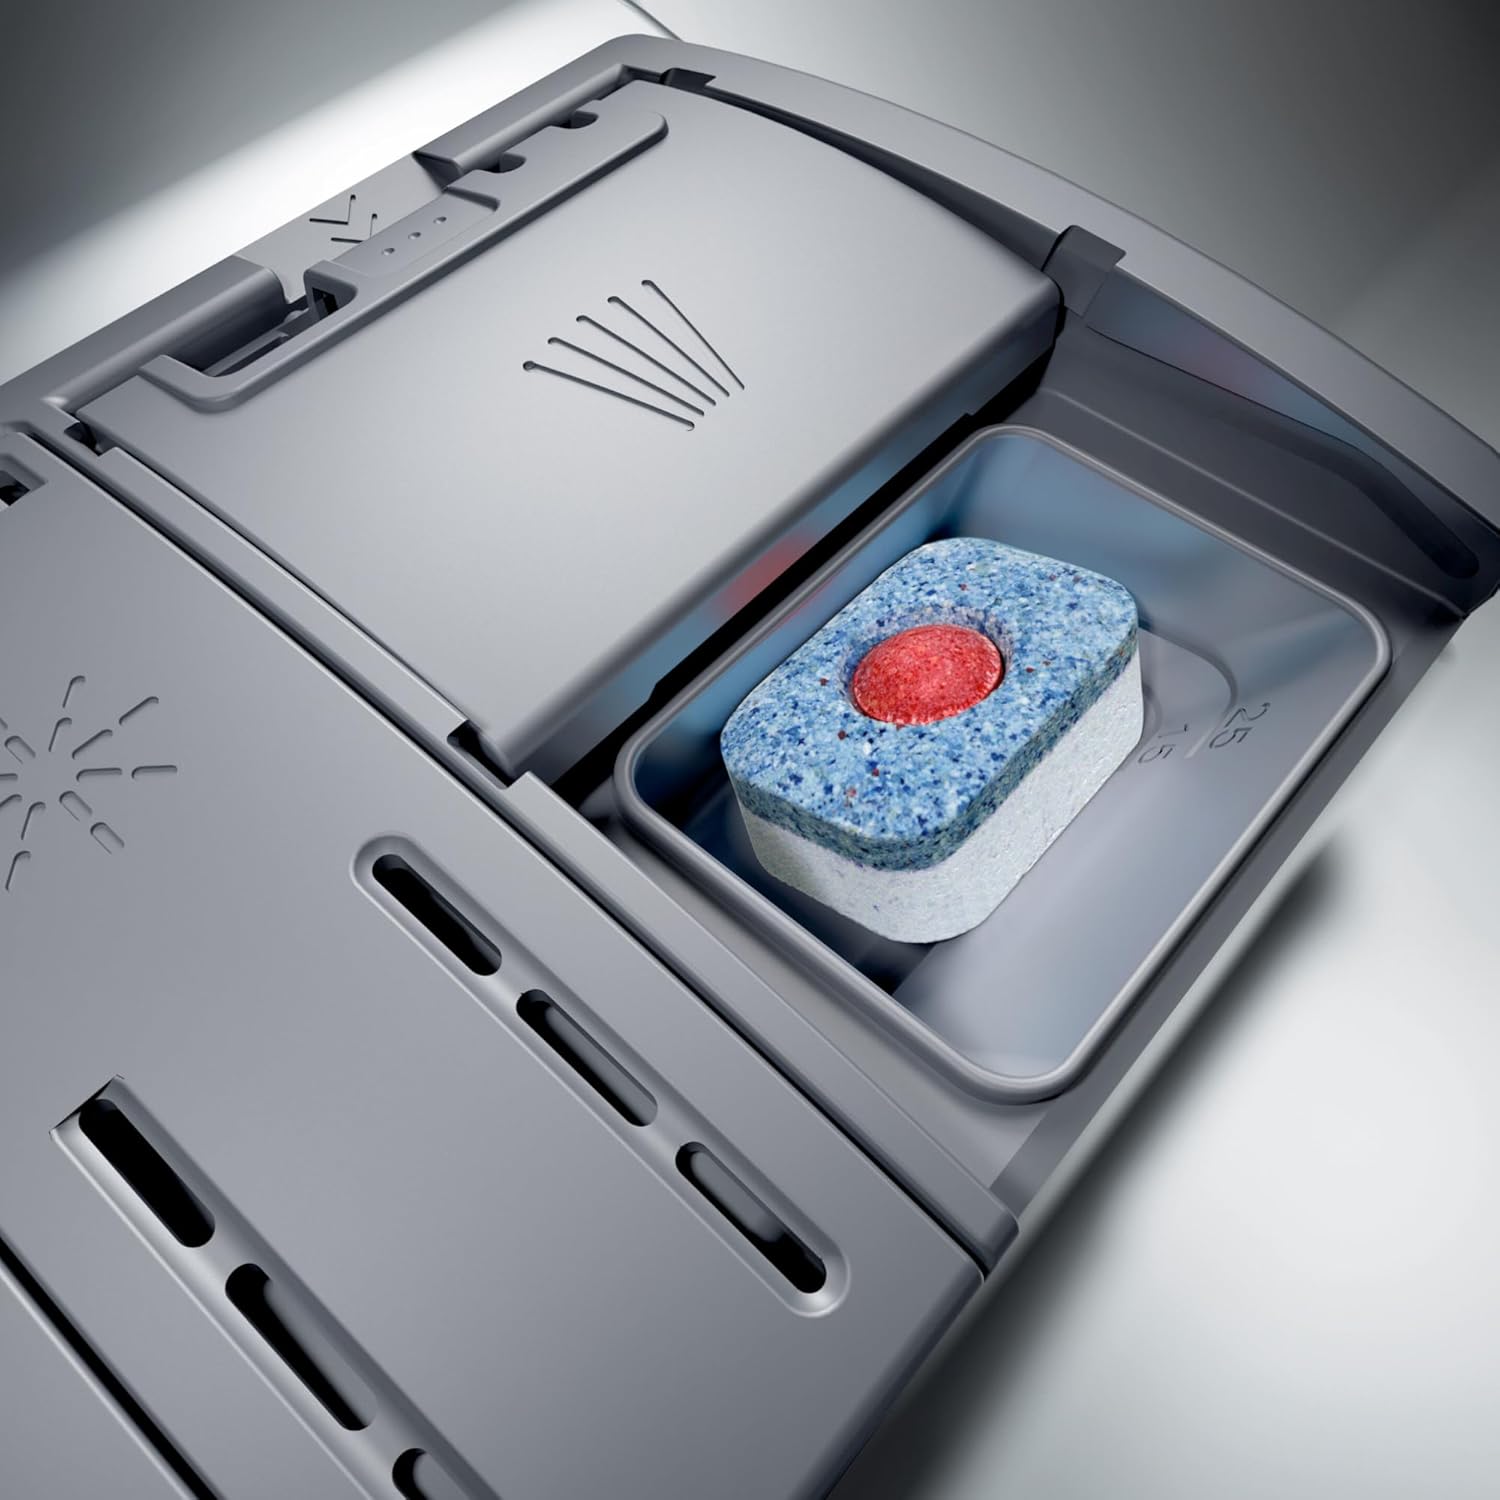
Image: Upper basket of the dishwasher, demonstrating proper loading of glasses and smaller items.
Lower Basket
The lower basket is designed for larger items such as dinner plates, pots, pans, and the cutlery basket.

Image: Lower basket of the dishwasher, showing how to arrange larger dishes, pots, and the cutlery basket.
Adding Detergent
Open the detergent dispenser and add the appropriate amount of dishwasher detergent. Close the dispenser lid securely.

Image: Close-up of the detergent dispenser compartment, with a multi-function dishwasher tablet placed inside.
Selecting a Program
Choose a wash program based on the type and soil level of your dishes. Available programs include:
- Normal: For daily soiled dishes.
- Rapid: For lightly soiled dishes or when time is limited.
- Eco: Energy-efficient program for normal soil.
Special Functions
The dishwasher offers special functions to optimize washing results:
- VarioSpeed: Reduces program duration while maintaining cleaning performance.
- Half Load: For smaller loads, saving water and energy.
Starting the Dishwasher
Close the dishwasher door firmly. Press the 'Start' button to begin the selected program. The digital display will show the remaining time.
Delayed Start
You can delay the start of a program by up to 24 hours. Use the delay start button to set the desired time.
Maintenance and Care
Cleaning the Filters
Regularly clean the filter system to ensure optimal washing performance. Refer to the detailed instructions in the full manual for filter removal and cleaning.
Refilling Salt and Rinse Aid
The control panel indicators will alert you when it's time to refill dishwasher salt and rinse aid. Use only products specifically designed for dishwashers.
Cleaning the Spray Arms
Periodically check and clean the spray arm nozzles to ensure they are not blocked by food particles.
Cleaning the Exterior
Wipe the exterior surfaces with a soft, damp cloth. For stainless steel surfaces, use a specialized stainless steel cleaner to maintain the anti-fingerprint finish.
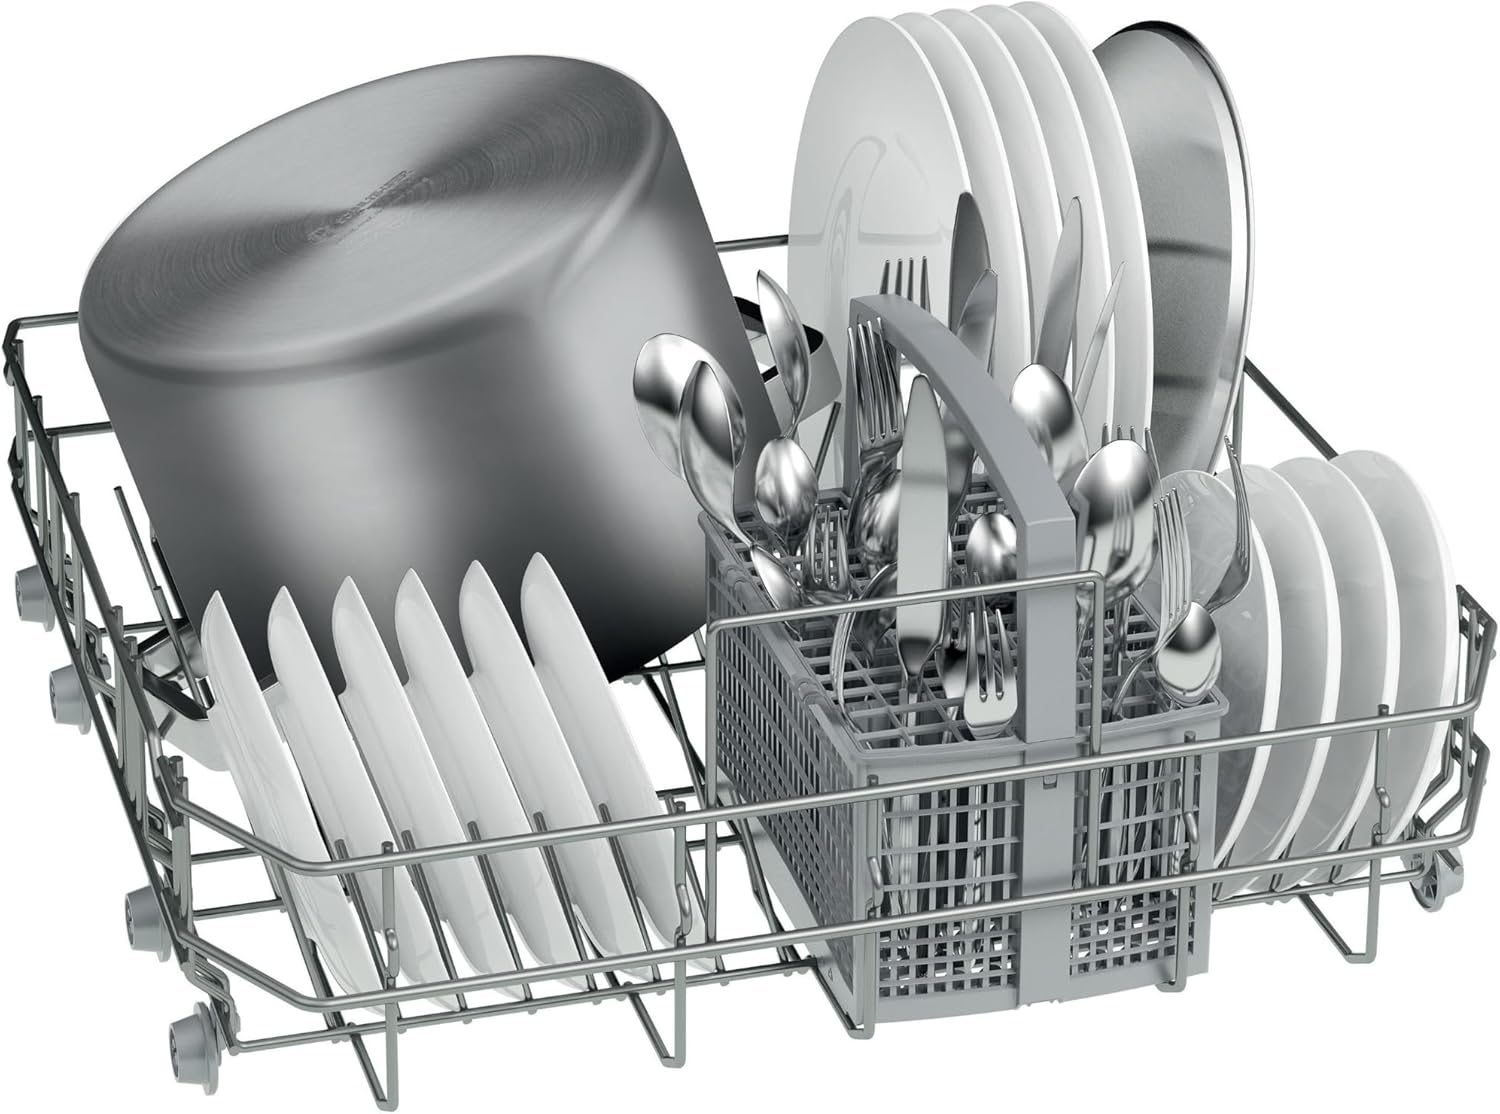
Image: Interior view of the dishwasher with both upper and lower baskets pulled out, showing the flexible loading options.
Troubleshooting
If you encounter a problem, consult the following table before contacting customer service.
| Problem | Possible Cause | Solution |
|---|---|---|
| Dishes are not clean | Incorrect program, overloaded baskets, blocked spray arms, insufficient detergent. | Select a more intensive program, load correctly, clean spray arms, add more detergent. |
| Water remains in the bottom of the dishwasher | Clogged filter system, kinked drain hose. | Clean filters, check drain hose for kinks. |
| Dishwasher does not start | Door not closed properly, power supply issue, program not selected. | Close door firmly, check power connection, select a program and press start. |
Specifications
| Feature | Detail |
|---|---|
| Model | SMS25AI05E |
| Brand | Bosch |
| Type | Freestanding Dishwasher |
| Capacity | 12 Place Settings |
| Dimensions (H x W x D) | 84.5 cm x 60 cm x 60 cm |
| Weight | 46.2 kg |
| Noise Level | 48 Decibels |
| Voltage | 230 Volts |
| Power | 2400 Watts |
| Material | Stainless Steel, Plastic |
| Special Features | EcoSilence Motor, AquaStop, VarioSpeed, Half Load, Anti-fingerprint finish |
| Energy Efficiency Class | E (New EU Label) / A++ (Old Label) |
Warranty and Support
Your Bosch SMS25AI05E dishwasher comes with a manufacturer's warranty. Key warranty features include:
- 10-Year Warranty on Inner Tub: Bosch guarantees against rusting through of the inner tub for 10 years from the date of purchase.
- AquaStop Lifetime Warranty: The AquaStop system provides a lifetime warranty against water damage caused by a fault in the system.
For detailed warranty terms and conditions, please refer to the warranty card included with your appliance or visit the official Bosch website. For technical assistance or spare parts, please contact Bosch customer service.


