
Acctim 71833 Higton
Acctim Higton Voice Activated RC Alarm Clock - Instruction Manual
Model: 71833
Introduction
Thank you for purchasing the Acctim Higton Voice Activated RC Alarm Clock. This manual provides detailed instructions for setting up, operating, and maintaining your new alarm clock. Designed for convenience and accuracy, this clock features Radio Controlled time synchronization and a voice-activated backlight for ease of use.
Product Overview
The Acctim Higton alarm clock is a compact and stylish device designed for your bedside. It features an analogue display with luminous hands for visibility in low light, and a unique voice-activated backlight and snooze function.
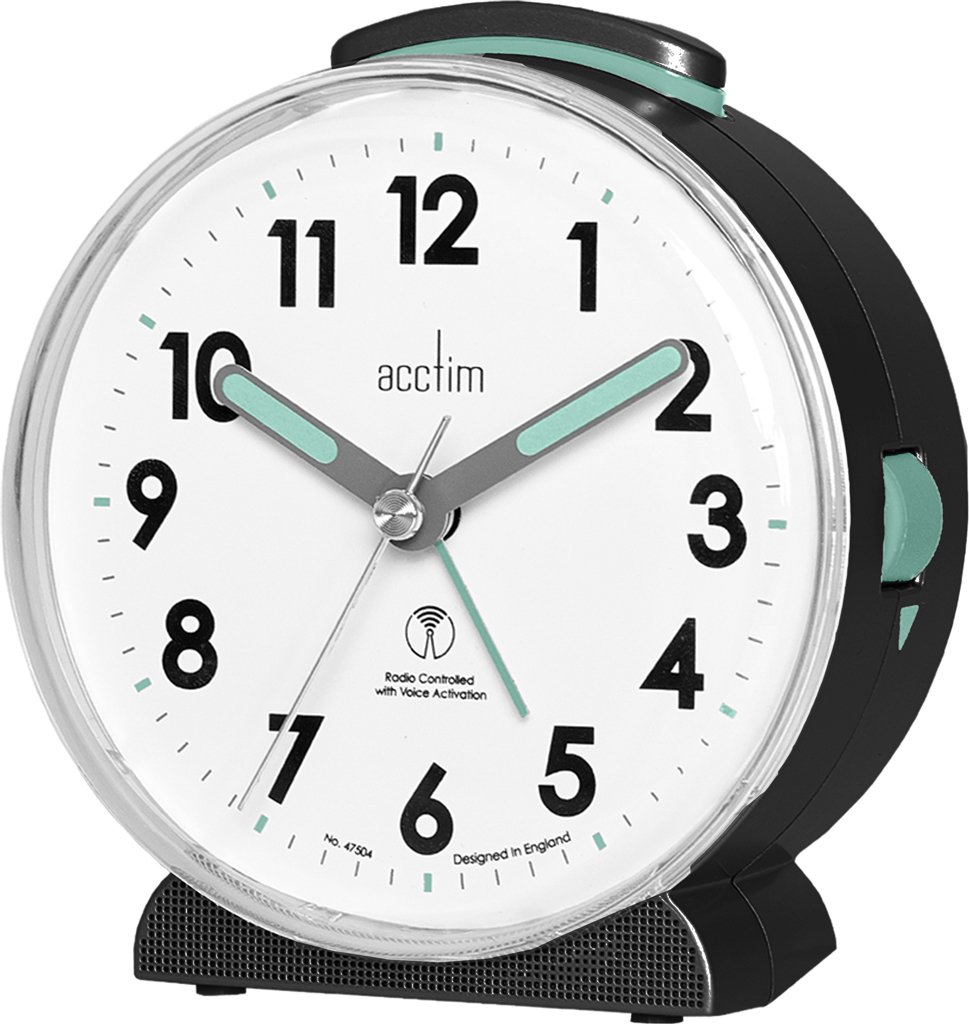
Figure 1: Front view of the Acctim Higton Alarm Clock. Shows the clock face with numbers 1-12, luminous hour and minute hands, a second hand, and the "acctim" logo. Below the logo, text indicates "Radio Controlled with Voice Activation" and "Designed in England". The clock is black with a clear front and a light green accent on top and side buttons.
Key Features:
- Radio Controlled (RC) Time: Automatically sets and adjusts time for accuracy (UK & Ireland only).
- Voice Activated Backlight & Snooze: Activate the backlight and snooze function with a sound, such as a clap.
- Easy Side Setting Alarm Wheel: Simple and intuitive alarm time adjustment.
- Luminous Tipped Hands: For improved visibility in the dark.
- Compact Design: Ideal for bedside tables.
Setup
1. Battery Installation
The Acctim Higton alarm clock requires 2x AAA batteries (not included) for operation.
- Locate the battery compartment cover on the back of the clock.
- Remove the cover by sliding or lifting it.
- Insert 2 new AAA batteries, ensuring the correct polarity (+ and -) as indicated inside the compartment.
- Replace the battery compartment cover securely.
2. Initial Time Synchronization (Radio Controlled)
Upon battery installation, the clock will automatically attempt to synchronize with the Radio Controlled signal. This process may take a few minutes to several hours, depending on your location and signal strength. For best reception, place the clock near a window and away from electronic devices that may cause interference.
- The clock hands will typically move to 12:00 and then begin searching for the signal.
- Once the signal is received, the clock will automatically set itself to the correct time, including adjustments for daylight saving.
- This feature is effective within the UK and Ireland.
3. Setting the Alarm
The alarm time is set using the wheel located on the side of the clock.
- Locate the alarm setting wheel on the right side of the clock (when viewed from the front).
- Rotate the wheel to move the small alarm hand to your desired alarm time.
- To activate the alarm, ensure the alarm ON/OFF switch (usually a small slider on the side or back) is in the 'ON' position.
Operating Instructions
Reading the Time
The clock displays time using traditional hour, minute, and second hands on an analogue dial. The luminous tips on the hour and minute hands glow in the dark after exposure to light, allowing for easy time reading at night.
Voice Activated Backlight and Snooze
The Higton alarm clock features a convenient voice-activated function for its backlight and snooze. This means you do not need to physically touch the clock to activate these features.
- To activate the backlight: Make a sharp sound, such as a clap, near the clock. The backlight will illuminate the clock face for a short period.
- To activate snooze (when alarm is sounding): Make a sharp sound, such as a clap, near the clock. The alarm will temporarily stop and sound again after approximately 5 minutes.
Alarm Function
- Turning Alarm ON/OFF: Use the dedicated alarm switch (slider) on the side or back of the clock to enable or disable the alarm.
- Stopping the Alarm: When the alarm sounds, you can either activate the snooze function with a sound or turn off the alarm completely using the ON/OFF switch.
Maintenance
Cleaning
To clean your alarm clock, gently wipe the surface with a soft, dry cloth. Do not use abrasive cleaners, solvents, or chemical sprays, as these may damage the clock's finish or internal components.
Battery Replacement
When the clock's display dims, the alarm weakens, or the Radio Controlled function becomes inconsistent, it is time to replace the batteries. Follow the "Battery Installation" steps in the Setup section to replace the 2x AAA batteries.
Troubleshooting
| Problem | Possible Cause | Solution |
|---|---|---|
| Clock not setting time automatically. | Weak or no Radio Controlled signal; batteries low. |
|
| Backlight or snooze not activating with sound. | Sound not loud enough; batteries low. |
|
| Alarm not sounding. | Alarm switch is OFF; alarm time not set correctly; batteries low. |
|
Specifications
| Brand | Acctim |
| Model | 71833 Higton |
| Colour | Black |
| Display Type | Analogue |
| Material | Plastic |
| Special Features | Snooze, Alarm, Radio Controlled, Voice Activated Backlight |
| Power Source | Battery Powered (2x AAA, not included) |
| Dimensions (H x W x L) | 9.7 x 9.4 x 4.8 cm |
| Item Weight | 200 g |
| Indoor/Outdoor Usage | Indoor |
Warranty and Support
Acctim products are manufactured to high quality standards. For information regarding warranty coverage, technical support, or replacement parts, please refer to the official Acctim website or contact their customer service directly. Please retain your proof of purchase for any warranty claims.
For further assistance, you may visit the Acctim Store on Amazon.
Ask a question about this manual
Ask about setup, troubleshooting, compatibility, parts, safety, or missing instructions. Manuals+ will review the question and use this page’s manual context to help answer it.