
Introduction
This manual provides comprehensive instructions for the installation, operation, maintenance, and troubleshooting of your Moen 82663 3 Handle Tub/Shower Faucet. Please read this manual thoroughly before beginning installation or use to ensure proper function and longevity of your product.
Product Overview
The Moen 82663 is a 3-handle tub/shower faucet designed for wall-mount installation, featuring a durable chrome finish. It includes separate handles for hot water, cold water, and a diverter for switching between the tub spout and showerhead.

Figure 1: Complete Moen 82663 Tub/Shower Faucet assembly, showing the showerhead, three control handles, and tub spout.
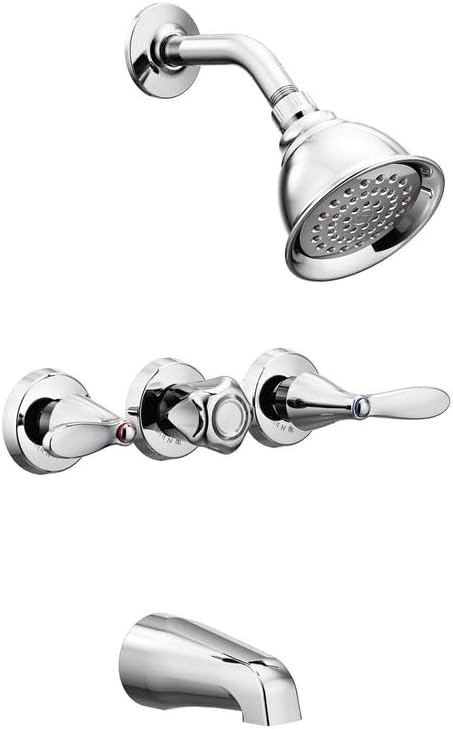
Figure 2: Close-up view of the faucet's three handles and the showerhead, highlighting the chrome finish.

Figure 3: The Moen 82663 faucet system installed in a typical bathroom setting, demonstrating its appearance.
Setup and Installation
The Moen 82663 faucet is designed for wall-mount installation. Professional installation is recommended to ensure proper function and to comply with local plumbing codes.
Tools and Materials Required:
- Adjustable wrench
- Pipe sealant tape
- Screwdriver (Phillips and flathead)
- Measuring tape
- Safety glasses
Installation Steps:
- Prepare the Installation Area: Ensure water supply is turned off at the main shut-off valve. Clear the area around the tub/shower wall where the faucet will be installed.
- Mount the Valve Body: Secure the faucet's valve body within the wall according to standard plumbing practices, ensuring it is level and properly aligned with the finished wall surface.
- Connect Water Lines: Connect the hot and cold water supply lines to the corresponding inlets on the valve body. Use pipe sealant tape on all threaded connections to prevent leaks.
- Install Tub Spout and Showerhead: Attach the tub spout and showerhead arm to their respective outlets. Ensure the tub spout is securely fastened and the showerhead is angled correctly.
- Install Trim and Handles: Once the rough-in is complete and the wall is finished, install the decorative escutcheons and the three control handles (hot, cold, and diverter).
- Test for Leaks: Slowly turn on the main water supply and check all connections for leaks. Operate the faucet to ensure proper water flow and temperature control.
Refer to the detailed plumbing diagrams provided with your product packaging for specific measurements and connection points.
Operating Instructions
The Moen 82663 features a traditional three-handle design for precise control over water temperature and flow.
Controls:
- Left Handle: Controls hot water flow. Turn counter-clockwise to increase hot water.
- Right Handle: Controls cold water flow. Turn counter-clockwise to increase cold water.
- Center Handle (Diverter): Directs water flow. Pull up or turn to divert water from the tub spout to the showerhead. Push down or turn back to direct water to the tub spout.
Using the Faucet:
- To Fill Tub: Ensure the center diverter handle is in the down position. Turn the left (hot) and right (cold) handles to achieve desired water temperature and flow.
- To Use Shower: Once water is flowing from the tub spout, pull up or turn the center diverter handle to redirect water to the showerhead. Adjust hot and cold handles for desired temperature.
- To Turn Off: Turn both the left (hot) and right (cold) handles clockwise until water flow stops completely.

Figure 4: The showerhead actively spraying water, demonstrating its function.

Figure 5: A hand demonstrating the operation of one of the faucet's control handles.
Maintenance and Care
Regular cleaning and proper care will help maintain the chrome finish and ensure the longevity of your Moen faucet.
Cleaning the Finish:
- Use a soft, damp cloth and mild soap to clean the chrome finish.
- Avoid abrasive cleaners, harsh chemicals, or scouring pads, as these can damage the finish.
- Rinse thoroughly with clean water and dry with a soft cloth to prevent water spots.
Showerhead Maintenance:
- Periodically check the showerhead nozzles for mineral buildup. Many Moen showerheads feature rubber nozzles that can be easily cleaned by rubbing them with your finger.
- For stubborn mineral deposits, remove the showerhead and soak it in a solution of equal parts white vinegar and water.
Handle and Valve Maintenance:
- If handles become stiff or difficult to turn, the internal cartridges may need lubrication or replacement. Consult a qualified plumber or Moen customer support.
Always ensure the water supply is turned off before performing any maintenance that requires disassembling parts of the faucet.
Troubleshooting
This section addresses common issues you might encounter with your Moen 82663 faucet. For problems not listed here, contact Moen customer support.
| Problem | Possible Cause | Solution |
|---|---|---|
| Low Water Flow | Clogged showerhead nozzles or aerator; partially closed shut-off valves. | Clean showerhead nozzles. Ensure all shut-off valves are fully open. |
| Leaking Faucet | Worn-out O-rings or cartridges. | Replace O-rings or cartridges. Consult a plumber if unsure. |
| Difficulty Diverting Water | Diverter mechanism is stiff or faulty. | Apply a silicone-based lubricant to the diverter stem. If issue persists, the diverter cartridge may need replacement. |
| Water Temperature Issues | Improper hot/cold water supply, or issues with internal mixing valve (if applicable). | Check hot and cold water supply lines. Ensure no blockages. |
Specifications
| Feature | Detail |
|---|---|
| Brand | Moen |
| Model Number | 82663 |
| Finish Type | Chrome Finish |
| Number of Handles | 3 |
| Material | Brass, Chrome |
| Mounting Type | Wall Mount |
| Showerhead Size | 4 inches |
| Tub Spout Length | 5-1/2 inches |
| Item Weight | 2.2 Kilograms |
| Package Dimensions | 10.12 x 8.11 x 5.2 inches |
| UPC | 026508271742 |
Warranty and Support
Moen products are manufactured under the highest standards of quality and workmanship. This product comes with a comprehensive warranty. For detailed warranty information, please refer to the warranty card included with your product or visit the official Moen website.
For technical assistance, replacement parts, or further inquiries, please contact Moen Customer Support:
- Website: www.moen.com
- Phone: Refer to Moen's official website for regional contact numbers.
When contacting support, please have your product model number (82663) and purchase date available.


