1. Introduction and Safety Information
Thank you for purchasing the Sharp R-742BKW Microwave Grill. This manual provides essential instructions for the safe and efficient operation of your appliance. Please read it thoroughly before use and keep it for future reference.
Important Safety Instructions
- Read all instructions before using the appliance.
- Do not attempt to operate this oven with the door open as this can result in harmful exposure to microwave energy.
- Do not heat liquids or other foods in sealed containers since they are liable to explode.
- Only allow children to use the oven without supervision when adequate instructions have been given so that the child is able to use the oven in a safe way and understands the hazards of improper use.
- If the door or door seals are damaged, the oven must not be operated until it has been repaired by a competent person.
- The oven should be cleaned regularly and any food deposits removed.
- Failure to maintain the oven in a clean condition could lead to deterioration of the surface that could adversely affect the life of the appliance and possibly result in a hazardous situation.
2. Product Overview
The Sharp R-742BKW is a 25-liter microwave grill designed for versatile cooking. It features a powerful 900W microwave and a 1000W grill, along with an electronic control panel and a 31.5 cm turntable.
Key Features:
- 25-liter capacity
- 900W Microwave Power
- 1000W Grill Power
- 31.5 cm Turntable
- 11 Power Levels
- 6 Automatic Programs (Popcorn, Jacket Potatoes, Pizza, Frozen Vegetables, Beverage, Dinner Plate)
- Defrost by Time and Weight
- Sequence Cooking
- Child Safety Lock
Components:
Your microwave grill comes with the following components:
- Microwave Grill Unit
- Glass Turntable (31.5 cm diameter)
- Turntable Support Ring
- Grill Rack

Figure 2.1: Front view of the Sharp R-742BKW Microwave Grill, showcasing the control panel and door.
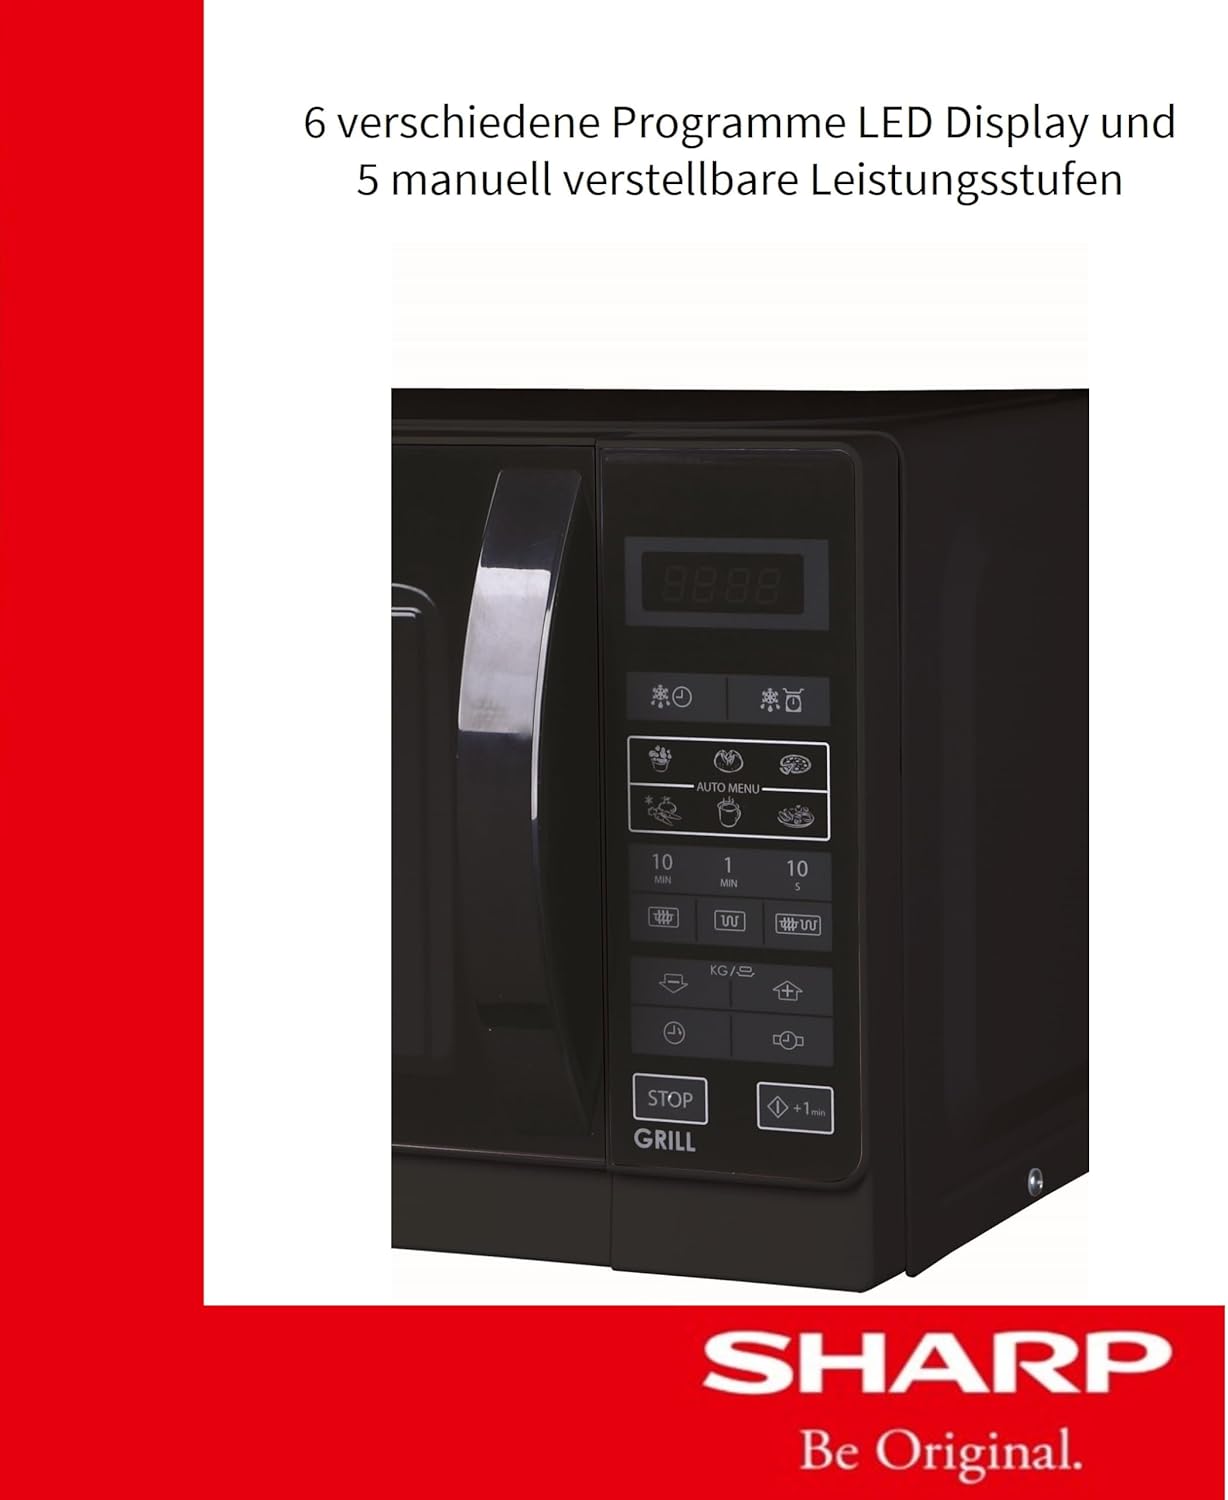
Figure 2.2: Interior view of the microwave grill, showing the heating element and the included grill rack.
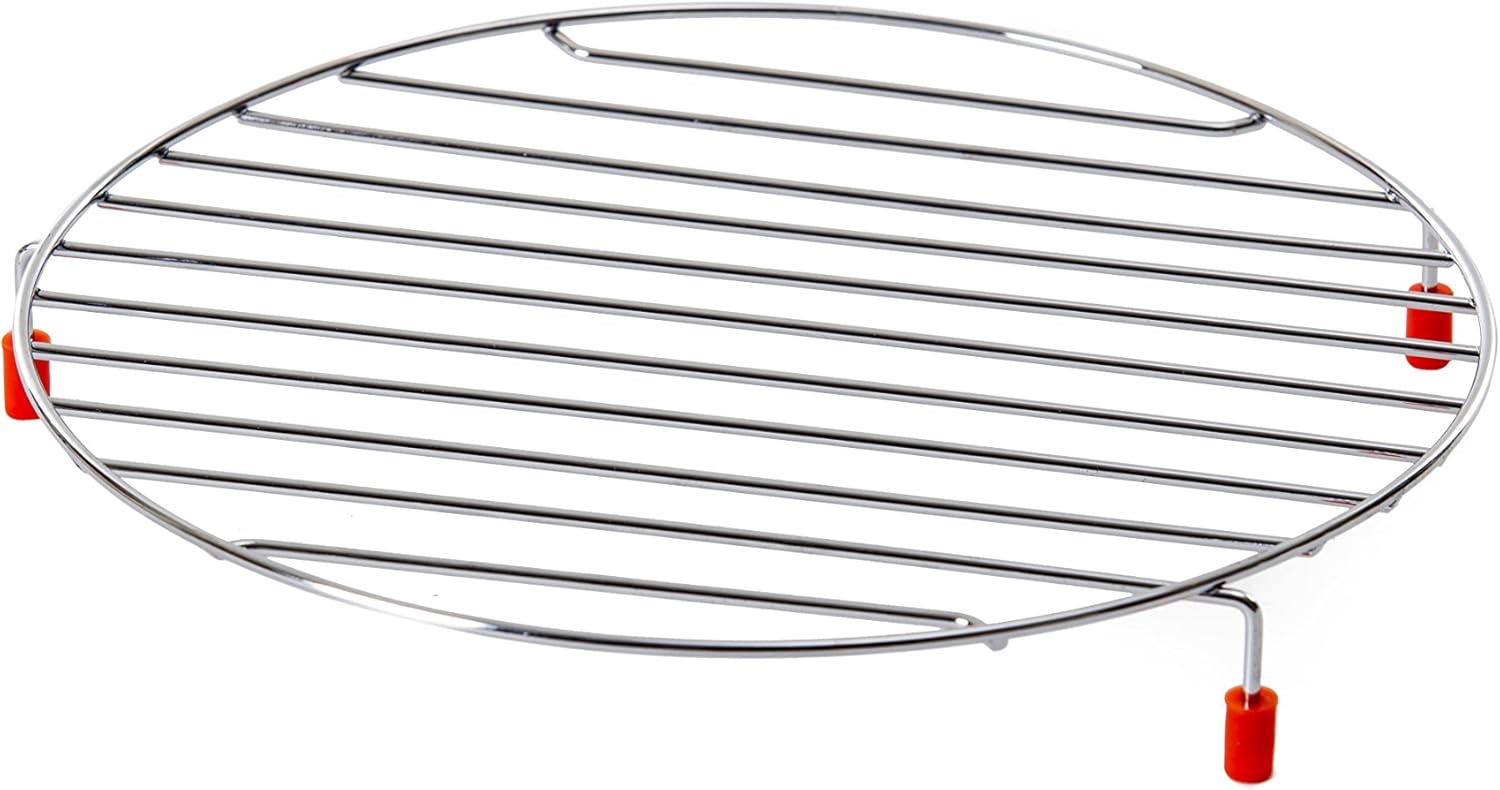
Figure 2.3: Interior view of the microwave grill, showing the glass turntable in place.

Figure 2.4: The glass turntable and metal grill rack, essential accessories for cooking and grilling.
3. Setup and Installation
Unpacking
- Remove all packaging materials from inside and outside the oven.
- Check the oven for any damage, such as a misaligned or bent door, damaged door seals and sealing surface, broken or loose door hinges and latches, or dents inside the cavity or on the door. If any damage is present, do not operate the oven and contact your dealer.
Placement
Place the microwave grill on a flat, stable surface that can support its weight and the heaviest food likely to be cooked in it. Ensure adequate ventilation around the unit.
- Allow a minimum of 20 cm (8 inches) of space above the oven.
- Allow a minimum of 10 cm (4 inches) of space at the rear and sides for proper ventilation.
- Do not block any ventilation openings.
- Do not place the oven near heat sources such as a conventional oven or radiator.

Figure 3.1: Side view of the microwave, illustrating the compact design and ventilation requirements.
Electrical Connection
Plug the power cord into a properly grounded electrical outlet. Ensure the voltage matches the rating label on the appliance.
4. Operating Instructions
Control Panel Overview
The electronic control panel features an LED display and various buttons for setting cooking functions, time, and power levels.

Figure 4.1: Detailed view of the electronic control panel with LED display and function buttons.
Basic Microwave Cooking
- Place food in a microwave-safe container on the turntable.
- Close the door.
- Press the 'Microwave' button to select desired power level (11 levels available).
- Use the '10 MIN', '1 MIN', '10 SEC' buttons to set the cooking time.
- Press 'START' to begin cooking.
Grill Operation
Use the grill function for browning and crisping food. Always use the provided grill rack.
- Place food on the grill rack, then place the rack on the turntable.
- Close the door.
- Press the 'Grill' button.
- Set the desired grilling time using the time buttons.
- Press 'START'.
Combination Cooking (Microwave + Grill)
This mode combines microwave energy with grilling for faster cooking and browning.
- Place food on the grill rack, then on the turntable.
- Close the door.
- Press the 'Combi' button to select the desired combination mode.
- Set the cooking time.
- Press 'START'.
Automatic Programs
The oven includes 6 pre-set automatic programs for common food items:
- Popcorn
- Jacket Potatoes
- Pizza
- Frozen Vegetables
- Beverage
- Dinner Plate
To use an automatic program:
- Place food in the oven.
- Press the 'Auto Menu' button repeatedly to select the desired program.
- Use the 'KG/G' button to select the weight or quantity if applicable.
- Press 'START'.
Defrosting
The oven offers defrosting by time or by weight.
- Defrost by Weight: Press the 'Defrost by Weight' button, select the weight using the 'KG/G' button, then press 'START'.
- Defrost by Time: Press the 'Defrost by Time' button, set the time using the time buttons, then press 'START'.
Child Safety Lock
To prevent unintended operation, activate the child safety lock.
- To activate: Press and hold the 'STOP' button for 3 seconds until a lock indicator appears on the display.
- To deactivate: Press and hold the 'STOP' button for 3 seconds until the lock indicator disappears.
5. Maintenance and Cleaning
Regular cleaning and maintenance will ensure the longevity and optimal performance of your microwave grill.
Cleaning the Exterior
Wipe the exterior surfaces with a soft, damp cloth. Do not use abrasive cleaners or harsh chemicals.
Cleaning the Interior
Clean the oven cavity after each use. Wipe with a damp cloth and mild detergent. For stubborn food splatters, place a bowl of water with lemon juice inside and microwave for a few minutes to loosen residue, then wipe clean.
Cleaning the Turntable and Grill Rack
The glass turntable and grill rack can be washed in warm, soapy water or in a dishwasher.
6. Troubleshooting
If you encounter issues with your microwave grill, consult the following table before contacting service.
| Problem | Possible Cause | Solution |
|---|---|---|
| Oven will not start | Power cord not plugged in; Door not closed properly; Fuse blown or circuit breaker tripped. | Ensure plug is securely in outlet; Close door firmly; Check household fuse/circuit breaker. |
| Food not heating | Door not closed properly; Incorrect cooking time/power level set; Food not suitable for microwave. | Ensure door is closed; Adjust time/power; Use microwave-safe dishes. |
| Sparks or arcing inside oven | Metal in oven; Food residue. | Remove any metal objects; Clean oven cavity thoroughly. |
| Turntable not rotating | Turntable not correctly placed; Obstruction; Motor fault. | Ensure turntable and support ring are correctly positioned; Remove any obstructions; Contact service if motor fault suspected. |
7. Specifications
| Feature | Specification |
|---|---|
| Brand | Sharp |
| Model Number | R-742BKW (18100111) |
| Capacity | 25 Liters |
| Microwave Power | 900 Watts |
| Grill Power | 1000 Watts |
| Voltage | 230 Volts |
| Product Dimensions (L x W x H) | 51.3 x 42.95 x 30.62 cm |
| Weight | 15.1 Kilograms |
| Turntable Diameter | 31.5 cm |
| Material | Glass, Metal |
| Installation Type | Freestanding |
| Special Features | Microwave Function, Grill, Automatic Programs, Child Safety Lock |
8. Warranty and Support
Warranty Information
Your Sharp R-742BKW Microwave Grill is covered by a manufacturer's warranty. Please refer to the separate warranty card included with your purchase for specific terms and conditions, including the warranty period and coverage details.
Customer Support
For technical assistance, service, or to order replacement parts, please contact Sharp customer support. Contact details can typically be found on the Sharp official website or in your warranty documentation.


