
ZACO V5sPro
ZACO V5sPro Robot Vacuum Cleaner User Manual
Model: V5sPro
Introduction
Thank you for choosing the ZACO V5sPro Robot Vacuum Cleaner. This 2-in-1 device is designed to provide efficient cleaning for your hard floors, offering both vacuuming and mopping functionalities. Its intelligent features, such as automatic charging, fall protection, and anti-collision sensors, ensure a thorough and safe cleaning experience. Please read this manual carefully before using the product to ensure proper operation and maintenance.

The ZACO V5sPro robot vacuum cleaner, showcasing its sleek gold and white design with the 'CLEAN' button visible on top.
Safety Instructions
- Always ensure the power adapter is compatible with your local power supply.
- Do not use the robot in wet environments or near water.
- Keep the robot away from open flames and heat sources.
- Do not allow children or pets to play with the robot.
- Before cleaning, remove loose cables, small objects, and fragile items from the floor.
- Do not use the robot to clean sharp objects, burning materials, or liquids.
- Regularly clean the dustbin and filters to maintain optimal performance.
- If the robot is not in use for a long period, turn it off and store it in a cool, dry place.
What's in the Box
The ZACO V5sPro package includes the following components:
- ZACO V5sPro Robot Vacuum Cleaner
- Charging Station with Adapter Cable
- Li-Ion Battery (2600 mAh)
- Remote Control (including batteries)
- 300ml Dustbin (pre-installed in the unit)
- 300ml Water Tank Module
- Microfiber Mopping Cloth (1 pre-installed, 1 additional)
- Side Brushes (1 pair pre-installed, 1 additional pair)
- Additional Fine Dust Filter (HEPA filter)
- Cleaning Tool
- User Manual (German, but this is the English version)
Product Overview
Familiarize yourself with the main components of your ZACO V5sPro robot vacuum cleaner.

The ZACO V5sPro is designed to be ultra-flat (81mm), allowing it to clean effectively under furniture.
Top View
- Clean Button: Initiates or pauses cleaning.
- Dustbin/Water Tank Cover: Access point for dustbin or water tank.
- Indicator Lights: Display status (charging, error, cleaning mode).
Bottom View
- Side Brushes: Two rotating brushes to sweep debris into the suction path.
- Driving Wheels: Large wheels for navigating various floor types.
- Universal Wheel: Provides 360-degree movement.
- Suction Inlet: Where dirt and dust are vacuumed.
- Charging Contacts: Connects with the charging station.
- Cliff Sensors: Detects drops and prevents falling down stairs.
- Mopping Cloth Attachment: Area for attaching the microfiber mopping cloth.
Setup
1. Charging the Robot
- Place the charging station against a wall in an open area, ensuring there are no obstacles within 1 meter to the sides and 2 meters in front.
- Connect the power adapter to the charging station and plug it into a power outlet.
- Place the robot on the charging station, ensuring the charging contacts align. The indicator light will show charging status.
- Allow the robot to fully charge before first use (approximately 4 hours). A full charge provides up to 120 minutes of operating time.

The ZACO V5sPro features automatic charging, returning to its station when the battery is low.
2. Installing Side Brushes
Gently push the side brushes onto the square posts at the bottom of the robot until they click into place. Ensure they are securely fastened.
3. Preparing the Cleaning Area
- Remove any loose cables, small rugs, or fragile items that could obstruct the robot's path or get tangled in its brushes.
- For mopping, ensure the water tank is filled and the microfiber cloth is attached.
Operating the Robot
The ZACO V5sPro offers various cleaning modes to suit your needs.

The ZACO V5sPro is a versatile 2-in-1 robot, capable of both vacuuming and mopping.
Cleaning Modes
- Auto Cleaning: Press the "Clean" button on the robot or remote control. The robot will automatically clean the area using a random path until the battery is low, then return to the charging station.
- Spot Cleaning: Place the robot near a specific dirty area and press the "Spot" button on the remote control. The robot will clean in a spiral pattern, covering an area of approximately 1.2 meters in diameter.
- Edge Cleaning: Press the "Edge" button on the remote control. The robot will clean along walls and furniture edges.
- Max-Power Cleaning: While in Auto, Spot, or Edge mode, press the "Max" button on the remote control to increase suction power for deeper cleaning.
Using the Remote Control
The remote control allows you to manage the robot's functions from a distance.

The remote control for the ZACO V5sPro, featuring buttons for various cleaning modes and scheduling.
- Directional Buttons: Manually control the robot's movement.
- Play/Pause Button: Start or pause cleaning.
- Home Button: Send the robot back to the charging station.
- Schedule Button: Set a cleaning schedule for automatic operation. Refer to the detailed instructions in the full manual for setting schedules.
Switching Between Vacuuming and Mopping
The ZACO V5sPro is designed for either vacuuming or mopping, not simultaneously.
- For Vacuuming: Ensure the dustbin is installed. The robot will use its suction and side brushes to collect debris.
- For Mopping: Remove the dustbin and insert the water tank module with a damp microfiber cloth attached. The robot will then perform a wet wipe. Ensure the floor type is suitable for wet cleaning.
Maintenance
Regular maintenance ensures optimal performance and extends the lifespan of your ZACO V5sPro.
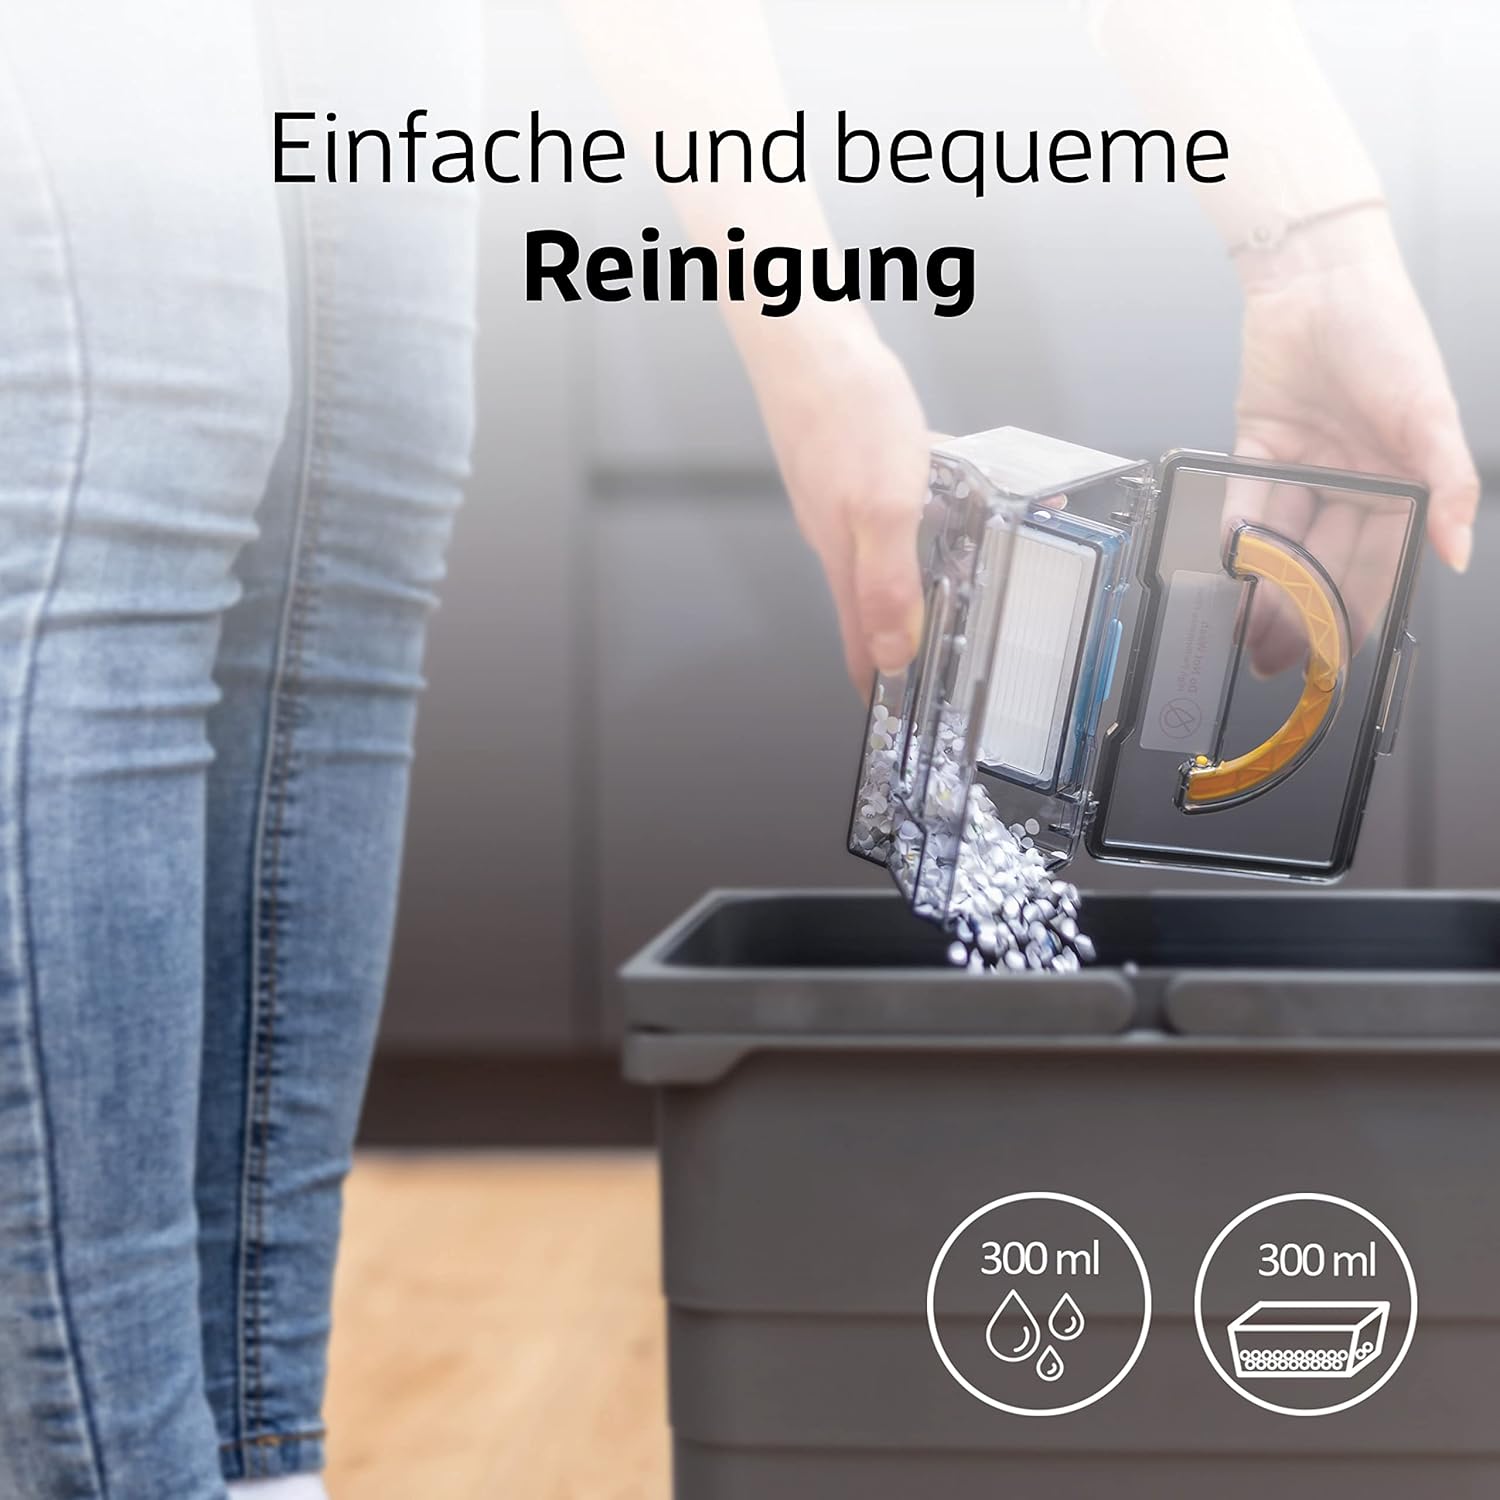
Emptying the dustbin of the ZACO V5sPro is a simple and convenient process.
1. Emptying the Dustbin and Cleaning Filters
- Press the "PUSH" button on the top cover to open it and remove the dustbin.
- Open the dustbin cover and empty its contents into a trash can.
- Remove the primary filter and HEPA filter. Tap them gently to remove dust. The primary filter can be rinsed with water, but ensure it is completely dry before re-installing. The HEPA filter should not be washed.
- Clean the dustbin with water if necessary and let it air dry completely.
- Reassemble the filters and dustbin, then place it back into the robot.
- It is recommended to replace the HEPA filter every 3-6 months, depending on usage.
2. Cleaning Side Brushes
Check the side brushes regularly for tangled hair or debris. Pull them off their posts and remove any obstructions. If brushes are worn, replace them with new ones.
3. Cleaning the Water Tank and Mopping Cloth
- After mopping, remove the water tank and empty any remaining water.
- Detach the microfiber mopping cloth and rinse it thoroughly with water. It can also be machine washed. Allow it to air dry completely.
- Clean the water tank with water and let it air dry.
4. Cleaning Sensors and Charging Contacts
Wipe the cliff sensors (located on the bottom of the robot) and the charging contacts (on both the robot and charging station) with a clean, dry cloth to ensure proper function.
Troubleshooting
| Problem | Possible Cause | Solution |
|---|---|---|
| Robot does not turn on. | Low battery; Power switch off. | Charge the robot; Ensure the main power switch (usually on the side) is ON. |
| Robot does not charge. | Charging contacts dirty; Charging station not powered. | Clean charging contacts on robot and station; Ensure charging station is plugged in and has power. |
| Robot gets stuck frequently. | Obstacles (cables, small rugs); Robot stuck under furniture. | Clear the cleaning area; Use boundary strips if available or block off problematic areas. |
| Poor cleaning performance. | Full dustbin; Clogged filters; Worn side brushes. | Empty dustbin; Clean/replace filters; Clean/replace side brushes. |
| Robot falls down stairs. | Cliff sensors dirty. | Clean the cliff sensors on the bottom of the robot. |
| Mopping function not effective. | Water tank empty; Mopping cloth dry or dirty. | Fill water tank; Dampen and clean mopping cloth. |
Specifications
| Feature | Detail |
|---|---|
| Brand | ZACO |
| Model Number | V5sPro |
| Color | Gold |
| Product Dimensions | 30 x 30 x 8.1 cm |
| Weight | 2.5 Kilograms |
| Dustbin Capacity | 300 Milliliters |
| Water Tank Capacity | 300 Milliliters |
| Power | 22 Watts |
| Voltage | 14V |
| Material | Plastic |
| Runtime | Up to 2 Hours (120 minutes) |
| Noise Level | 60 dB |
| Special Features | Automatic Cleaning, Edge Cleaning, Spot Cleaning, Max-Mode, Timer Control, Obstacle Detection, Anti-Drop Sensors, Automatic Return to Charging Station, Quiet Operation, Suitable for Pet Owners and Allergy Sufferers, Cordless, Bagless. |
Warranty and Support
For warranty information and technical support, please refer to the official ZACO website or contact their customer service directly. Keep your purchase receipt as proof of purchase for warranty claims.
This product is from a small or medium-sized company from Germany, Austria, or Switzerland, which is registered with its brand on Amazon.
Related documentsV5sPro


Ask a question about this manual
Ask about setup, troubleshooting, compatibility, parts, safety, or missing instructions. Manuals+ will review the question and use this page’s manual context to help answer it.