
1. Introduction
This manual provides detailed instructions for the AIBOO Mini RF RGB LED Controller and its accompanying wireless remote. This device is designed to control RGB color-changing LED strip lights, under cabinet lights, LED neon signs, and similar 12V DC LED lighting products. It offers various dynamic modes, static colors, and adjustable brightness and speed settings for a customizable lighting experience.

Image 1.1: The AIBOO Mini RF RGB LED Controller and its wireless remote control.
2. Product Features
- Wireless RF LED controller and remote for RGB color changing LED strips, under cabinet lights, and LED neon signs.
- Remote can be attached to surfaces using the magnetic and iron plate system, preventing misplacement.
- Features a protective case for enhanced reliability.
- 17-key mini controller with 19 dynamic modes, 20 static colors, 5 brightness levels, and 10 speed grades.
- Offers a control distance of up to 15 meters (49 feet) in open areas, allowing the controller to be hidden.
- Auto-save function retains the last used settings when the lights are turned on again.
3. Package Contents
The package typically includes:
- 1 x AIBOO Mini RF RGB LED Controller
- 1 x 17-Key Wireless Remote Control
- 1 x CR2025 Battery (pre-installed in remote)
- 1 x Remote Holder (with adhesive backing)
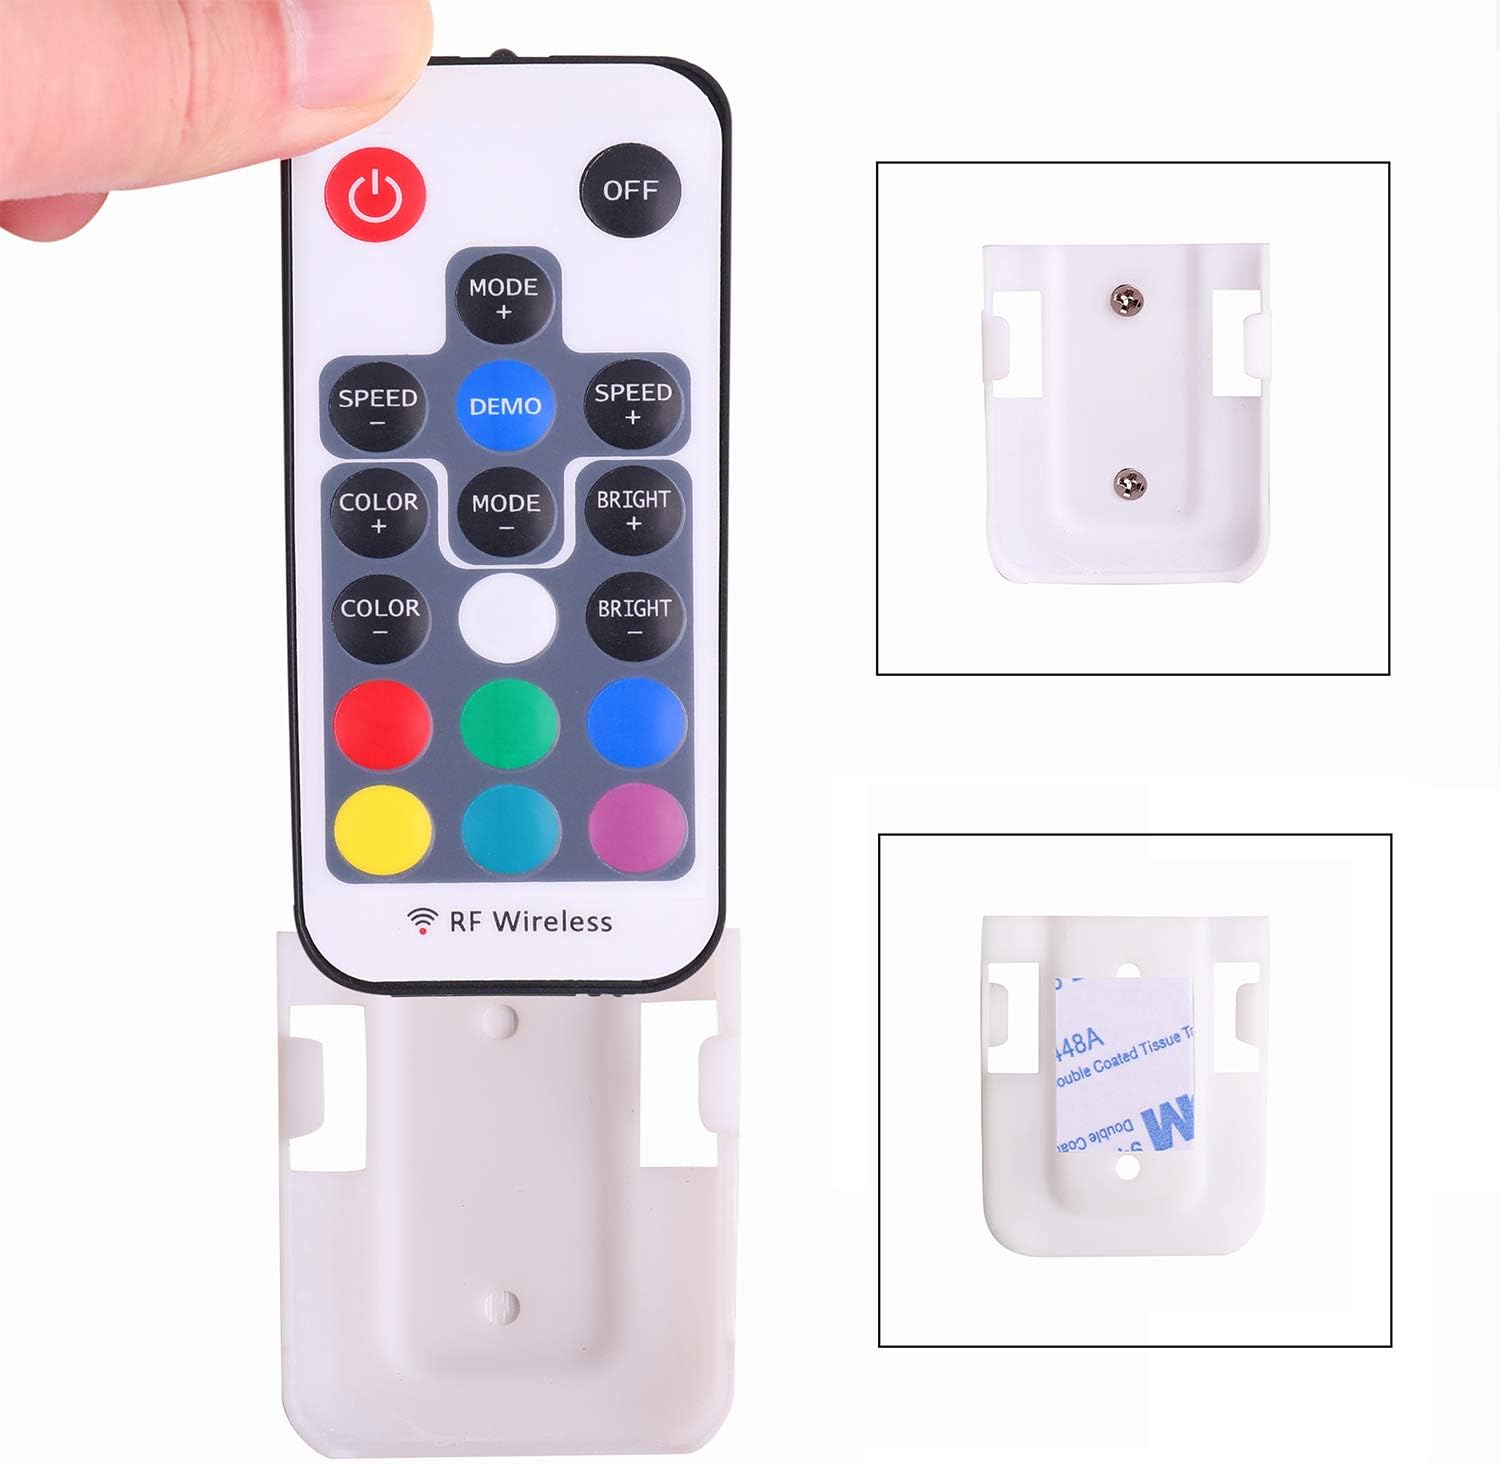
Image 3.1: The remote control shown with its wall mount holder, which can be affixed using adhesive or screws.
4. Setup and Installation
- Connect the LED Controller: Connect the mini RF controller to your 12V DC power supply and your RGB LED strip or AIBOO 4-pin splitter. Ensure the arrows on the connectors align correctly to establish proper polarity.

Image 4.1: Visual guide for connecting the LED controller, highlighting arrow alignment for the LED strip connection and the DC power input. Also shows removing the battery tab from the remote.
- Power Connection: Connect the DC power adapter to the controller's input.

Image 4.2: The controller can be connected directly to an RGB strip or to an AIBOO 4-pin splitter for multiple light connections.
- Remote Battery: Remove the plastic insulating sheet from the remote control's battery compartment before first use.
- Mounting the Remote Holder: The remote holder can be mounted to a desired surface using its adhesive backing or screws (not included).
5. Operating Instructions
The 17-key RF wireless remote control allows for comprehensive management of your LED lighting. The remote operates using Radio Frequency (RF) technology, meaning it does not require direct line-of-sight to the controller.

Image 5.1: The RF wireless remote control, illustrating its 22 dynamic modes, 20 static colors, 5 brightness levels, 10 speed levels, and a remote control range of up to 49 feet.
Remote Control Functions:
- Power Button (●): Turns the lights ON or OFF.
- OFF Button: Turns the lights OFF.
- MODE+ / MODE-: Cycles through 19 dynamic lighting modes.
- SPEED+ / SPEED-: Adjusts the speed of dynamic modes (10 levels).
- COLOR+ / COLOR-: Cycles through 20 static colors.
- BRIGHT+ / BRIGHT-: Adjusts the brightness of static colors (5 levels).
- DEMO Button: Activates a demonstration mode cycling through various effects.
- White Button: Sets the light to pure white.
- Color Buttons (Red, Green, Blue, Yellow, Cyan, Purple): Directly selects specific static colors.
The controller features an auto-save function, which remembers the last selected mode, color, brightness, and speed settings when the power is cycled.
6. Pairing Instructions
The AIBOO RF controller supports two pairing modes: 1-to-1 (one remote controls one controller) and 1-to-many (one remote controls multiple controllers). The default mode is 1-to-many.
6.1. 1-to-1 Pairing Mode
To pair one remote exclusively with one controller:
- Ensure only the specific LED controller you wish to pair is powered on. Disconnect power from any other controllers.
- Within 5 seconds of powering on the controller, press and hold the 'COLOR-' and 'BRIGHT-' buttons on the remote simultaneously.
- The connected lights will flash, indicating successful 1-to-1 pairing. This remote will now only control this specific controller.
Video 6.1: This video demonstrates the process of setting up 1-to-1 pairing for the AIBOO RGB LED controllers. It shows how to isolate one controller, press specific buttons on the remote, and then repeat for a second controller to ensure each remote controls only one set of lights.

Image 6.2: Diagram illustrating the buttons to press for 1-to-1 pairing (COLOR- and BRIGHT-) and 1-to-many pairing (White button).
6.2. 1-to-Many Pairing Mode
To pair one remote with multiple controllers (default mode):
- Ensure all LED controllers you wish to pair are powered on.
- Within 5 seconds of powering on the controllers, press and hold the 'White' button on the remote.
- The connected lights will flash, indicating successful 1-to-many pairing. This remote will now control all paired controllers.
You can switch between 1-to-1 and 1-to-many pairing modes repeatedly as needed by following the respective instructions.
7. Specifications
| Specification | Detail |
|---|---|
| Brand | AIBOO |
| Model Number | YK-300000160 |
| Control Method | RF Wireless Remote Control |
| Input Voltage | 12 Volts DC |
| Light Source Type | LED (RGB) |
| Number of Keys (Remote) | 17 |
| Dynamic Modes | 19 |
| Static Colors | 20 |
| Brightness Levels | 5 |
| Speed Levels | 10 |
| Control Distance | Up to 15 meters (49 feet) in open area |
| Remote Battery Type | 1 x CR2025 (included) |
| Auto-Save Function | Yes |
8. Troubleshooting
- Lights not responding to remote:
- Check if the plastic insulating tab has been removed from the remote's battery compartment.
- Ensure the remote battery (CR2025) is correctly inserted and has sufficient power. Replace if necessary.
- Verify that the controller is properly connected to the power supply and the LED lights.
- Re-attempt the pairing process (Section 6) to ensure the remote is correctly linked to the controller(s).
- Lights not turning on:
- Confirm that the power adapter is plugged into a working outlet and providing 12V DC power.
- Check all connections between the power supply, controller, and LED lights for secure fit and correct polarity (aligning arrows).
- Test the LED lights with a different controller or power supply if available, to isolate the issue.
- Incorrect colors or flickering:
- Ensure the 4-pin connector between the controller and the LED strip is fully inserted and the arrows are aligned. A loose connection can cause color issues.
- Verify that your LED strip is an RGB type compatible with this controller.
9. Warranty and Support
AIBOO is committed to providing reliable products and customer service. For any questions, technical assistance, or warranty inquiries, please contact AIBOO customer support.
U.S. Live Customer Support is available Monday - Friday, 9 AM - 5 PM (EST).
Please refer to your product packaging or the AIBOO official website for the most current contact information.

Image 9.1: AIBOO customer service is available for support.
