
Introduction
This manual provides essential instructions for the safe operation, maintenance, and care of your RYOBI P1813 ONE+ 18V Lithium Ion Cordless Hammer Drill Kit. Please read this manual thoroughly before first use and retain it for future reference. This kit includes the P251 Hammer Drill, P108 4Ah Lithium+ Battery, P117 Battery Charger, Auxiliary Handle, and a Contractor's Bag.
Safety Information
Always observe basic safety precautions to reduce the risk of fire, electric shock, and personal injury. Keep the work area clean and well-lit. Do not operate power tools in explosive atmospheres, such as in the presence of flammable liquids, gases, or dust. Always wear eye protection and hearing protection. Secure the workpiece. Do not overreach. Maintain proper footing and balance at all times. Disconnect the battery pack from the tool before making any adjustments, changing accessories, or storing the tool.
Package Contents
- RYOBI P251 18V ONE+ Hammer Drill
- RYOBI P108 18V ONE+ 4Ah Lithium+ Battery
- RYOBI P117 18V ONE+ IntelliPort Dual Chemistry Charger
- Auxiliary Handle
- Contractor's Bag
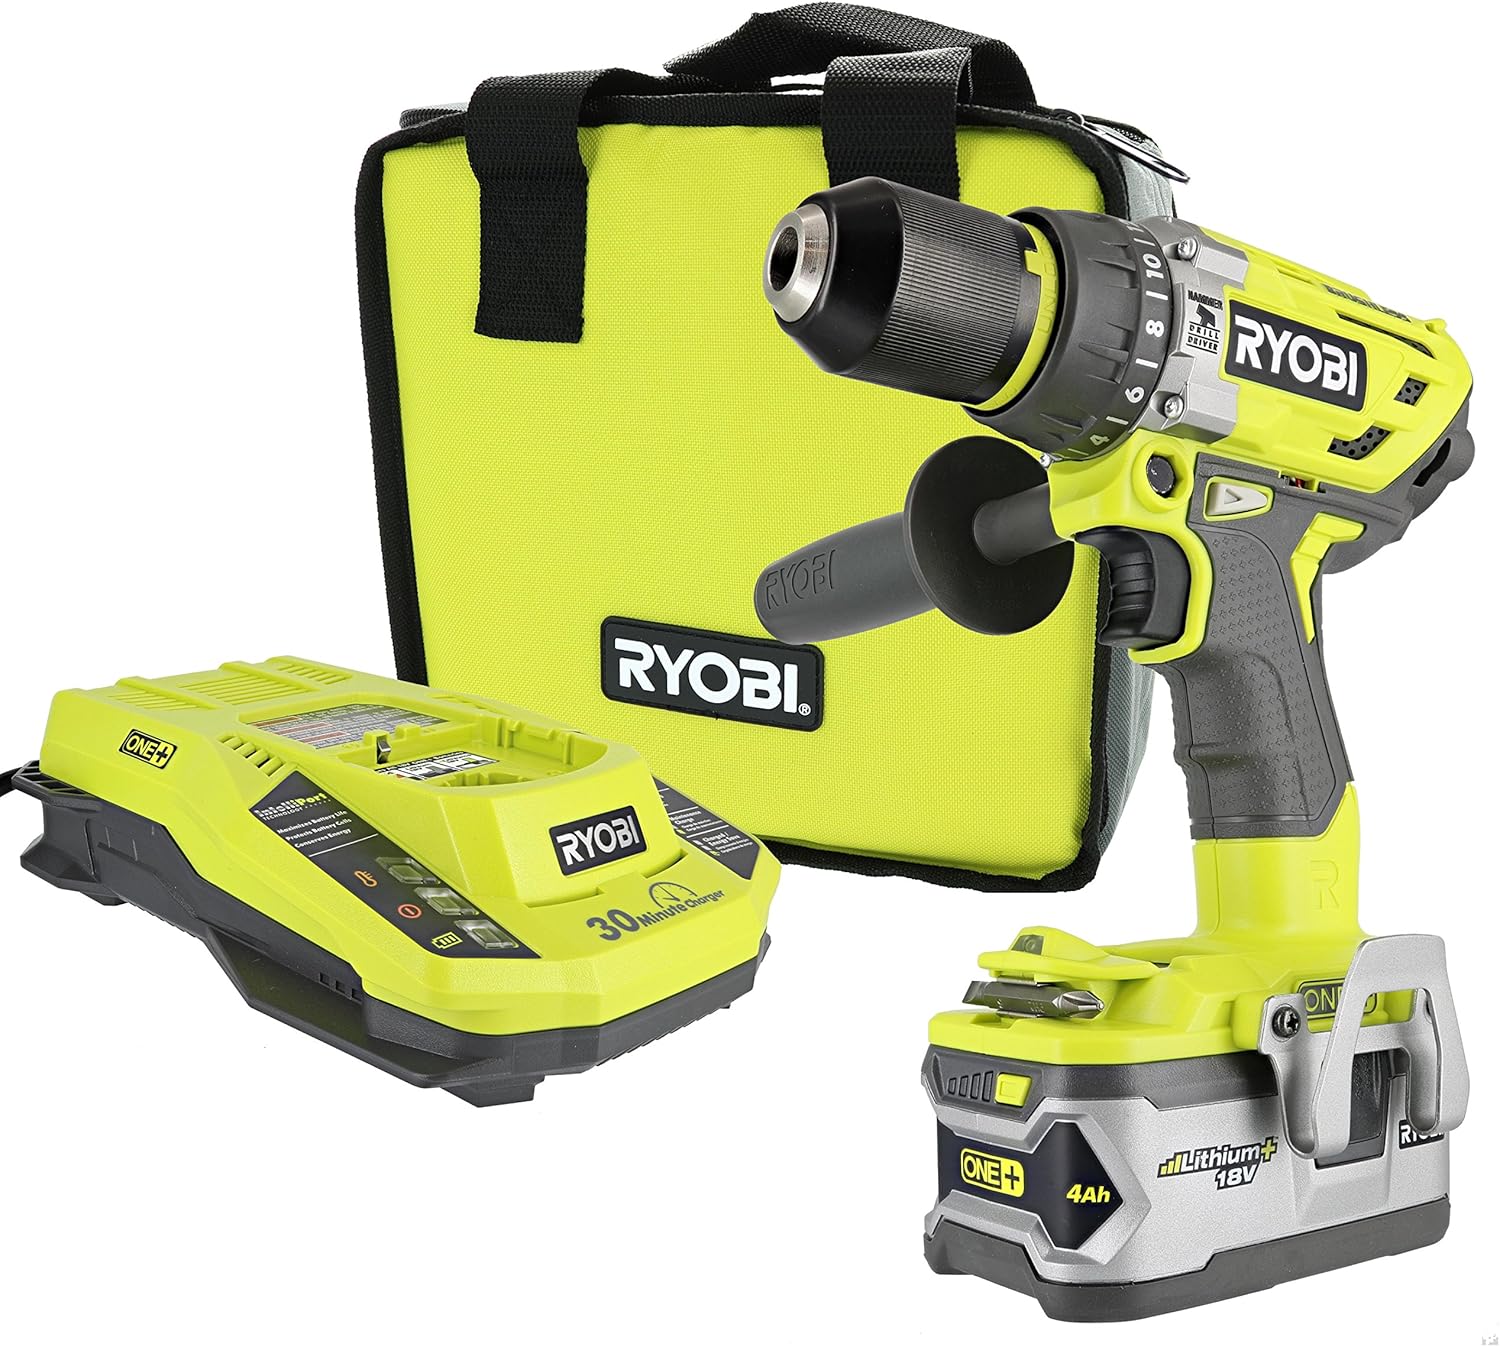
Image: Overview of the RYOBI P1813 kit, showing the hammer drill, battery, charger, and contractor's bag.
Product Features
P251 Hammer Drill
- 24-Position Clutch: Allows for precise torque adjustment up to 750 inch-pounds, preventing overdriving screws and damaging materials.
- 3-Speed Settings: Provides versatility for various applications: drilling (wood, plastic), driving (fasteners), and hammer drilling (masonry, concrete).
- Auxiliary Handle: Enhances control and reduces fatigue, especially during hammer drilling. Can be mounted on either side for user preference.
- Magnetic Bit Holder: Conveniently stores bits and fasteners directly on the tool for quick access.
- Rubber Overmold Grip: Provides a secure and comfortable grip, even in wet or vibrating conditions.

Image: The RYOBI P251 Hammer Drill, highlighting its robust design and the attached auxiliary handle.
P108 4Ah Lithium+ Battery
- High Capacity: Provides extended runtime for demanding tasks.
- Onboard Fuel Gauge: Indicates remaining charge level for efficient work planning.
- Extreme Weather Performance: Operates effectively in temperatures as low as 14°F (-10°C).

Image: The RYOBI P108 4Ah Lithium+ Battery, showing its compact design and fuel gauge indicator.
P117 IntelliPort Dual Chemistry Charger
- Fast Charging: Capable of fully charging a 2Ah battery in approximately 30 minutes.
- Dual Chemistry: Compatible with all RYOBI 18V ONE+ Lithium-Ion and Ni-Cd batteries.
- IntelliPort Technology: Maximizes battery life and conserves energy.

Image: The RYOBI P117 IntelliPort Charger, displaying its charging indicators and battery slot.
Contractor's Bag
- Durable bag for convenient storage and transport of the hammer drill, battery, charger, and accessories.

Image: The RYOBI Contractor's Bag, designed for carrying the tool kit components.
Setup
1. Charging the Battery
- Connect the P117 charger to a standard 120V AC outlet.
- Slide the P108 battery pack onto the charger. Ensure it is fully seated.
- The charger's indicator lights will show the charging status. A fully charged battery is indicated by a solid green light.
- Once charging is complete, remove the battery from the charger.
2. Attaching the Auxiliary Handle
- Loosen the auxiliary handle by twisting it counter-clockwise.
- Slide the handle onto the front of the drill, positioning it to your preferred side (left or right).
- Tighten the handle by twisting it clockwise until it is secure.
3. Installing/Removing Battery Pack
- To install, align the battery pack with the receptacle on the drill handle and slide it in until it clicks into place.
- To remove, press the release latches on the sides of the battery pack and slide it out.
4. Installing/Removing Drill Bits
- Ensure the drill is off and the battery is removed.
- Twist the chuck counter-clockwise to open the jaws.
- Insert the drill bit or accessory into the chuck. Ensure it is centered.
- Twist the chuck clockwise to tighten the jaws securely around the bit.
- To remove, twist the chuck counter-clockwise to loosen and pull the bit out.
Operating Instructions
1. Powering On/Off
- To turn on, press the trigger switch. The speed is variable based on trigger pressure.
- To turn off, release the trigger switch.
2. Selecting Speed
The drill features a 3-speed selector switch located on top of the gear housing.
- Speed 1 (Low): For high torque applications, such as driving large fasteners or drilling large holes.
- Speed 2 (Medium): For general drilling and driving tasks.
- Speed 3 (High): For high-speed drilling in softer materials.

Image: Close-up of the RYOBI P251 Hammer Drill, showing the clutch settings and the 3-speed selector switch.
3. Adjusting Torque/Clutch
The 24-position clutch ring allows you to set the desired torque. Rotate the ring to align the desired setting with the arrow on the drill body. Lower numbers are for smaller screws and softer materials, while higher numbers are for larger screws and harder materials. The drill icon bypasses the clutch for maximum torque.
4. Selecting Operating Mode
The mode selector ring allows you to choose between three operating modes:
- Drill Mode: For drilling holes in wood, plastic, and metal.
- Drive Mode: For driving screws and fasteners.
- Hammer Drill Mode: For drilling into masonry and concrete.
5. Using the Magnetic Bit Holder
The magnetic bit holder located at the base of the drill allows for convenient storage of commonly used bits and fasteners, enabling quick changes during tasks.
Maintenance
- Cleaning: Keep the tool's air vents clear and free of debris. Use a clean, dry cloth to wipe down the tool. Do not use solvents or harsh chemicals.
- Battery Care: Store batteries in a cool, dry place away from direct sunlight and extreme temperatures. Do not store fully discharged batteries for extended periods.
- Inspection: Regularly inspect the tool for any damaged parts, loose screws, or worn components. Replace damaged parts immediately.
Troubleshooting
| Problem | Possible Cause | Solution |
|---|---|---|
| Tool does not start | Battery not installed correctly Battery discharged Tool malfunction | Ensure battery is fully seated Charge the battery Contact customer support |
| Battery not charging | Charger not plugged in Battery or charger faulty Extreme temperature | Verify power connection Test with another battery/charger if available; contact support Move to a moderate temperature environment |
| Reduced performance/power | Low battery charge Incorrect speed/torque setting Worn drill bit | Recharge battery Adjust speed and torque settings appropriately Replace with a sharp, suitable drill bit |
Specifications
| Feature | Specification |
|---|---|
| Brand | RYOBI |
| Model Number | P1813 |
| Power Source | Battery Powered |
| Voltage | 18 Volts |
| Amperage | 4 Amps (Battery Capacity) |
| Maximum Chuck Size | 13 Millimeters |
| Maximum Torque | 750 Inch Pounds |
| Number of Speeds | 3 |
| Drill Type | Hammer Drill |
| Battery Cell Type | Lithium Ion |
| Item Weight | 7.7 pounds (3.5 Kilograms) |
| Product Dimensions | 10.38 x 9.88 x 6.5 inches |
| UPC | 033287173808 |
Warranty and Support
This RYOBI product is covered by a manufacturer's warranty. For specific warranty details, registration, or technical support, please refer to the documentation included with your product or visit the official RYOBI website. Keep your purchase receipt as proof of purchase for warranty claims.


