
VIAIR 00047
VIAIR 00047 Tire Inflation Kit User Manual
Model: 00047
Introduction
The VIAIR 00047 Tire Inflation Kit is designed for accurate tire pressure reading and inflation. It features a 2.5-inch mechanical gauge, a tire gun, and is compatible with Onboard Air Systems equipped with an air tank. This kit allows for precise pressure adjustments and efficient tire maintenance for various vehicle types.
Safety Information
WARNING: This product contains chemicals known to the State of California to cause cancer, birth defects, or other reproductive harm. Always follow safety guidelines when operating this equipment.
- Always wear appropriate eye protection when using air tools.
- Ensure the air source is regulated to prevent over-inflation.
- Keep hands and body clear of moving parts.
- Do not exceed the maximum rated pressure of the tire or the inflation kit.
- Use in a well-ventilated area.
What's in the Box
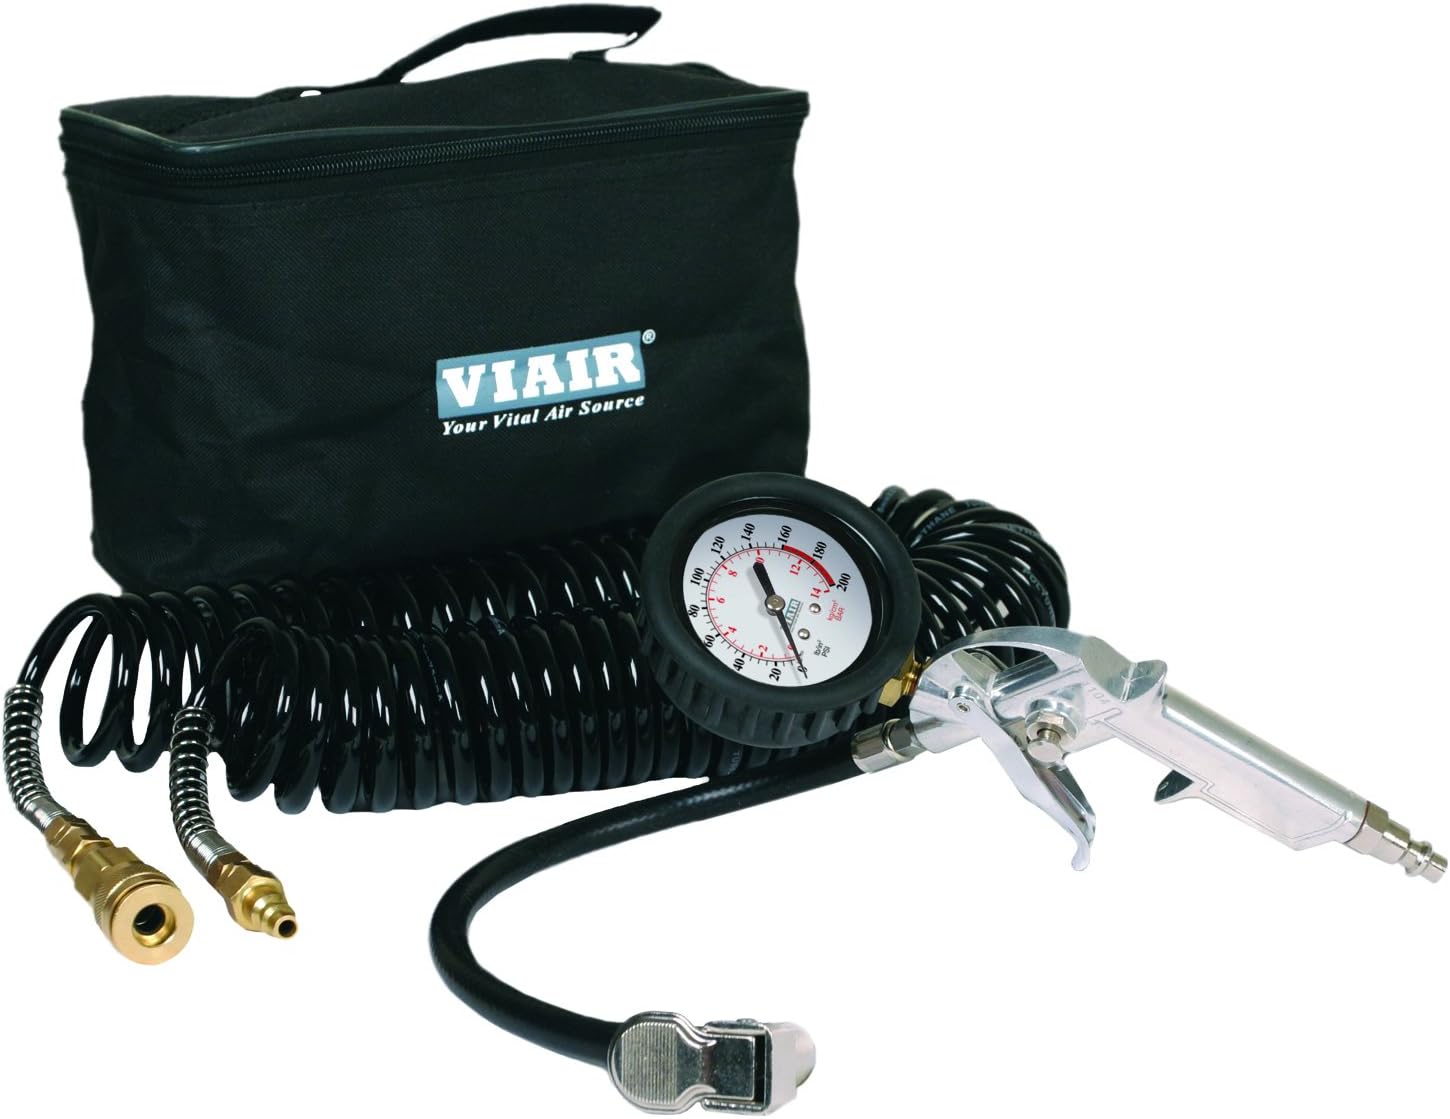
Image: All components of the VIAIR 00047 Tire Inflation Kit, including the inflation gun, coiled hose, and carry bag.
- Inflation Gun with 2.5" Mechanical Gauge (200 PSI)
- 30 ft. Polyurethane Air Line with Quick Connect Stud & Coupler
- 12" Rubber Air Hose
- Carry Bag
Product Features

Image: Detailed view of the inflation gun, highlighting the 2.5" gauge, deflation button, trigger control, and quick connect stud.
- 2.5" (actual 3" on product description) 200 PSI/14 BAR Air Pressure Gauge: Provides accurate pressure readings for various tire types.
- Bleeder Valve: Integrated button for precise pressure adjustment and controlled deflation.
- 30' Polyurethane Air Line: Durable, coiled hose with quick connect stud & coupler for extended reach and easy connection.
- Folding Lever Air Chuck: Designed for secure and hands-free attachment to tire valve stems.
- 12" Rubber Air Hose: Flexible hose connecting the inflation gun to the main air line.
Setup
- Unpack all components from the carry bag.
- Connect the 12" rubber air hose to the threaded inlet on the inflation gun. Hand-tighten securely.
- Attach the quick connect stud of the 30' polyurethane air line to the quick connect coupler on the 12" rubber air hose. Push firmly until it clicks into place.
- Connect the other end of the 30' polyurethane air line to your Onboard Air System's air tank outlet. Ensure your air tank is pressurized and ready for use.
- Verify all connections are tight and free of leaks before proceeding.
Operating Instructions
Checking Tire Pressure
- Ensure the inflation gun is connected to a pressurized air source.
- Press the folding lever air chuck firmly onto the tire's valve stem. The gauge will immediately display the current tire pressure.
- Read the pressure indicated on the 2.5" mechanical gauge.
- If the pressure is too high, gently press the bleeder valve button to release air until the desired pressure is reached.

Image: The folding lever air chuck shown in an open position, ready to be attached to a tire valve.

Image: The folding lever air chuck shown in a closed position, indicating a secure connection to a tire valve.
Inflating Tires
- Attach the folding lever air chuck to the tire's valve stem.
- Squeeze the inflation trigger on the gun to begin inflating the tire.
- Monitor the pressure gauge closely. Release the trigger when the desired pressure is reached.
- Remove the air chuck from the valve stem.
Maintenance
- After each use, wipe down the inflation gun and hoses with a clean, dry cloth to remove dirt and moisture.
- Store the kit in its provided carry bag in a cool, dry place, away from direct sunlight and extreme temperatures.
- Regularly inspect hoses for cracks, kinks, or damage. Replace if necessary to ensure optimal performance and safety.
- Check quick connect fittings for wear and ensure they seal properly. A small amount of silicone grease can be applied to O-rings if needed.
- Do not lubricate the gauge or internal mechanisms of the inflation gun unless specified by the manufacturer.

Image: The VIAIR 00047 kit, including the coiled hose and quick connect fittings, neatly packed inside its black carry bag.

Image: The inflation gun and coiled hose components of the kit stored compactly within the black zippered carry bag.
Troubleshooting
| Problem | Possible Cause | Solution |
|---|---|---|
| Air Leak at Connection | Loose fitting, worn O-ring, or damaged threads. | Tighten connections. Inspect and replace O-rings or fittings if damaged. |
| Gauge Not Reading Pressure | Air chuck not fully seated on valve stem, or gauge malfunction. | Ensure air chuck is firmly pressed onto valve stem. If problem persists, gauge may need replacement. |
| Slow Inflation | Insufficient air pressure from source, or partial blockage in hose. | Check air compressor pressure. Inspect hose for kinks or obstructions. |
| Air Chuck Does Not Seal | Worn rubber gasket inside chuck, or damaged valve stem. | Inspect and replace the rubber gasket if worn. Check tire valve stem for damage. |
Specifications
| Feature | Detail |
|---|---|
| Brand | VIAIR |
| Model Number | 00047 |
| Gauge Type | Mechanical |
| Gauge Size | 2.5 inches (200 PSI) |
| Max Pressure Reading | 200 PSI / 14 BAR |
| Air Line Length | 30 feet (Polyurethane) |
| Air Hose Length | 12 inches (Rubber) |
| Material | Polyurethane |
| Item Weight | 1.65 pounds |
| Product Dimensions (L x W x H) | 10.5 x 5.5 x 6.5 inches |
| UPC | 818114001475 |
Warranty and Support
For detailed warranty information, product registration, and technical support, please visit the official VIAIR website or contact their customer service department. It is recommended to keep your purchase receipt for any warranty claims.
Official VIAIR Store: VIAIR Store on Amazon
Ask a question about this manual
Ask about setup, troubleshooting, compatibility, parts, safety, or missing instructions. Manuals+ will review the question and use this page’s manual context to help answer it.