
1. Introduction
This manual provides essential instructions for the proper installation, operation, and maintenance of your Ozone 40 Litres Fingerprint Safe Locker. Please read this manual thoroughly before using the safe to ensure optimal performance and security.

Image 1.1: The Ozone 40 Litres Fingerprint Safe Locker features a removable shelf for flexible storage. This allows for organized storage of various items such as cash, passports, documents, and jewelry.
Key Features:
- Fast Fingerprint Access: Open the safe quickly with a single touch using the high-resolution capacitive sensor. Stores up to 29 fingerprints.
- Dual Unlocking Methods: Access the safe using either a registered fingerprint or a user-defined password.
- 40 Litres Capacity: Ideal for securing valuables in homes and offices. Dimensions: 420mm (Height) x 350mm (Width) x 360mm (Depth).
- Backup Access: Includes emergency keys and a USB port for power bank connection in case of battery depletion.
- Auto-Freeze Mode: Temporarily disables the keypad and alerts the user after multiple incorrect unlocking attempts, enhancing security.
- Internal LED Light: Provides illumination inside the safe for easy visibility of contents, even in low light conditions.
2. Setup Instructions
2.1 Unpacking and Initial Inspection
Carefully remove the safe from its packaging. Inspect the safe for any signs of damage. Ensure all included components are present:
- 1 Lock set
- 1 Warranty Card
- User Manual
- 1 Quality Checklist
- 1 Installation kit (including 4 fasteners)
- Emergency Keys (2)
- 4 x 1.5V AA Batteries
- 1 Adaptor (6V)
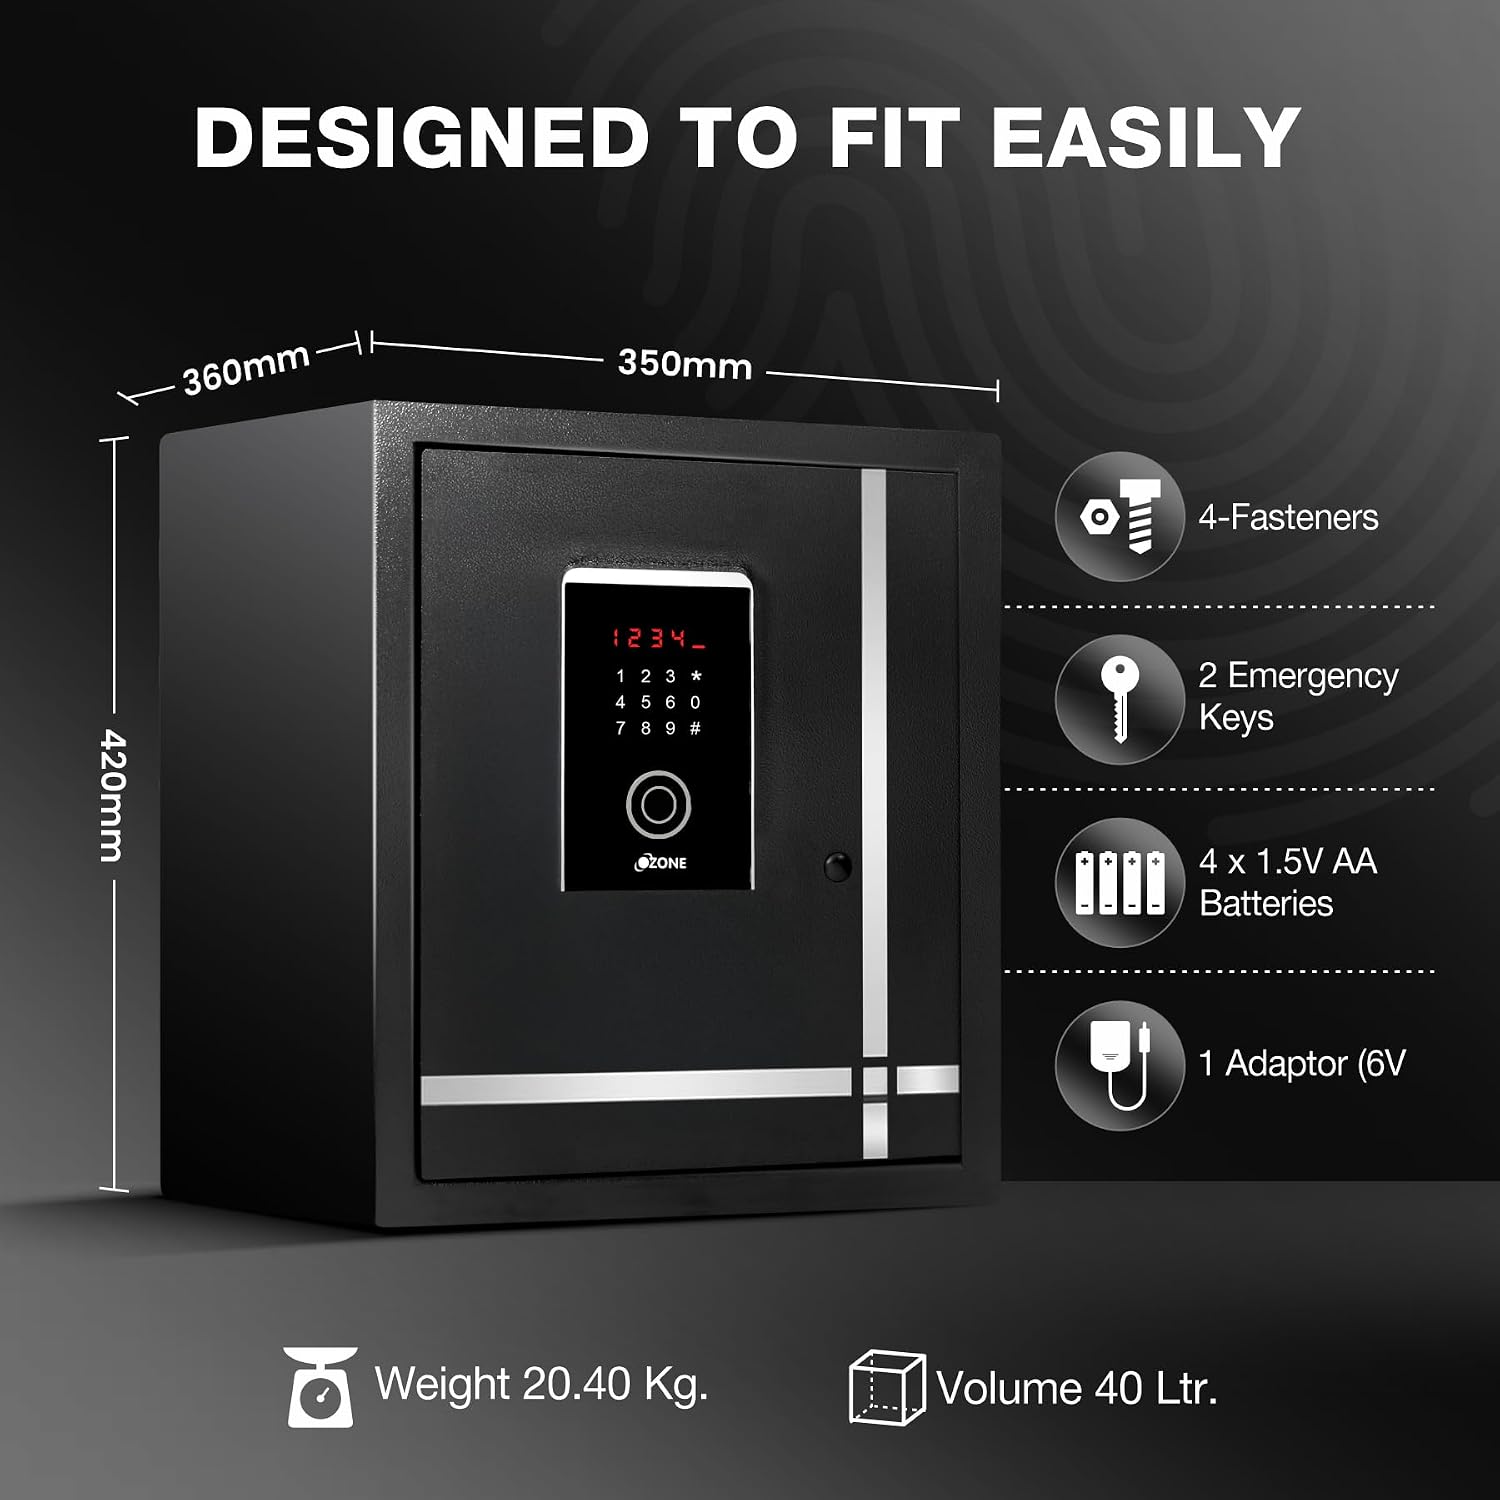
Image 2.1: Visual representation of the safe's dimensions (420mm H x 350mm W x 360mm D) and a list of included accessories such as fasteners, emergency keys, AA batteries, and an adaptor.
2.2 Battery Installation
- Locate the battery compartment, typically on the inside of the safe door.
- Insert the 4 x 1.5V AA batteries, ensuring correct polarity (+/-).
- Close the battery compartment cover securely.
2.3 Mounting the Safe
The safe is designed for wall mounting. For secure installation, use the provided installation kit and fasteners. Professional installation is recommended, but if you have a drill machine, it can be installed at home. Ensure the mounting surface is strong enough to support the safe's weight (20.4 kg) and its contents.
3. Operating Instructions
3.1 Initial Opening with Emergency Key
Before setting up fingerprints or passwords, use the emergency key to open the safe for the first time. This allows access to the battery compartment and internal controls.
3.2 Setting Up a Password
- With the safe door open, locate the reset button inside the safe (refer to the diagram in the full user manual for exact location).
- Press the reset button. The indicator light on the keypad will illuminate.
- Enter your desired password (4-8 digits) on the keypad.
- Press the '#' button to confirm. The indicator light will flash, confirming the password has been set.


Image 3.1: The digital keypad allows for password entry. The hidden password feature ensures privacy during input.
3.3 Registering Fingerprints
The safe can store up to 29 unique fingerprints.
- With the safe door open, press the reset button.
- Place your finger on the fingerprint scanner. The indicator light will prompt you to lift and place your finger multiple times for a complete scan.
- Repeat the process for each finger you wish to register.
- Once registration is complete, the indicator light will confirm.

Image 3.2: The fingerprint scanner provides instant access to the safe. It uses a high-resolution capacitive sensor and can store up to 29 fingerprints.
3.4 Opening the Safe
To open the safe:
- Using Fingerprint: Place a registered finger on the scanner. The safe will unlock within a second.
- Using Password: Enter your password on the keypad, then press '#'. The safe will unlock.
- Using Emergency Key: Insert the emergency key into the keyhole and turn it to open the safe. This method bypasses electronic locks.

Image 3.3: The safe offers multiple access modes including fingerprint recognition, digital password entry, and traditional emergency key access.
3.5 Closing and Locking the Safe
Simply close the safe door. The motorized shooting bolts will automatically engage, securing the safe.
3.6 Internal LED Light
The internal LED light activates automatically when the safe door is opened, providing visibility to your belongings.
4. Maintenance
4.1 Battery Replacement
When the low battery indicator appears (refer to troubleshooting section), replace all four AA batteries promptly. Use only new, high-quality alkaline batteries.
4.2 Cleaning
Wipe the exterior of the safe with a soft, damp cloth. Avoid using abrasive cleaners or solvents. Keep the fingerprint scanner and keypad clean and dry for optimal performance.
4.3 Emergency Keys
Important: Do not lock the emergency keys inside the safe.
Store the emergency keys in a secure location outside the safe, accessible only to authorized individuals. These keys are crucial for opening the safe if the electronic system fails or batteries are depleted.

Image 4.1: The emergency keys provide mechanical access to the safe. Keep them in a safe place outside the locker.
5. Troubleshooting
5.1 Safe Does Not Open Electronically
- Check Batteries: If the keypad or scanner does not respond, the batteries may be depleted. Look for a low battery indicator.
- Use Emergency Key: If batteries are dead, use the emergency key to open the safe and replace the batteries.
- External Power: Connect a power bank to the USB port on the safe to provide temporary power for electronic access.

Image 5.1: The safe can be temporarily powered by a power bank via its USB port for emergency access when batteries are low.
5.2 Incorrect Fingerprint/Password Attempts
The safe features an Auto-Freeze Mode. After multiple failed unlocking attempts (fingerprint or password), the keypad will temporarily disable, and an audible alarm may sound. Wait for the freeze period to expire before attempting to unlock again. Ensure your registered fingerprint is clean and correctly placed on the scanner, and that the password is entered accurately.

Image 5.2: The safe includes a low battery indicator and an anti-theft alarm system to alert users of potential issues or unauthorized access attempts.

Image 5.3: An alarm icon indicates that the safe's anti-theft alarm has been triggered, providing an audible alert.
6. Specifications
| Feature | Detail |
|---|---|
| Brand | Ozone |
| Model Number | SF00006 (Safilo Bio-1) |
| Product Dimensions (D x W x H) | 36D x 35W x 42H Centimeters |
| Capacity | 40 Liters |
| Item Weight | 20.4 Kilograms |
| Lock Type | Biometric (Fingerprint) and Digital (Password) |
| Material | Acrylonitrile Butadiene Styrene (ABS), Alloy Steel |
| Color | Black |
| Mounting Type | Wall Mount |
| Alarm | Audible |
| Water Resistance Level | Not Water Resistant |
7. Warranty Information
Your Ozone 40 Litres Fingerprint Safe Locker comes with a 2-year warranty provided by the manufacturer from the date of purchase. Please retain your purchase receipt for warranty claims.
8. Support and Contact Information
For any assistance, support, or manufacturing defects, please contact Ozone Customer Care directly. The seller is not responsible for support related to initial setup or product defects.
Ozone Customer Care Number: 9716500300
Manufacturer Contact Information:
Ozone Secutech Pvt.Ltd.
Village Kheri, Trilokpur Road, Kala Amb, Nahan District Sirmur, (Himachal Pradesh) - 173030 (India)