1. Introduction
This manual provides essential information for the safe and effective operation, maintenance, and troubleshooting of your BLACK+DECKER KC3610 3.6V Cordless Screwdriver. Please read these instructions carefully before using the tool and retain them for future reference.
2. Safety Instructions
Always observe basic safety precautions to reduce the risk of fire, electric shock, and personal injury.
- Keep the work area clean and well-lit. Cluttered or dark areas invite accidents.
- Do not operate power tools in explosive atmospheres, such as in the presence of flammable liquids, gases, or dust. Power tools create sparks which may ignite the dust or fumes.
- Keep children and bystanders away while operating a power tool. Distractions can cause you to lose control.
- Avoid accidental starting. Ensure the switch is in the off-position before connecting to battery pack, picking up or carrying the tool.
- Do not overreach. Keep proper footing and balance at all times. This enables better control of the power tool in unexpected situations.
- Dress properly. Do not wear loose clothing or jewelry. Keep your hair and clothing away from moving parts. Loose clothes, jewelry or long hair can be caught in moving parts.
- Use safety equipment. Always wear eye protection. Dust mask, non-skid safety shoes, hard hat, or hearing protection must be used for appropriate conditions.
- Disconnect the battery pack from the power tool before making any adjustments, changing accessories, or storing power tools.
- Store idle power tools out of the reach of children and do not allow persons unfamiliar with the power tool or these instructions to operate the power tool.
3. Package Contents
Verify that all items listed below are present in your package:
- 1 x BLACK+DECKER KC3610 Cordless Screwdriver
- 1 x Wall Charger
- 1 x Magnetic Bit Holder
- 10 x Screwdriver Bits (various sizes and types)
- 1 x Instruction Manual

Figure 3.1: Complete package contents including the screwdriver, charger, and bit set.

Figure 3.2: Visual representation of the included components.
4. Product Overview
Familiarize yourself with the various parts of your BLACK+DECKER KC3610 Cordless Screwdriver.
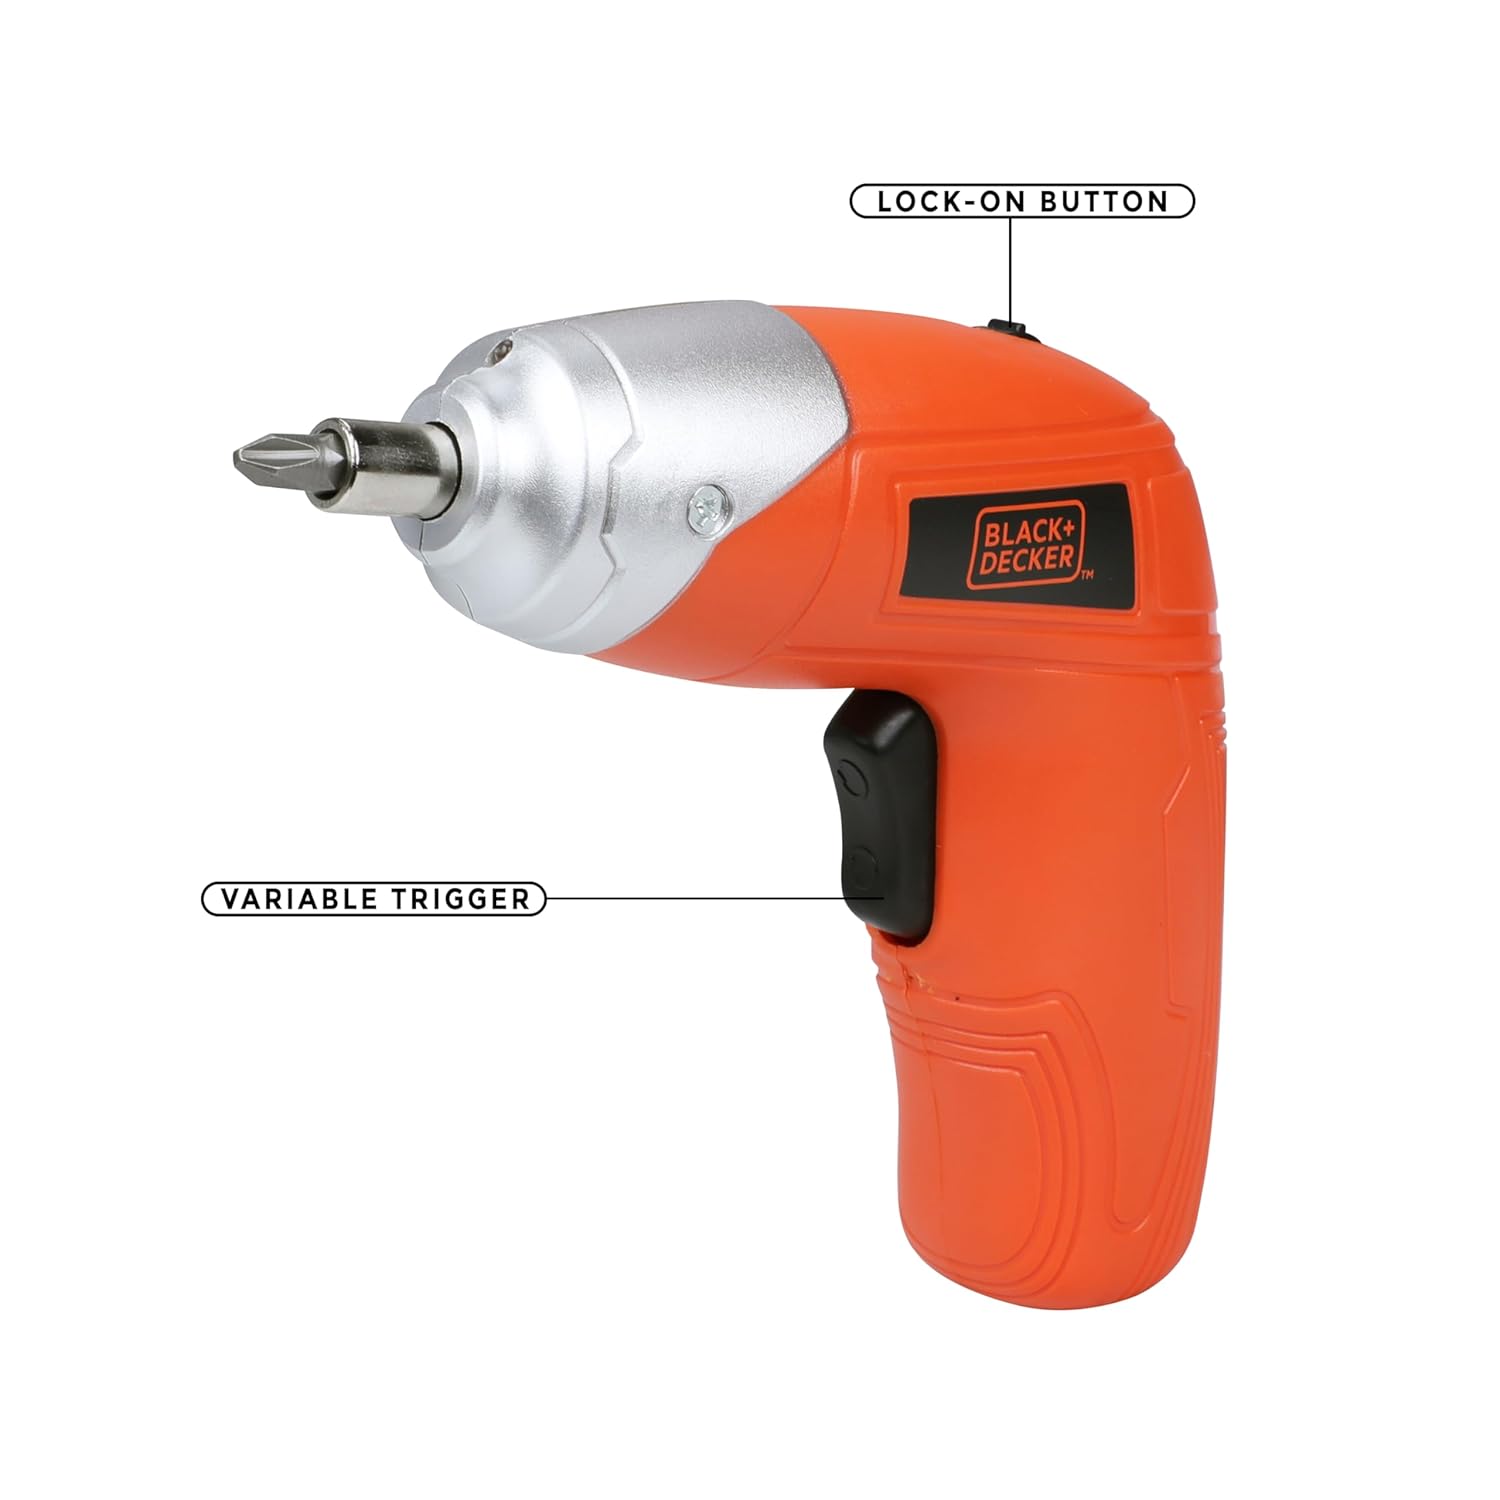
Figure 4.1: Key operational parts: Lock-on Button (top) and Variable Trigger (handle).

Figure 4.2: Front view highlighting the Tool Holder (1) and LED Light (2).

Figure 4.3: Side view indicating LED Switch (3), Charging Indicator (4), Charging Port (5), and Main Switch (6).
5. Setup
5.1 Charging the Battery
- Connect the wall charger to the charging port (5) on the screwdriver.
- Plug the charger into a standard electrical outlet.
- The charging indicator (4) will illuminate to show that the battery is charging.
- Allow approximately 2 hours for a full charge. The indicator may change or turn off once fully charged (refer to specific product behavior if different).
Note: The screwdriver uses a Lithium-Ion battery. It is recommended to fully charge the battery before first use.
5.2 Inserting and Removing Screwdriver Bits
- Ensure the screwdriver is switched off.
- Insert the desired screwdriver bit into the tool holder (1) until it is securely seated. For smaller bits, use the magnetic bit holder provided.
- To remove a bit, simply pull it straight out from the tool holder.

Figure 5.1: Proper insertion of a screwdriver bit into the tool holder.
6. Operating Instructions
6.1 Powering On/Off and Direction Control
- To operate the screwdriver, slide the main switch (6) to the desired direction (forward for tightening, reverse for loosening).
- Press the variable trigger to start the screwdriver. Release the trigger to stop.
- For continuous use, press the variable trigger and then engage the lock-on button (Figure 4.1). To disengage, press the trigger again.
6.2 Using the LED Worklight
- The integrated LED worklight (2) illuminates the work area for improved visibility.
- To activate the LED light independently, use the LED switch (3). The light may also activate automatically when the trigger is pressed.
6.3 Torque Adjustment
The BLACK+DECKER KC3610 features adjustable torque, allowing you to match the fastening power to the task and material, preventing overtightening or stripping screws.
- Locate the torque adjustment mechanism (refer to product diagram if available, typically a collar near the chuck).
- Rotate the collar to select the desired torque setting. Lower settings are for smaller screws and softer materials, while higher settings are for larger screws and harder materials.
Note: Some user experiences indicate that torque adjustment may not be present or as effective as expected. Always test on a scrap piece of material first to determine the appropriate setting for your application.
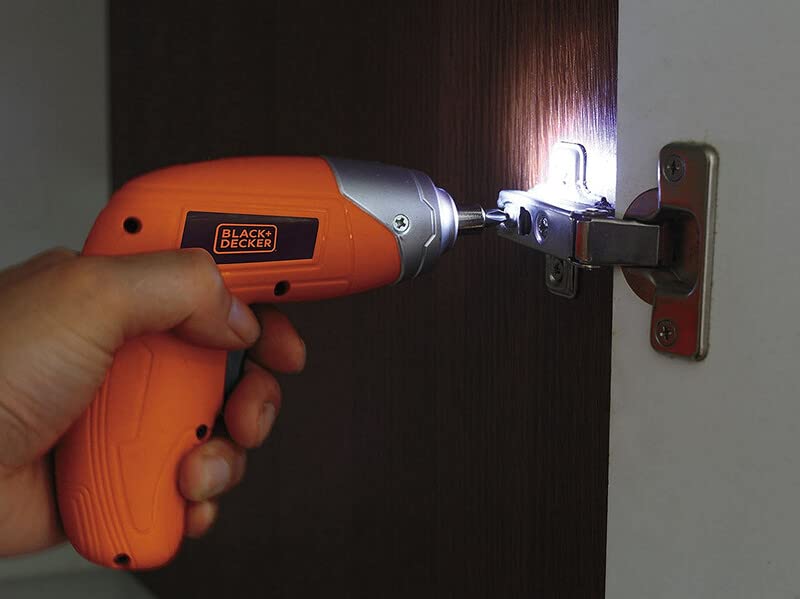
Figure 6.1: Screwdriver in operation, demonstrating the LED worklight.

Figure 6.2: Screwdriver being used for a typical fastening task.
7. Maintenance
Regular maintenance ensures optimal performance and extends the life of your tool.
- Cleaning: Keep the tool's ventilation slots clean to prevent overheating. Use a soft, damp cloth to clean the housing. Do not use harsh chemicals or abrasive cleaners.
- Storage: Store the screwdriver and accessories in a dry, secure place out of reach of children. Ensure the battery is partially charged before long-term storage.
- Battery Care: Do not store the battery in discharged condition. Recharge it periodically if not in use for extended periods.
8. Troubleshooting
Refer to the table below for common issues and their solutions.
| Problem | Possible Cause | Solution |
|---|---|---|
| Screwdriver does not turn on. | Battery is discharged. Switch is in the OFF position. | Charge the battery. Ensure the main switch is set to forward or reverse. |
| Low power or slow operation. | Battery is low. Task is too demanding for the tool. | Recharge the battery. This screwdriver is designed for light-duty fastening tasks, not heavy drilling or driving large screws into dense materials. |
| Screws are stripping or overtightening. | Incorrect torque setting. Bit is worn or incorrect size. | Adjust the torque setting to a lower value. Use the correct size and type of bit for the screw. Replace worn bits. |
| Button or switch malfunction. | Internal component failure. | Contact customer support for assistance or warranty service. Do not attempt to repair yourself. |
9. Specifications
Technical specifications for the BLACK+DECKER KC3610 Cordless Screwdriver:
| Feature | Specification |
|---|---|
| Model Number | KC3610 |
| Voltage | 3.6 Volts |
| No Load Speed | 200 RPM |
| Power Source | Cordless |
| Battery Type | Lithium Ion |
| Battery Capacity | 1500 mAh |
| Charging Time | Approx. 2 hours |
| Item Weight | 450 Grams |
| Product Dimensions | 13.5L x 5.5W x 13H Centimeters |
| Material | Plastic |
| LED Worklight | Yes |
| Charge Indicator | Yes |
| Torque Adjustment | Yes |
Note: Specifications are subject to change without notice for product improvement.

Figure 9.1: Overview of key product specifications.
10. Warranty and Customer Support
BLACK+DECKER provides a 1-Year Warranty on this product from the date of purchase, covering manufacturing defects.
For any warranty-related issues, product feedback, or technical assistance, please contact our customer care team:
- Phone: 1860-425-1111 (Monday to Friday, 10 AM to 5 PM, except government holidays)
- Email: SBD-CUSTOMERCOMMUNICATIONS@SBDINC.COM
- WhatsApp: +91 96060 55835
You can also find information on authorized service centers by contacting customer care.

Figure 10.1: BLACK+DECKER Total Care contact details.


