
1. Introduction
This manual provides detailed instructions for the installation, operation, and programming of the UHPPOTE T3-EM Touch Access Control Keypad. This device is designed for secure access management, supporting up to 2000 users with various access methods including RFID cards, PINs, or a combination of both. It features a robust design suitable for various environments.
2. Features
- Strong zinc alloy electroplated anti-vandal case for enhanced durability.
- Full programming capabilities directly from the keypad.
- Supports up to 2000 users with access via Card, PIN, or Card+PIN.
- Functions as a standalone access control keypad.
- Equipped with backlight keys for visibility in low-light conditions.
- Wiegand 26 input for connection to an external reader or Wiegand 26 output for connection to a controller.
- Adjustable Door Output time, Alarm time, and Door Open time.
- Very low power consumption (30mA).
- Fast operating speed, less than 20ms with 2000 users.
- Lock output current short circuit protection.
- Built-in Light Dependent Resistor (LDR) for anti-tamper functionality.
- Integrated buzzer for audible feedback.
- Red, Yellow, and Green LEDs indicate working status.
- Supports four-digit PINs for standalone operation.
3. Package Contents
Upon unpacking, please verify that all items listed below are present:
- 1 x UHPPOTE T3-EM Access Control Keypad
- 1 x Installation Kit (screws, wall plugs, special screwdriver)
- 1 x User Manual (this document)
4. Product Overview

Figure 4.1: Front view of the UHPPOTE T3-EM Touch Access Control Keypad, showing the illuminated touch keys and doorbell button.

Figure 4.2: Labeled components of the keypad, including Double Colour LED, Digital Backlit Touch, Sensor Area, and The Doorbell Button.

Figure 4.3: Dimensions of the keypad, approximately 154mm (6.06in) in height, 45mm (1.77in) in width, and 20mm (0.79in) in depth.

Figure 4.4: The keypad demonstrating its water-resistant design with water droplets on the surface.
5. Installation
Follow these steps for proper installation of the access control keypad:
- Remove the back cover from the keypad using the supplied special screwdriver.
- Drill two holes on the wall for the self-tapping screws and one hole for the cable.
- Insert the supplied rubber bungs into the two drilled holes for the screws.
- Fix the back cover firmly onto the wall using the two self-tapping screws.
- Thread the connection cable through the designated cable hole in the back cover.
- Attach the main keypad unit to the secured back cover.
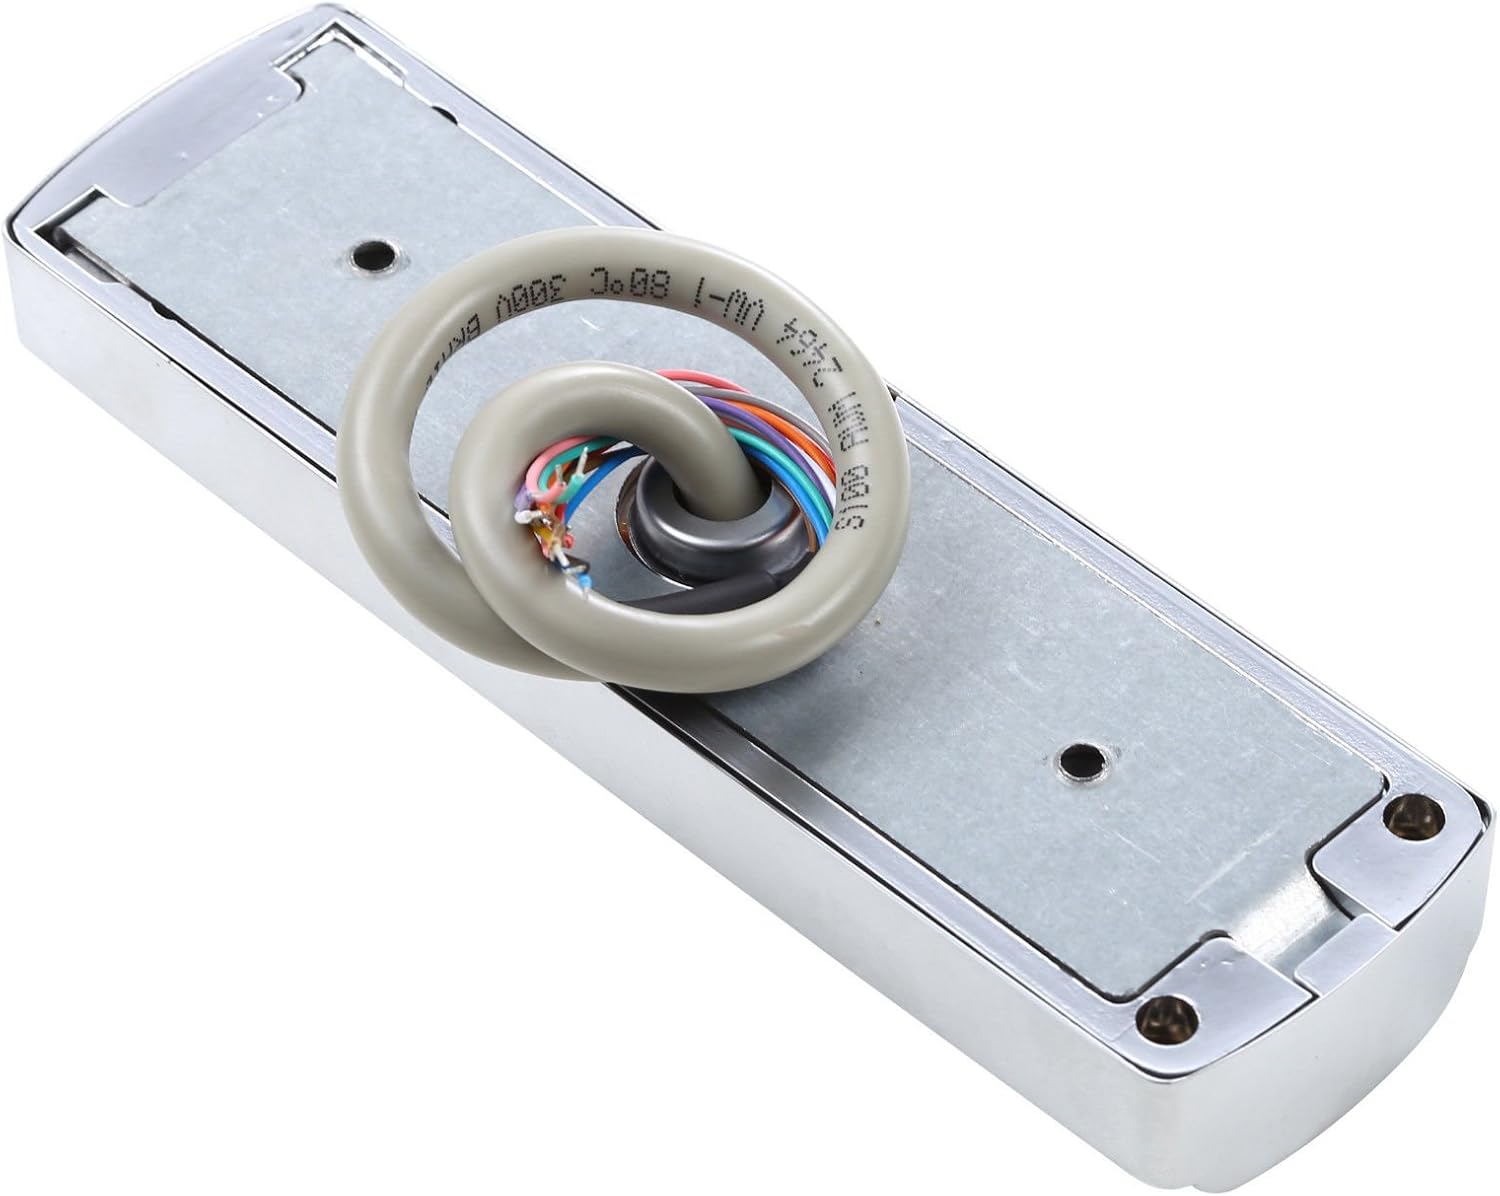
Figure 5.1: Back view of the keypad showing the integrated cable for wiring connections.
6. Wiring Diagram
The following diagram illustrates the common power supply connections for the UHPPOTE T3-EM keypad. Ensure all connections are made correctly to prevent damage and ensure proper functionality.

Figure 6.1: Common power supply diagram showing connections for Bell, D0, D1, Alarm, Open, D_IN, +12V, GND, NO, COM, and NC terminals.
Wiring Key:
- PINK (BELL_A, BELL_B): Doorbell connection.
- GREEN (D0), WHITE (D1): Wiegand data output.
- GRAY (ALARM): Alarm output.
- YELLOW (OPEN): Exit button connection.
- BROWN (D_IN): Door contact input.
- RED (+12V): 12V DC power input.
- BLACK (GND): Ground connection.
- BLUE (NO), PURPLE (COM), ORANGE (NC): Relay outputs for lock control.
Note: Always ensure power is disconnected before performing any wiring to avoid electrical shock or damage to the device.
7. Operation Modes
The UHPPOTE T3-EM keypad supports three primary methods for opening the lock, providing flexibility for various security requirements:

Figure 7.1: Illustration of the three access modes: RFID Card, Password, and a combination of RFID Card and Password.
- RFID Card: Present a pre-programmed 125kHz RFID card to the sensor area on the keypad.
- PIN (Password): Enter a pre-programmed personal identification number (PIN) on the touch keypad.
- Card + PIN: For enhanced security, present a pre-programmed RFID card and then enter its corresponding PIN.
8. Programming Instructions
The UHPPOTE T3-EM keypad allows for full programming directly from the unit. This includes adding and deleting users, changing access codes, and configuring system settings. The device supports up to 2000 users, each configurable with a card, PIN, or a combination of both.
8.1. Entering Programming Mode
To enter programming mode, you typically need to enter a master code followed by a specific command. Refer to the detailed programming guide included with your product for the exact sequence.
8.2. Adding Users (Card, PIN, Card+PIN)
Once in programming mode, you can add new users. Each user will be assigned a unique ID. You can then associate an RFID card, a PIN, or both with that user ID.
- Adding an RFID Card: Present the card to the keypad when prompted in programming mode.
- Adding a PIN: Enter the desired PIN (typically 4-6 digits) when prompted.
- Adding Card+PIN: Present the card, then enter the desired PIN.
8.3. Deleting Users
Users can be deleted individually by their user ID or by presenting their card in programming mode. Entire groups of users or all users can also be cleared.
8.4. System Settings
Various system parameters can be adjusted, including:
- Door open time (duration the lock remains unlocked).
- Alarm duration.
- Wiegand output settings (if connected to an external controller).
- Master code change.
Important: Always record your master code and user IDs. Misplacing the master code may require a factory reset, which will erase all programmed data.
9. Specifications
| Feature | Specification |
|---|---|
| Model Number | T3-EM |
| Material | Zinc Alloy |
| Display Type | LED |
| Voltage | 12 Volts DC |
| User Capacity | 2000 Users |
| Card Type | 125kHz RFID Card |
| Wiegand Interface | Wiegand 26-bit Input/Output |
| Operating Speed | <20ms (for 2000 users) |
| Power Consumption | 30mA (low power) |
| Product Dimensions | 6.1 x 0.8 x 1.8 inches (154 x 20 x 45 mm) |
| Item Weight | 11.7 ounces (0.73 lbs) |
10. Maintenance
To ensure the longevity and optimal performance of your UHPPOTE T3-EM keypad, follow these maintenance guidelines:
- Cleaning: Use a soft, dry cloth to clean the keypad surface. Avoid abrasive cleaners, solvents, or excessive moisture, which can damage the electronic components or finish.
- Environmental Protection: While the keypad features an anti-vandal case, prolonged exposure to extreme weather conditions (e.g., direct heavy rain, intense sunlight, freezing temperatures) should be minimized if possible.
- Cable Integrity: Periodically inspect the wiring connections for any signs of wear, corrosion, or damage. Ensure all connections remain secure.
- Firmware Updates: Check the manufacturer's website for any available firmware updates that may improve performance or add features.
11. Troubleshooting
If you encounter issues with your UHPPOTE T3-EM keypad, refer to the following common problems and solutions:
- Keypad is unresponsive:
- Check power supply connections. Ensure 12V DC is correctly supplied.
- Verify all wiring is secure and free from damage.
- Door does not unlock after valid entry:
- Confirm the lock mechanism is functioning correctly.
- Check the relay output wiring (NO, COM, NC) to the lock.
- Ensure the door open time setting is configured appropriately.
- RFID card not recognized:
- Ensure the card is a 125kHz RFID type. This keypad is not compatible with UHF or encrypted cards (e.g., HID, Indala).
- Verify the card has been correctly programmed into the keypad.
- PIN not accepted:
- Ensure the correct PIN is being entered.
- Verify the PIN is correctly programmed for the user.
- Wiegand output not working with controller:
- Check D0 and D1 wiring to the access controller.
- Ensure the controller is configured to receive Wiegand 26-bit input.
- Consult the controller's manual for specific Wiegand input settings.
- Constant flashing red light:
- This is a normal operational indicator for some units and may not be configurable.
If the problem persists after attempting these solutions, please contact customer support.
12. Warranty and Support
For warranty information and technical support, please refer to the documentation provided at the time of purchase or visit the official UHPPOTE website. Keep your purchase receipt as proof of purchase for any warranty claims.
UHPPOTE Official Store: Visit the UHPPOTE Store on Amazon