
1. Product Overview
This manual provides detailed instructions for the installation, operation, and maintenance of the Hager SFT140 Modular Changeover Switch. The SFT140 is a 1-pole, 40A device designed for switching between two power sources or circuits, featuring a central off position (I-0-II). It is suitable for modular installations in electrical panels.
Key Features:
- Control Type: Changeover Switch
- Poles: 1-pole
- Current Rating: 40A
- Switching Positions: I - 0 - II (Common at the top)
- Rated Frequency: 50/60 Hz
- Standard: IEC 60947-3
- Material: Alloy Steel
2. Safety Information
WARNING: Electrical installations must only be carried out by a qualified electrician. Failure to follow these instructions can result in serious injury or death.
- Always disconnect power at the main supply before installing, servicing, or removing the device.
- Ensure all wiring complies with local and national electrical codes.
- Do not exceed the specified current and voltage ratings of the switch.
- Protect the device from moisture and extreme temperatures.
- Verify all connections are secure before restoring power.
3. Installation
3.1 Mounting
The Hager SFT140 is designed for modular installation on a DIN rail within an electrical enclosure.
- Ensure the main power supply is disconnected.
- Locate an available space on the DIN rail within your electrical panel.
- Hook the top edge of the switch onto the DIN rail.
- Press the bottom of the switch firmly until it clicks into place on the DIN rail.
- Verify the switch is securely mounted and does not wobble.
3.2 Wiring
The SFT140 is a 1-pole changeover switch with common at the top (I-0-II). Refer to the wiring diagram below and the markings on the device for correct connections.
- Terminal 1: Input for Source I
- Terminal 2: Output (Common)
- Terminal 3: Input for Source II
- Terminal 4: Output (Common)
Note: The common connection is typically made at the top terminals (1 and 2) for the output, and the two sources (I and II) are connected to the bottom terminals (3 and 4). However, always verify with the specific markings on your device.
- Strip approximately 10-12mm of insulation from the ends of the wires.
- Loosen the screw terminals on the switch.
- Insert the wires into the appropriate terminals as per your wiring scheme.
- Tighten the screw terminals securely. Ensure no bare wire strands are exposed.
- Double-check all connections for tightness and correctness.

Figure 1: Front view of the Hager SFT140 switch, showing the operating lever, terminal markings (1, 2, 4), and technical specifications such as IEC 60947-3, AC22A, Ie=40A, P(230V)=6kW, and frequency 50/60 Hz. The barcode 3250615510914 is also visible.

Figure 2: Top-front view of the Hager SFT140 switch, providing another perspective of the operating lever and the main product markings.
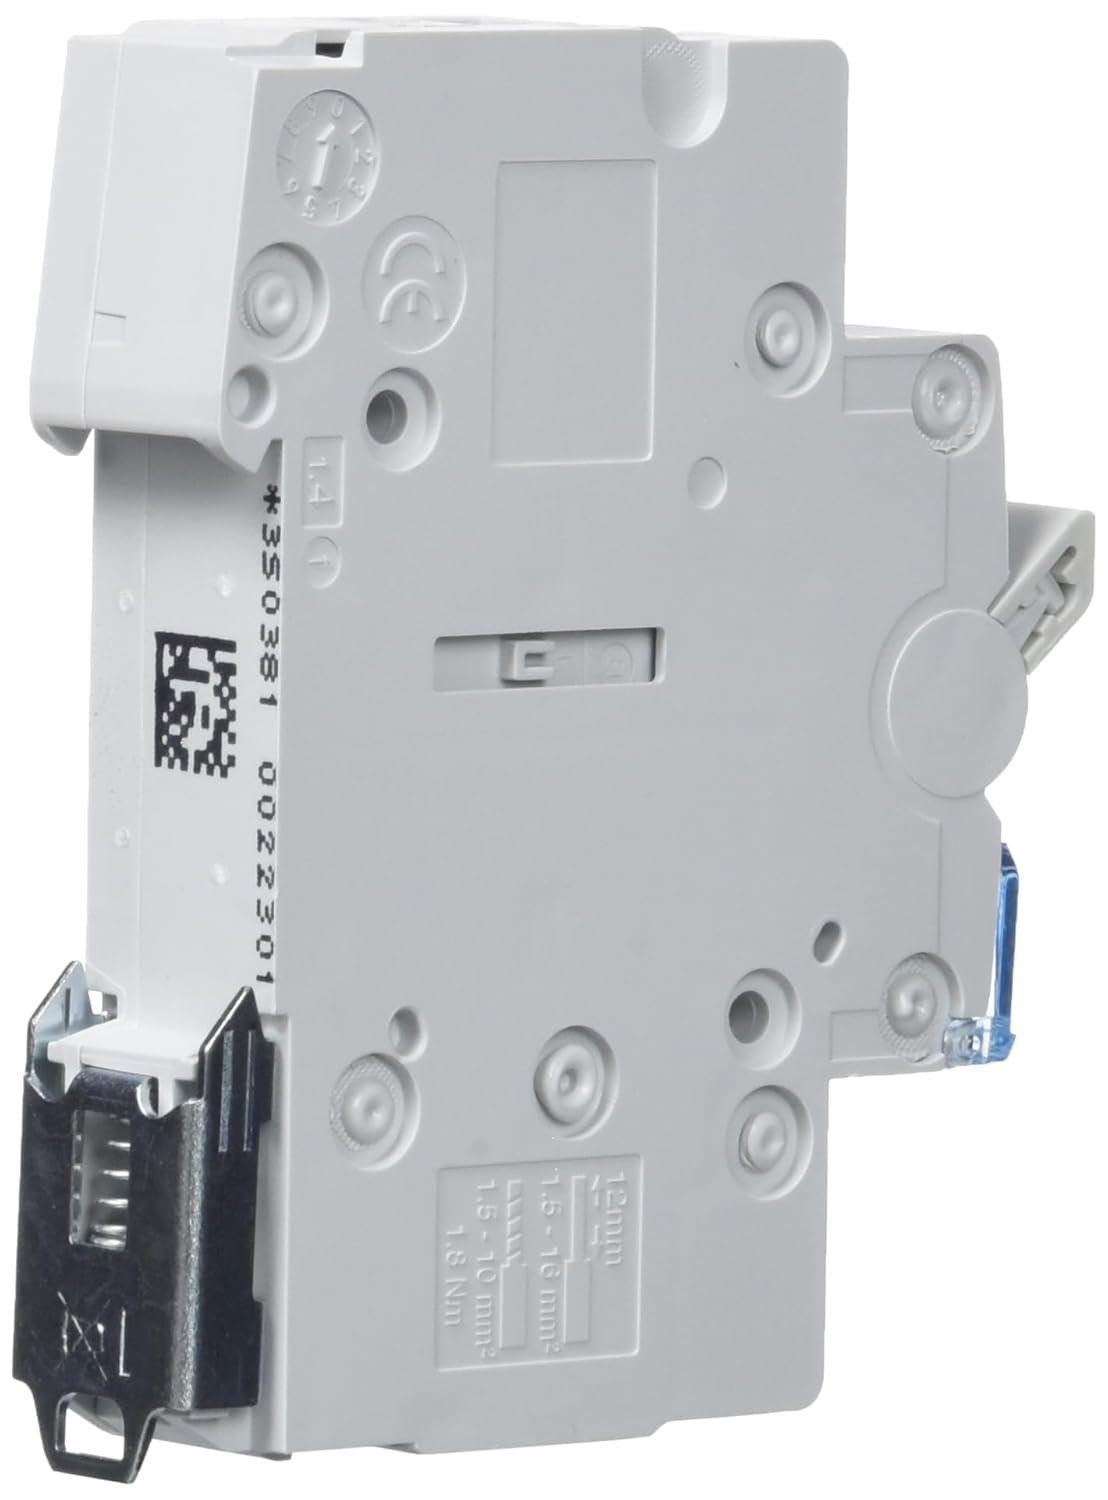
Figure 3: Side view of the Hager SFT140 switch, illustrating the DIN rail mounting clip and wire stripping length (12mm) and wire cross-sections (1.5-10 mm²).

Figure 4: Bottom-side view of the Hager SFT140 switch, showing the underside of the DIN rail mounting mechanism.
4. Operation
The Hager SFT140 switch has three positions, indicated by the lever:
- Position I: Connects the circuit to Source I.
- Position 0: Disconnects both Source I and Source II from the circuit (OFF position).
- Position II: Connects the circuit to Source II.
To change the position, simply move the operating lever to the desired setting (I, 0, or II). Ensure the lever is fully engaged in each position.
5. Maintenance
The Hager SFT140 Modular Changeover Switch is designed for maintenance-free operation under normal conditions.
- Periodically inspect the device for any signs of physical damage, overheating (discoloration), or loose connections.
- Ensure the operating lever moves freely and engages positively in all three positions.
- Clean the exterior of the switch with a dry, soft cloth if necessary. Do not use abrasive cleaners or solvents.
- If any issues are observed, disconnect power immediately and consult a qualified electrician.
6. Troubleshooting
If you experience problems with your Hager SFT140 switch, consider the following:
| Problem | Possible Cause | Solution |
|---|---|---|
| No power to load in Position I or II |
|
|
| Switch lever is stiff or does not engage properly |
|
|
For problems not listed here or if troubleshooting steps do not resolve the issue, contact a qualified electrician or Hager technical support.
7. Specifications
| Model Number | SFT140 |
| Brand | Hager |
| Poles | 1 |
| Current Rating | 40 A |
| Switching Positions | I - 0 - II (Common at top) |
| Rated Frequency | 50/60 Hz |
| Standard | IEC 60947-3 |
| Material | Alloy Steel |
| Dimensions (L x W x H) | 25 x 12.5 x 30 cm |
| Weight | 70 grams |
| EAN/GTIN | 03250615510914 |
8. Warranty and Support
For information regarding warranty terms and conditions, please refer to the documentation provided with your purchase or visit the official Hager website.
For technical support, product inquiries, or service, please contact your local Hager distributor or customer service center.


