
1. Introduction
Welcome to the user manual for the Neoteck WT390 Smart Touch Digital Multimeter. This advanced device is engineered for precise and secure electrical measurements across various applications, including household repairs, industrial diagnostics, and automotive maintenance. It features a 6000-count display, an intelligent measurement mode, and a convenient rechargeable battery.
Your safety is our utmost priority. Always thoroughly read and comprehend all safety warnings and operational instructions provided in this manual before using the multimeter.
2. Product Overview
The Neoteck WT390 is a compact and feature-rich digital multimeter. Familiarize yourself with its key components:
- Large Color LCD Screen: Displays measurement readings, mode indicators, and battery status.
- Touch Controls: Intuitive interface for selecting measurement functions.
- Input Jacks: Ports for connecting test leads and specialized probes.
- NCV Sensor: For non-contact voltage detection.
- Flashlight: Integrated LED for illuminating work areas.

Front view of the Neoteck WT390 Smart Touch Digital Multimeter, showing the large color LCD screen and touch controls.

Exploded view of the Neoteck WT390 Smart Touch Digital Multimeter, highlighting the internal high-precision chips and smart anti-burn fuse for enhanced safety and accuracy.
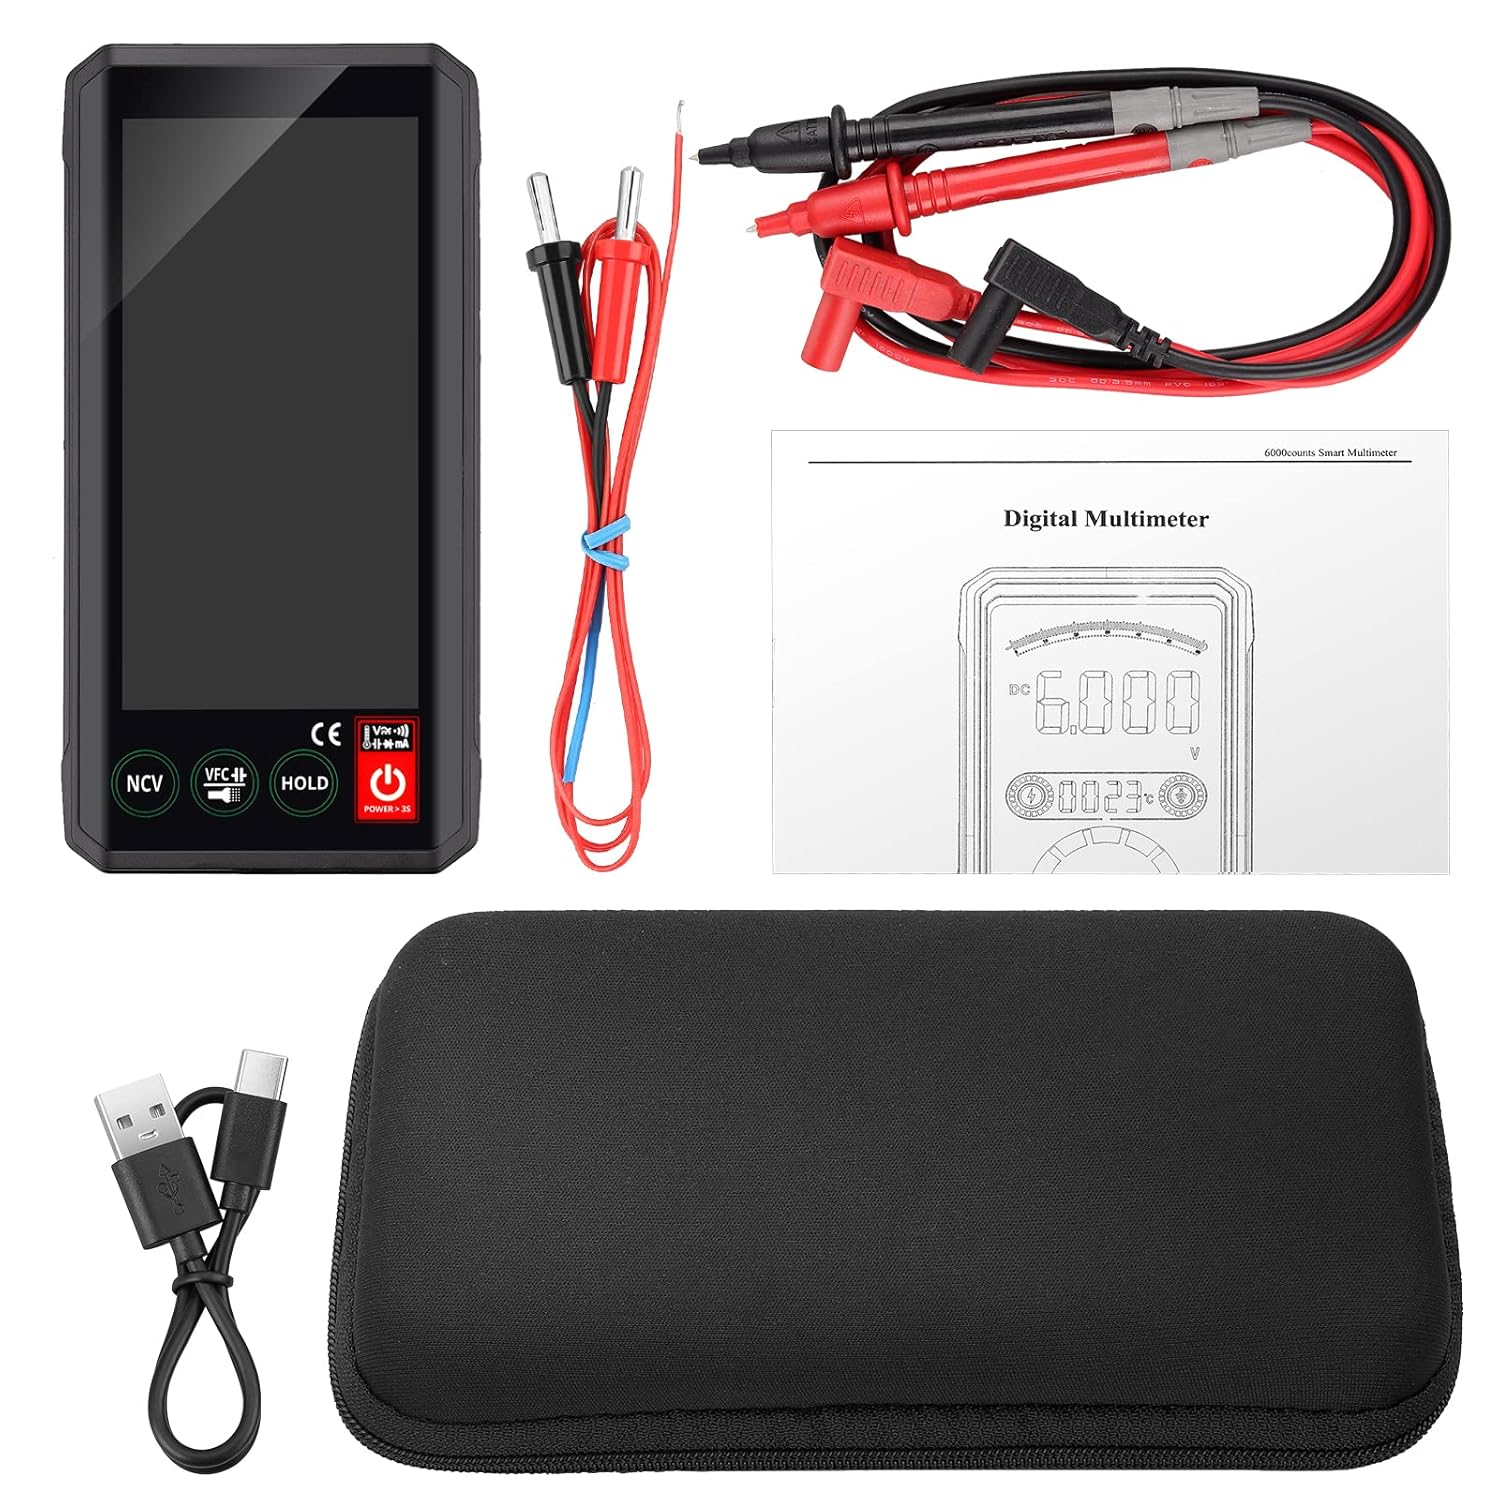
Image showing the compact dimensions of the Neoteck WT390 Smart Touch Digital Multimeter, alongside its protective carrying case, emphasizing its portability.

Contents of the Neoteck WT390 package, including the multimeter, test leads, USB charging cable, and a protective carrying case.
3. Setup
3.1 Charging the Battery
The multimeter is equipped with an 800mAh lithium battery. To charge:
- Connect the included Micro USB cable to the multimeter's charging port.
- Connect the other end of the USB cable to a standard USB power source (e.g., computer, USB wall adapter).
- The charging indicator on the multimeter will show the charging status. Ensure the device is fully charged before first use for optimal performance.

The Neoteck WT390 Digital Multimeter connected to a USB power source via its Micro USB port, illustrating the charging process.
3.2 Connecting Test Probes
For most measurements:
- Insert the red test lead into the VΩmA input jack.
- Insert the black test lead into the COM (common) input jack.
Refer to specific measurement sections for alternative connections, particularly for high current measurements.
4. Operating Instructions
4.1 Power On/Off
To power on or off the multimeter, press and hold the red power button (marked with a power symbol) located on the device.
4.2 Smart Mode (Auto Identification)
Upon powering on, the multimeter defaults to Smart Mode. In this intelligent mode, the device automatically detects and measures:
- AC/DC Voltage
- Resistance
- Continuity
If a measurement requires a different probe input than the default VΩmA/COM, the display will indicate the correct jack to use by flashing the corresponding input light.

A hand interacting with the touchscreen of the Neoteck WT390 Multimeter, demonstrating the intuitive touch control for mode selection.
4.3 Manual Mode Selection
For specific functions not automatically covered by Smart Mode, use the touch controls on the screen to manually select the desired measurement mode. These include:
- Capacitance (F)
- Temperature (°C/°F)
- Frequency (Hz)
- Diode Test
- NCV (Non-Contact Voltage)
- Live Wire Detection
- VFC (Variable Frequency Control)
4.4 Performing Measurements
Follow these general steps for measurements:
- Voltage (AC/DC): Connect probes to the circuit in parallel. Ensure the correct voltage range is selected if not in Smart Mode.
- Current (AC/DC): CAUTION: For current measurements, the red probe must be moved to the appropriate current input jack (e.g., mA or A, if available and distinct from VΩmA). Break the circuit and connect the multimeter in series with the load.
- Resistance (Ω): Ensure the circuit is de-energized. Connect probes across the component.
- Capacitance (F): Ensure the capacitor is fully discharged before connecting probes.
- Temperature (°C/°F): Insert the included temperature probe into the designated jacks and place the sensor at the measurement point.
- Frequency (Hz): Connect probes to the signal source.
- Continuity: Connect probes across the circuit or component. An audible beep indicates continuity.
- Diode Test: Connect probes across the diode. The display will show the forward voltage drop.
- NCV (Non-Contact Voltage): Select NCV mode. Hold the NCV sensor near a live AC voltage source. The device will indicate voltage presence without direct contact.
- Flashlight: Activate the built-in LED flashlight via the touch controls to illuminate dark work areas.

A collage of the Neoteck WT390 Multimeter performing various functions: temperature measurement, NCV detection, LED flashlight operation, and showcasing its durable ABS safety material.
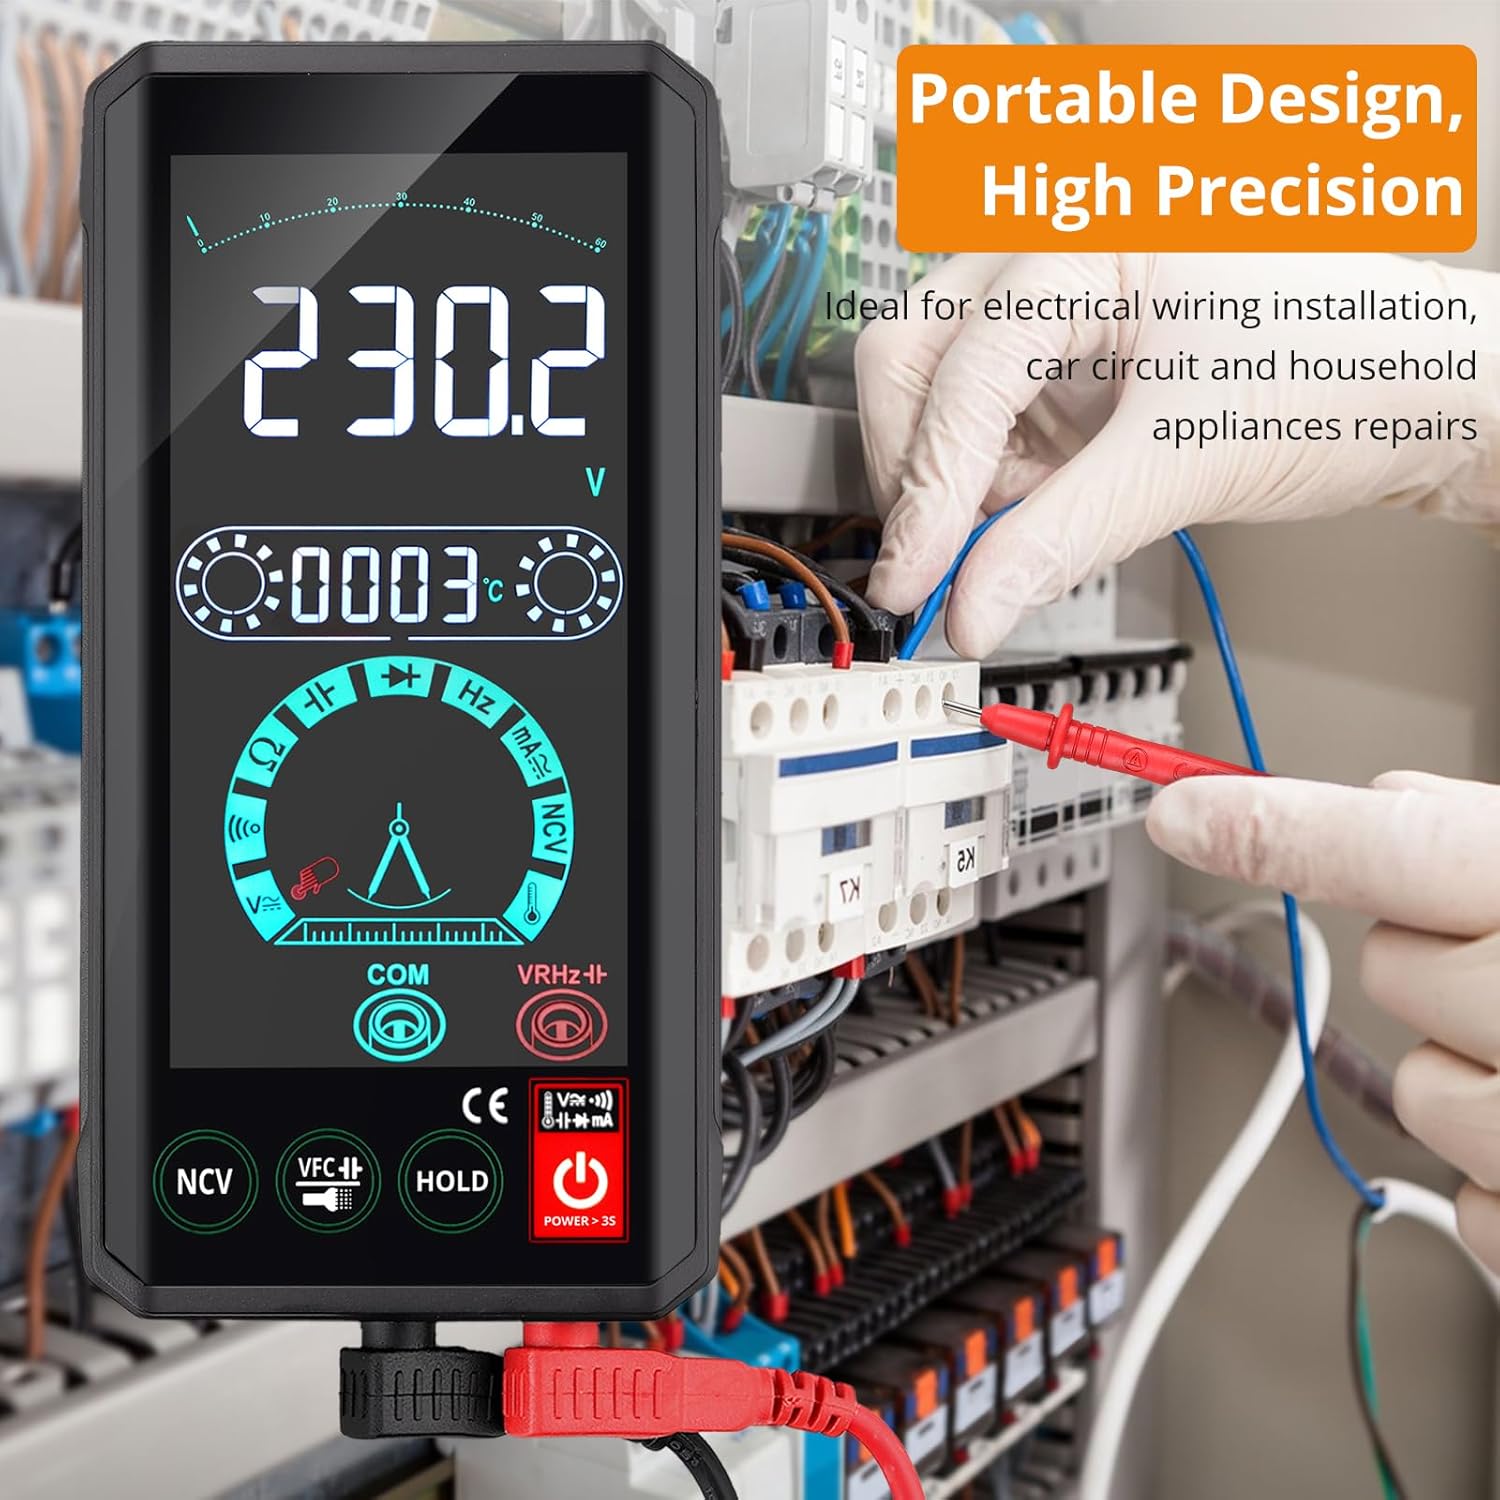
The Neoteck WT390 Multimeter in active use, measuring voltage in an electrical panel, demonstrating its portable design and high precision for electrical wiring installations.
5. Maintenance
5.1 Cleaning
To clean the multimeter, gently wipe the casing with a soft, damp cloth. Do not use abrasive cleaners, solvents, or harsh chemicals, as these can damage the device or its display.
5.2 Battery Care
The integrated lithium battery should be recharged when the low battery indicator appears on the display. To maximize battery lifespan, avoid fully discharging the battery for extended periods. If storing the multimeter for a long time, ensure it is partially charged.
5.3 Fuse Replacement
The multimeter incorporates an integrated anti-overload protection fuse. If the fuse is damaged due to an overload, the device may display a fuse error message. Fuse replacement should only be performed by qualified service personnel to ensure continued safety and proper function.
6. Troubleshooting
If you encounter issues with your Neoteck WT390 Multimeter, refer to the following common problems and solutions:
- No Display or Fails to Power On:
- Ensure the battery is sufficiently charged. Connect the multimeter to a USB charger.
- Press and hold the power button for a few seconds to ensure it's properly activated.
- Inaccurate Readings:
- Verify that the test probes are securely connected to the correct input jacks.
- Confirm that the appropriate measurement mode is selected (or rely on Smart Mode for auto-detection).
- Ensure the component or circuit being tested is functioning correctly.
- No Continuity Beep:
- Check if continuity mode is active.
- Ensure the test probes are making good, firm contact with the circuit points.
- "OL" or Overload Indication:
- This indicates that the measured value exceeds the multimeter's current range, or there is an open circuit.
- Switch to a higher range if available, or verify the circuit integrity.
- Fuse Error Message:
- This message indicates a blown fuse, typically due to an overload.
- Contact qualified service personnel for fuse replacement.
7. Specifications
| Feature | Specification |
|---|---|
| Brand | Neoteck |
| Model | WT390 |
| Power Source | Battery Powered (800mAh Lithium) |
| Display Style | Backlit Color LCD |
| Color | Black |
| Item Weight | 150 Grams |
| Item Dimensions (L x W x H) | 16 x 11 x 6 cm |
| Min. Operating Voltage | 3.7 Volts |
| Compliant Specifications | CE, FCC |
| Max Rated Temperature | 1000 Degrees Celsius |
| Measurement Type | Multimeter, Voltmeter |
8. Safety Information
Adhering to safety guidelines is crucial when operating any electrical testing equipment. The Neoteck WT390 Multimeter is designed with safety features, but user vigilance is essential:
- This multimeter complies with DC/AC 1000V CAT II overvoltage standards and features double insulation for enhanced user protection.
- It includes integrated overload protection and a smart anti-burn fuse system to prevent damage from incorrect usage.
- Always ensure that test leads are correctly inserted into the appropriate input jacks for the selected measurement function. Incorrect connections can lead to damage or injury.
- Do not attempt to measure voltages or currents that exceed the specified maximum limits of the device. Refer to the specifications section.
- Never use the multimeter if it appears damaged, if the casing is open, or if the test leads are compromised (e.g., frayed, cracked insulation).
- Always disconnect power to the circuit before attempting to measure resistance, capacitance, or continuity to prevent electric shock or damage to the multimeter.
- Exercise extreme caution when working with live circuits. Avoid touching exposed conductors.
- Keep the multimeter dry and clean. Do not operate in wet or damp conditions.
9. Warranty and Support
For detailed warranty information, technical assistance, or customer support regarding your Neoteck WT390 Smart Touch Digital Multimeter, please refer to the documentation included with your purchase. You may also visit the official Neoteck website for further resources and contact options.


