
Olight SS-BRK-OLTX7
Olight X7 Marauder Handheld Flashlight User Manual
Model: SS-BRK-OLTX7 | Brand: Olight
1. Introduction
Thank you for choosing the Olight X7 Marauder Handheld Flashlight. This powerful and versatile flashlight is engineered for exceptional performance and durability, featuring advanced LED technology and robust construction. This manual provides detailed instructions for the safe and efficient operation, maintenance, and troubleshooting of your X7 Marauder.
The X7 Marauder is designed with precision and quality, offering a maximum output of 9000 lumens. It is water-resistant and shock-resistant, making it suitable for various demanding environments. Please read this manual thoroughly before using the product to ensure proper handling and to maximize its lifespan.
2. Product Overview
The Olight X7 Marauder is a high-performance flashlight equipped with three Cree XHP70 white LEDs, providing immense brightness and a wide beam. Its compact yet powerful design makes it an ideal tool for outdoor activities, search and rescue, or general illumination needs.

Figure 1: Olight X7 Marauder Flashlight, showcasing its overall design with the blue bezel and textured body.
Key Features:
- Three Cree XHP70 CW LEDs for powerful illumination.
- Maximum output of 9000 lumens.
- IPX8 waterproof rating.
- Shock-resistant aluminum body.
- Active thermal management system.
- Multiple lighting modes: Turbo S, Turbo, High, Medium, Low, Moonlight.
- Convenient side switch for operation.

Figure 2: Front view of the Olight X7 Marauder, highlighting the side switch and Olight branding.
3. Setup
3.1 Battery Installation
The Olight X7 Marauder requires four 18650 batteries (not included) for operation. Ensure you use high-drain, unprotected 18650 batteries for optimal performance and safety.
- Unscrew the tail cap of the flashlight by turning it counter-clockwise.
- Insert four 18650 batteries with the positive (+) terminals facing towards the head of the flashlight.
- Carefully screw the tail cap back on, turning it clockwise until it is fully tightened. Ensure a secure connection to prevent power interruptions and maintain water resistance.
Important: Always insert batteries with the correct polarity. Incorrect installation can damage the flashlight and void the warranty.
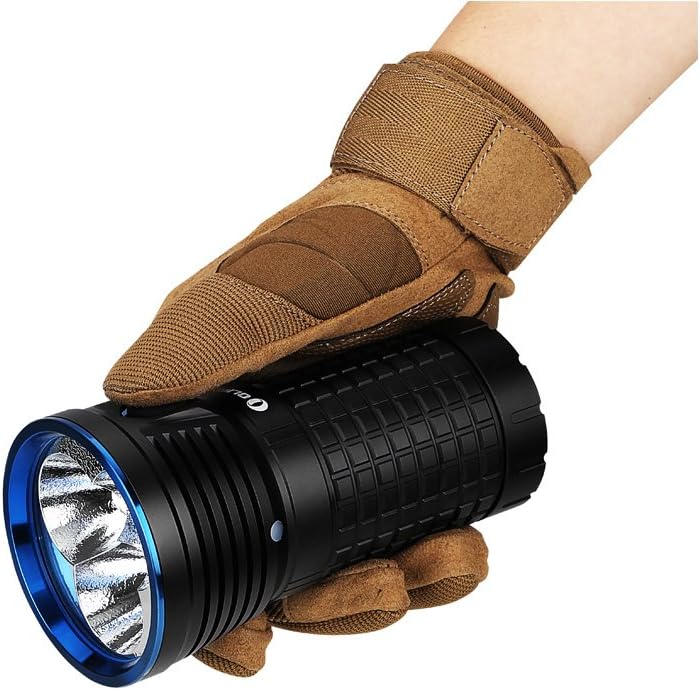
Figure 3: The Olight X7 Marauder held comfortably in a gloved hand, demonstrating its ergonomic design.
4. Operating Instructions
4.1 Basic Operation
- Turn On/Off: Single click the side switch to turn the flashlight on or off.
- Change Brightness Levels: When the flashlight is on, press and hold the side switch to cycle through Low, Medium, and High modes. Release the switch to select the desired mode.
- Moonlight Mode: When the flashlight is off, press and hold the side switch for approximately one second to activate Moonlight mode.
- Turbo Mode: Double-click the side switch quickly to activate Turbo mode. Double-click again to activate Turbo S mode.
- Strobe Mode: Triple-click the side switch quickly to activate Strobe mode. Single click to exit Strobe mode.
- Memory Function: The flashlight will remember the last used brightness level (except Turbo S, Turbo, and Strobe) when turned off and back on.
4.2 Active Thermal Management System
The X7 Marauder is equipped with an active thermal management system. When the flashlight operates at high brightness levels (Turbo S, Turbo, High) for an extended period, it may automatically reduce its output to prevent overheating and protect the internal components. This is normal operation and ensures the longevity of the device.
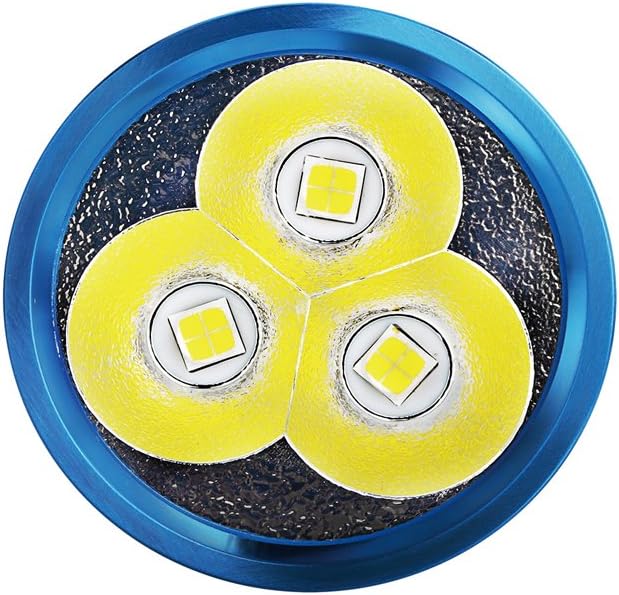
Figure 4: A close-up view of the three Cree XHP70 LED emitters within the Olight X7 Marauder's head.
5. Maintenance
Proper maintenance ensures the longevity and optimal performance of your Olight X7 Marauder.
- Cleaning: Use a clean, soft cloth to wipe the flashlight body. For stubborn dirt, a slightly damp cloth can be used. Do not use harsh chemicals or abrasive materials.
- Threads and O-rings: Periodically lubricate the threads and O-rings with silicone grease to maintain water resistance and smooth operation. Replace O-rings if they appear damaged or worn.
- Battery Care: Remove batteries if the flashlight will not be used for an extended period to prevent battery leakage. Store batteries in a cool, dry place.
- Storage: Store the flashlight in a dry environment, away from direct sunlight and extreme temperatures.

Figure 5: The Olight X7 Marauder securely placed in its protective holster, demonstrating portability and storage.
6. Troubleshooting
If you encounter issues with your Olight X7 Marauder, please refer to the following common problems and solutions:
| Problem | Possible Cause | Solution |
|---|---|---|
| Flashlight does not turn on | Low or dead batteries Incorrect battery installation Loose tail cap | Replace or recharge batteries Ensure correct polarity (+/-) Tighten tail cap securely |
| Light flickers or turns off unexpectedly | Loose connections Dirty contacts Overheating (in high modes) | Tighten all parts Clean battery contacts and threads Allow flashlight to cool down; it will automatically reduce output to prevent damage |
| Reduced brightness or short runtime | Low battery charge Using low-quality batteries | Recharge or replace batteries Use high-quality, high-drain 18650 batteries |
| Water ingress | Damaged or missing O-rings Tail cap not fully tightened | Inspect and replace O-rings if necessary Ensure tail cap is fully tightened |
If the problem persists after trying these solutions, please contact Olight customer support for further assistance.
7. Specifications
Detailed technical specifications for the Olight X7 Marauder Flashlight:
| Feature | Detail |
|---|---|
| Brand | Olight |
| Model Number | SS-BRK-OLTX7 |
| Manufacturer | Steel Street (Home) |
| Item Weight | 471 g |
| Product Dimensions | 8.26 x 16.51 x 16.51 cm |
| Material | Aluminum |
| Color | Black |
| Light Source Type | LED (Cree XHP70 CW) |
| Luminous Flux | 9000 Lumen (Max) |
| Beam Distance | 313 meters |
| Water Resistance Level | IPX8 (Waterproof) |
| Power Source | Battery Powered |
| Batteries Required | 4 x 18650 (not included) |
| Special Features | Rechargeable, Impact Resistant |
| Included Components | Olight X7 Flashlight |
8. Warranty and Support
For warranty information and customer support, please refer to the official Olight website or contact your authorized Olight dealer. Keep your purchase receipt as proof of purchase for warranty claims.
Ask a question about this manual
Ask about setup, troubleshooting, compatibility, parts, safety, or missing instructions. Manuals+ will review the question and use this page’s manual context to help answer it.