
1. Introduction
Thank you for choosing the Farberware 1.3 Cu. Ft. Countertop Microwave Oven. This appliance is designed for convenient and efficient cooking, reheating, and defrosting. With 1100 watts of power, smart sensor auto cook settings, and a child safety lock, it offers a user-friendly experience for your kitchen. Please read this manual thoroughly before operating your new microwave oven to ensure safe and proper use.

Figure 1: Front view of the Farberware 1.3 Cu. Ft. Countertop Microwave Oven.
2. Key Features
- 1100 Watts of Power: Provides efficient and fast cooking results.
- 1.3 Cu. Ft. Capacity: Ideal for various dish sizes, including standard dinner plates.
- Smart Sensor Auto Cook Settings: Automatically adjusts cooking time and power for popular food items like popcorn, potato, pizza, frozen vegetable, beverage, and dinner plate.
- 10 Power Levels: Offers flexibility for precise cooking control.
- Time and Weight Defrost: Convenient options for thawing frozen foods.
- LED Display with Clock and Kitchen Timer: Easy-to-read digital interface for time management.
- Easy-to-Clean Interior and Exterior: Designed for simple maintenance.
- Child Safety Lock: Prevents unsupervised operation.

Figure 2: Overview of key specifications including capacity, power levels, and wattage.
3. Setup and Installation
3.1 Unpacking
Carefully remove the microwave oven and all packing materials from the carton. Check the oven for any damage, such as dents or a misaligned door. Do not operate the oven if it is damaged. Retain the carton and packing materials for future use or proper disposal.
3.2 Placement
- Place the oven on a flat, stable surface that can support its weight.
- Ensure adequate ventilation: leave at least 4 inches (10 cm) of space on the top, sides, and rear of the oven for proper airflow.
- Keep the oven away from heat sources, steam, or splashing liquids.
- Do not block air vents.
3.3 Electrical Connection
Plug the microwave oven into a properly grounded 3-prong outlet. Ensure the voltage and frequency match the specifications on the rating label of the oven. Do not use an extension cord or adapter.
3.4 Turntable Assembly
Place the turntable ring in the depression on the oven floor. Place the glass turntable plate on top of the turntable ring, ensuring it sits securely.
4. Operating Instructions

Figure 3: Detailed view of the control panel and its functions.
4.1 Setting the Clock
- Press the "Clock" button.
- Use the number pads to enter the current time (e.g., 12:00).
- Press the "Clock" button again to confirm.
4.2 Time Cook
- Place food in the oven and close the door.
- Press the "Time Cook" button.
- Enter the desired cooking time using the number pads.
- Press "Power Level" and then a number from 1-10 for desired power (10 is 100% power). Skip this step for 100% power.
- Press the "START/+30SEC" button to begin cooking.
4.3 Express Cook (One-Touch Start)
For quick cooking, simply press any number pad from 1 to 6. The oven will immediately start cooking at 100% power for that many minutes (e.g., pressing '1' cooks for 1 minute). Pressing "START/+30SEC" will also start cooking for 30 seconds at 100% power, and each subsequent press adds 30 seconds.
4.4 Smart Sensor Auto Cook Settings
These settings automatically detect the food's moisture and adjust cooking time for optimal results. Place food in the oven, close the door, and press the corresponding button:
- Popcorn: For microwave popcorn.
- Sensor Reheat: For reheating leftovers.
- Frozen Pizza: For frozen pizzas.
- Memory: To recall saved custom settings.
- Fish: For cooking fish.
- Meat: For cooking meat.
- Time Defrost: Defrosts for a set time.
- Fresh Vegetable: For fresh vegetables.
- Frozen Vegetable: For frozen vegetables.
- Weight Defrost: Defrosts based on food weight.
- Potato: For baking potatoes.
- Frozen Entrée: For frozen meals.
4.5 Child Safety Lock
To activate the child safety lock, press and hold the "STOP/Cancel" button for 3 seconds. The display will show "LOCK" or a lock icon. To deactivate, press and hold the "STOP/Cancel" button again for 3 seconds.
4.6 Kitchen Timer
Press the "Kitchen Timer" button, enter the desired time using the number pads, and press "START/+30SEC". The timer will count down without operating the microwave function.
5. Care and Maintenance

Figure 4: The microwave interior is designed for easy cleaning.
5.1 Cleaning the Exterior
Wipe the exterior with a damp cloth and mild soap. Avoid abrasive cleaners or harsh chemicals.
5.2 Cleaning the Interior
For spills and splatters, wipe the interior with a soft, damp cloth. For stubborn stains, place a bowl of water with lemon slices inside and microwave for a few minutes until steam fills the oven. This will loosen food particles for easier cleaning. Always ensure the oven is unplugged before cleaning.
5.3 Turntable Care
The glass turntable and roller ring can be removed for cleaning. Wash them in warm, soapy water or in the dishwasher. Ensure they are completely dry before placing them back in the oven.
6. Troubleshooting
| Problem | Possible Cause | Solution |
|---|---|---|
| Oven will not start | Door not closed properly; Power cord unplugged; Fuse blown or circuit breaker tripped | Ensure door is securely closed; Check power cord connection; Check household fuse/circuit breaker |
| Food not heating | Incorrect cooking time/power level; Door not closed; Child lock activated | Adjust time/power; Close door securely; Deactivate child lock |
| Turntable not rotating | Turntable not placed correctly; Debris under turntable ring | Re-position turntable; Clean under the roller ring |
| Display shows "LOCK" | Child safety lock is active | Press and hold "STOP/Cancel" for 3 seconds to deactivate |
7. Specifications
- Model: FMO13AHTPLE
- Capacity: 1.3 Cubic Feet
- Power Output: 1100 Watts
- Voltage: 120V (AC)
- Product Dimensions (D x W x H): 16.65" x 20.43" x 12.36"
- Item Weight: 33.73 Pounds
- Color: White Platinum
- Installation Type: Countertop
- Special Feature: Child Safety Lock
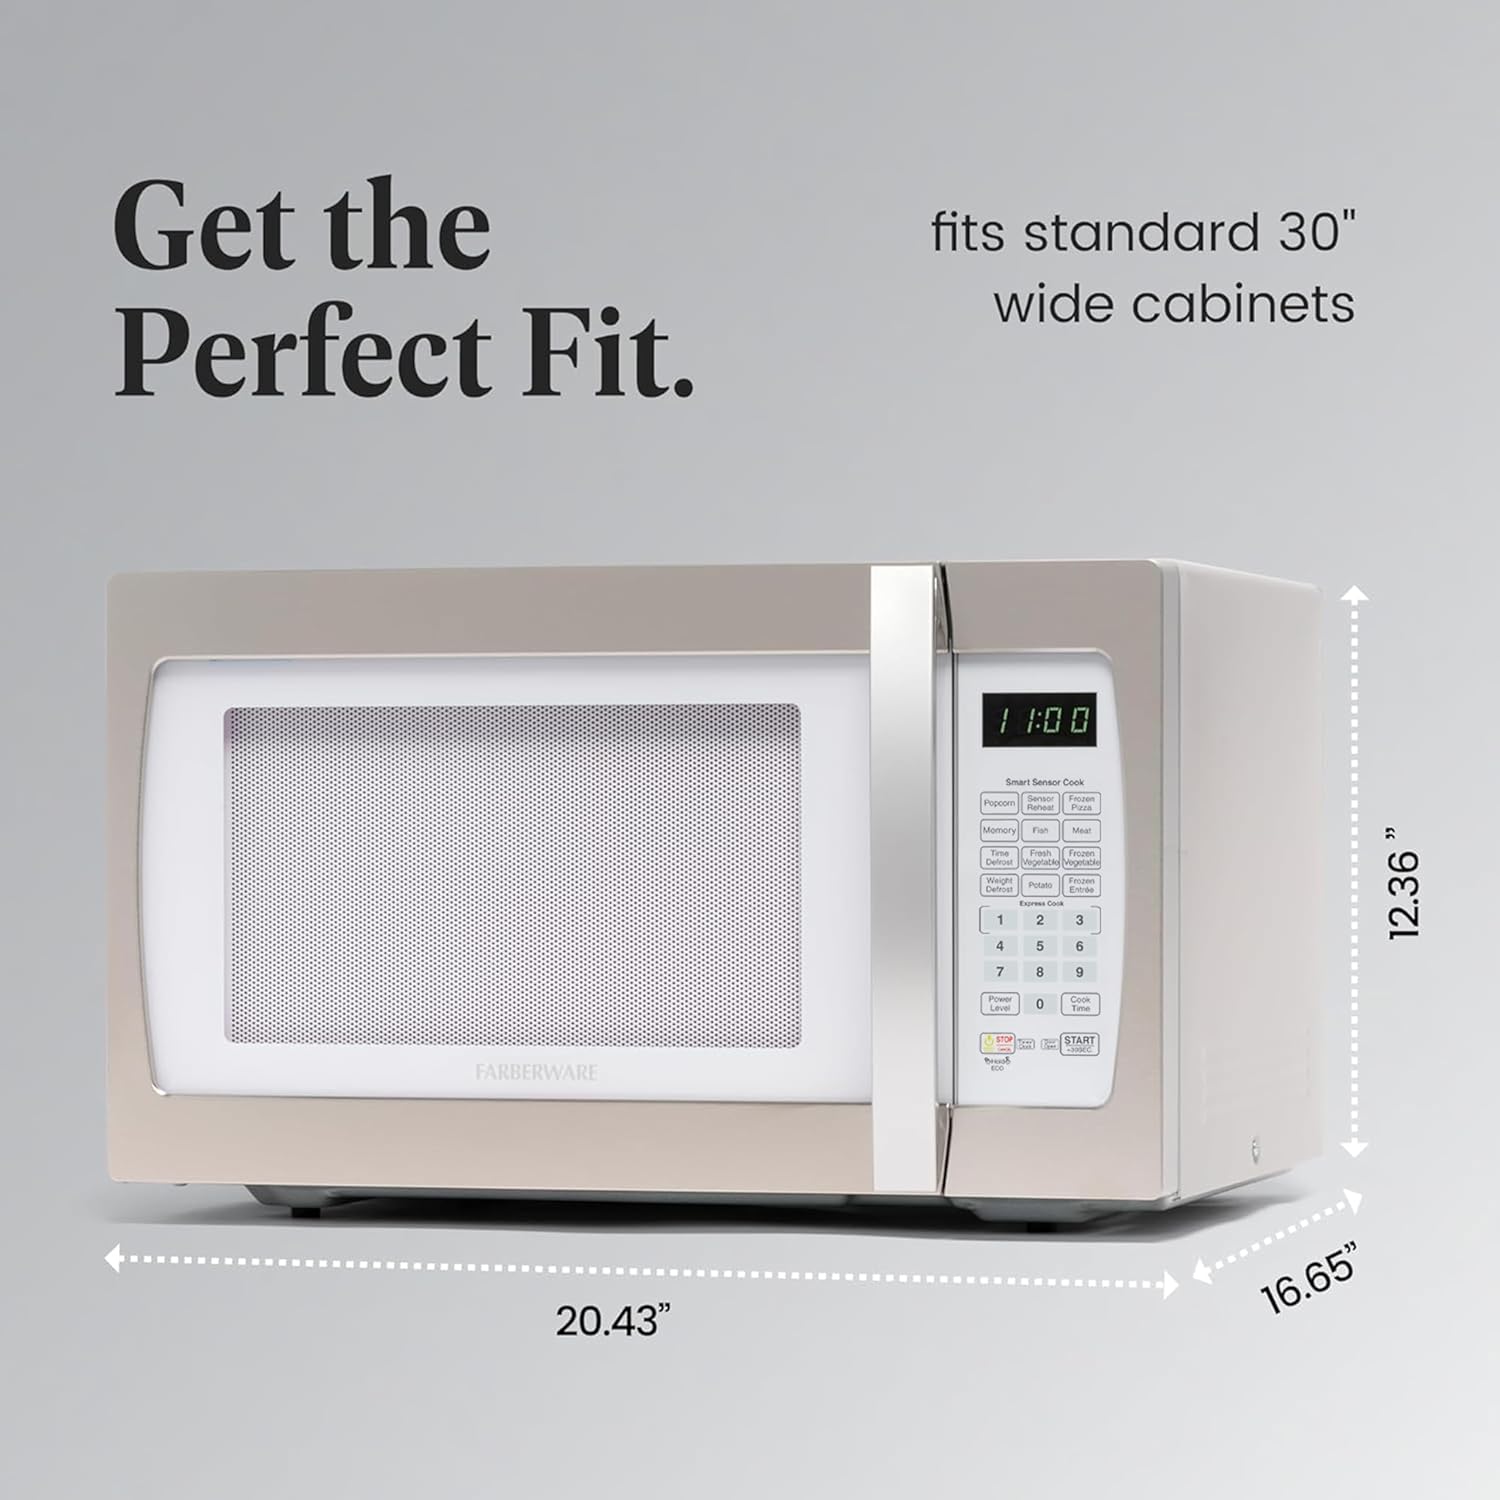
Figure 5: Dimensions of the Farberware Countertop Microwave Oven.
8. Warranty and Support
Your Farberware microwave oven is covered by a manufacturer's warranty. Please refer to the warranty card included with your product for specific terms and conditions. For technical support, service, or replacement parts, please contact Farberware customer service. Contact information can typically be found on the manufacturer's website or in the product packaging.
8.1 Product Summary Video
Video 1: A brief product summary highlighting key features and benefits of the Farberware microwave.